5 Setting up Pipit 500
Pipit 500 is designed to view and monitor energy usage information that it receives from the Smart Meter with
which it has been paired via the commissioning process (pairing is a one-time self-running process to link the
unit wirelessly to the Smart Meter). Commissioning can be done either by the meter installer or by consumers
themselves.
5.1 Powering the unit
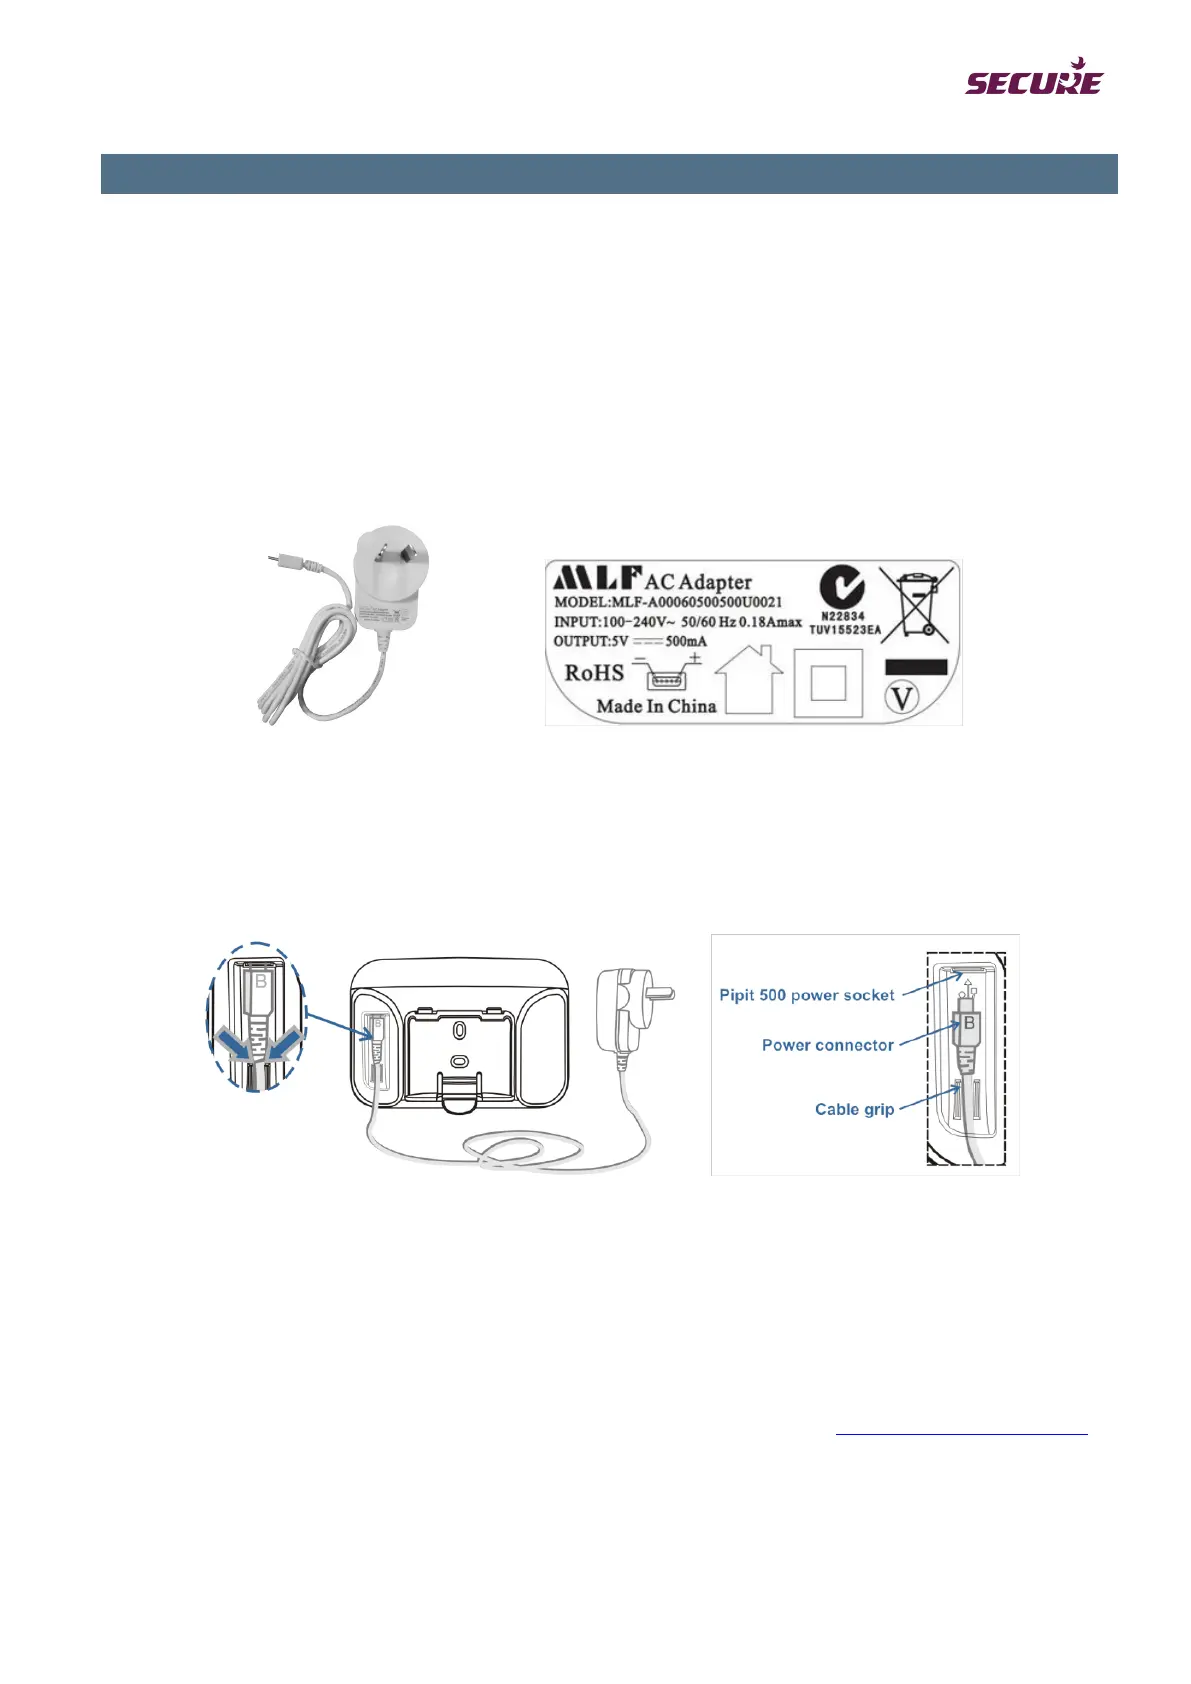
Only use the adapter provided with the Pipit to power it. Check for the following label on the adapter:
The unit can be either wall-mounted using the supplied bracket or it can be placed on a table-top. Pipit should
be placed in an easy-to-view location near a power outlet. To connect the unit to the power supply insert the
small end of the power adapter cable into the socket on the back of the unit, with the symbol ‘B’ facing
outwards, as shown in the following figure. Push the cable firmly into the groove of the cable grip to secure the
connector in place. Plug the other end of the adapter cable into a power outlet and switch the power on.
5.2 Pairing Pipit 500 with Smart Meter
Pre-requisite:
For the unit to pair automatically, the smart meter should have the pairing window open so as to accept
connection requests from Pipit. The pairing process is similar to connecting two devices over Bluetooth. A
pairing wizard is accessible using the ‘pair with smart meter’ tab from our website
www.freedomtosave.com.au
which can guide you through the pairing process.