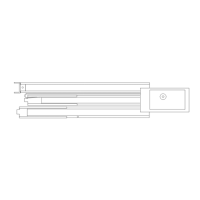
LERN/
LEARN
B A
DIP
HF-Modul
D C 24V
TEST/
RUN
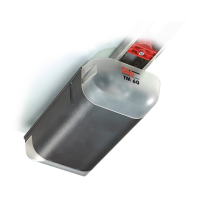
Installation Instructions TM50/TM80 - MO911/1V0
Page 10
TEST/RUN Button (black)
Standard Function
Run the operator: Pressing the button runs or stops the operator� The function depends on the
entire status of the operator, following the sequence OPEN-STOP-CLOSE etc�
Function when Automa-
tic Closing is active
Opening command: Pressing the button gives an opening command� When the garage door is
open then presing the button will extend the opening time� When pressing the button during the
closing procedure, then the operator will stop and open the door again�
Programming Functions
Adjusting the limit blocks: In programming mode the operator can be run by keeping the TEST-
button pressed� When the button is released, then the operator will stop - when pressing the
button again then the operator will run into the opposite direction�
Reducing the running speeds: When setting the opening and closing speed in „free program-
ming“ mode then each press of the TEST-button will reduce the running speed by one level�
LERN/LEARN Button (red)
Standard Function
Starting the programming mode: The button must be kept pressed for approx� 3 seconds and
then must be released; the operators‘ light starts blinking and the operator is in programming
mode� Using the TEST-button the operator can be run to adjust the limit switches�
Starting the learning cycles: Once the operator is in programming mode, a short press on the
LEARN-button will start the learning cycles for the running length and the force-measurements�
DIP-Switch Confirmation
Changing the settings of DIP-switches 3 to 6: Once the DIP-switch setting is changed, it must be
confirmed by shortly pressing the LEARN-button�
Changing the settings of DIP-switches 1 and 2: Keep the LERN-button pressed for approx� 3
seconds until the integrated lighting starts blinking� Release the LERN-button and press it once
again shortly to start the learning cycles� When set to „free programming“, then pls� refer to
page 13�
Programming Functions
Adjusting the time for the integrated lighting: The LERN-button must be pressed for approx� 6
seconds until the green LED starts blinking; then release the button� Pressing the button again,
will confirm the the new time for the integrated lighting�
Increasing the running speeds: When setting the opening and closing speed in „free program-
ming“ mode then each press of the TEST-button will increase the running speed by one level�
Combined Functions of TEST and LERN Button
Change speed settings
when DIP-switches were
set to „free program-
ming“
The LERN-button must be kept pressed� In addition the TEST-button must be kept pressed� After
approx� 3 seconds the operators lighting starts blinking and the red LED starts blinking in a
sequence� Both buttons must now be released� The operator is now in the mode to adjust the
closing and opening speed, pls� refer to page 13�
DIP-Switches
1+2
Standard: 1 OFF, 2 ON
Adjusting the type of garage door: It may be chosen either sectional door (standard adjustment),
tilting door, short running door (e�g� Canopy type doors) and free programming�
3
Standard: OFF
Additional force shortly before closed position: When using mechanical locking systems a higher
force might be necessary in order to ensure a proper locking� Setting the switch to ON increases
the force before reaching the closed position�
4
Standard: OFF
Pre-warning: When set to ON, the operators‘ lighting will blink for approx� 4 seconds before
every opening or closing�
When automatic closing is activated: When set to OFF, the operators‘ lighting will blink for 6 se-
conds before closing the door� When set to ON, it will be blinking before openings and closings�
5+6
Standard: OFF
Automatic closing: The time until the door will be closed can be set to 30, 90 or 120 seconds� For
programming pls� refer to page 14�
Control Elements
Printed Circuit Board: Adjustments and Connectors