ATTENTION: Changing the running-speeds might result in non-conformant force values dependant on the door
type and the doors‘ weight. To ensure the installation is within legal regulations a force testing as to directive
EN13241-1 must be made.
1
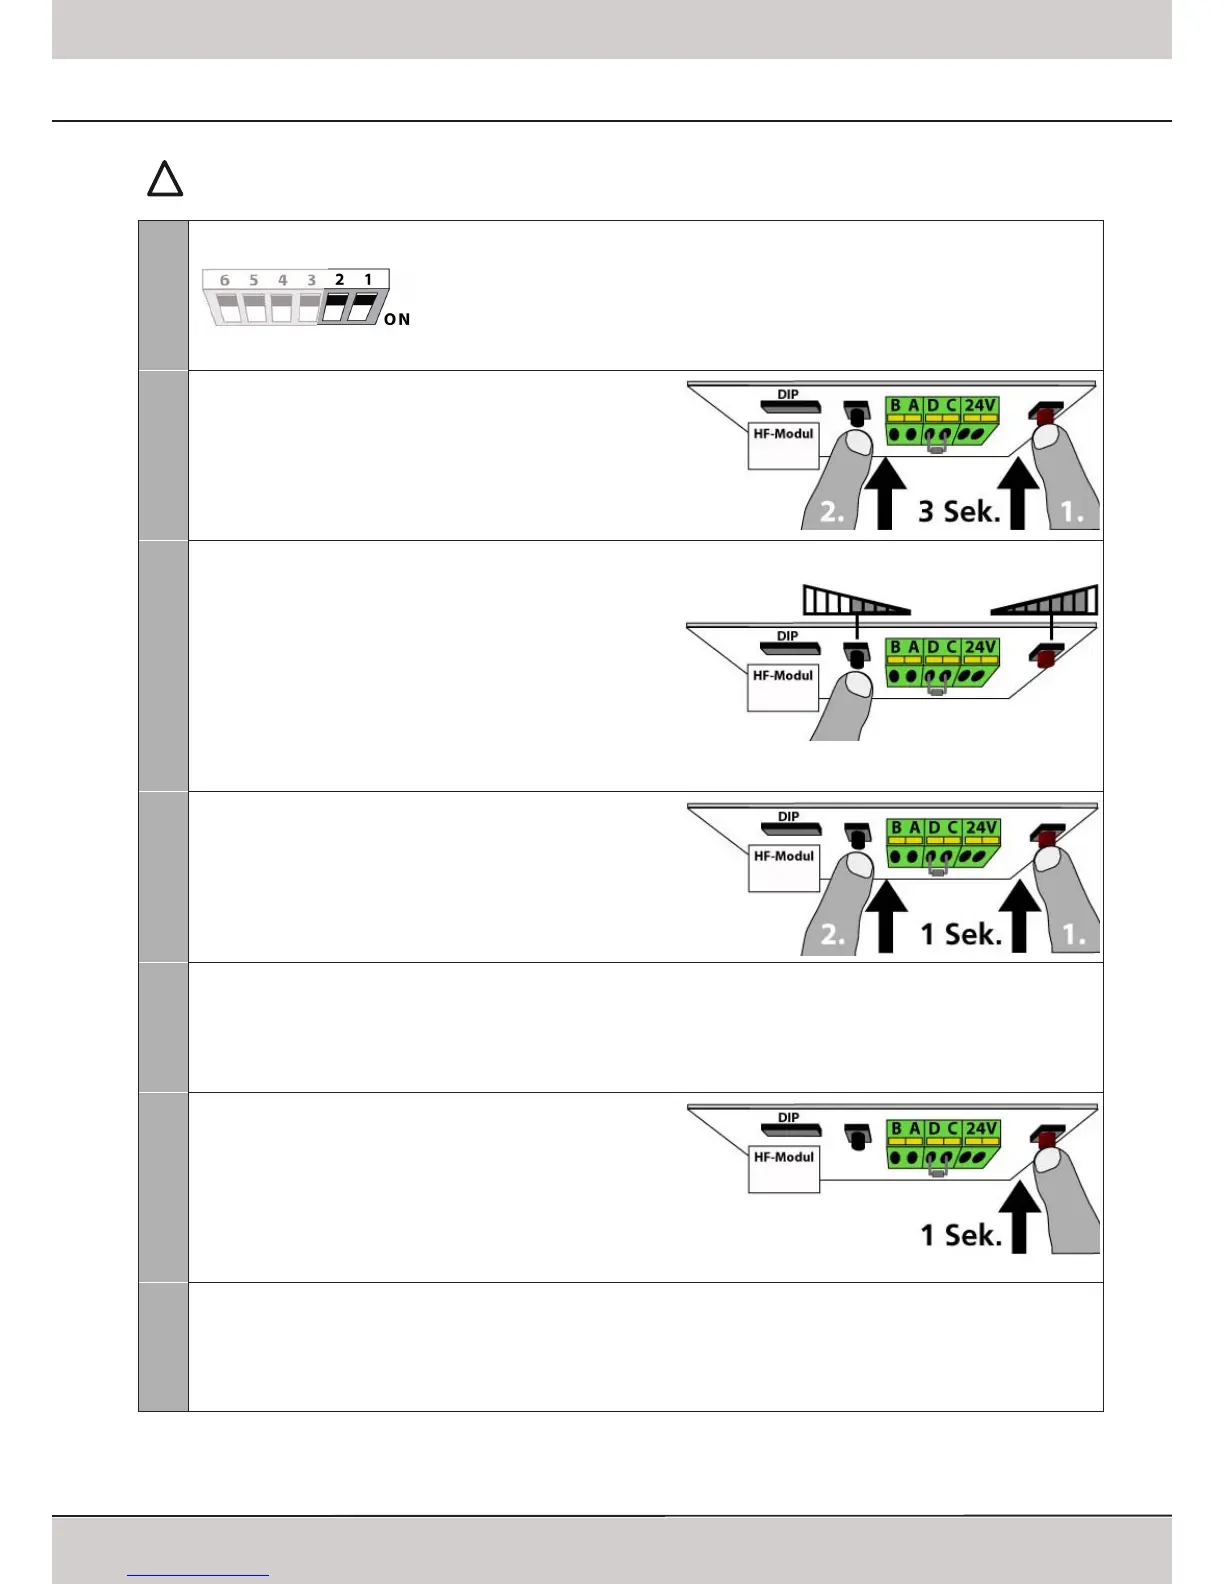
Free Programming
Opening and closing speeds can be set manually when running the free programming
mode� The length of the soft-stop in closing direction may also be set manually� When
running the free programming for the first time all speeds are set to maximum�
After changing the DIP-switch settings the red LED will start blinking in intervalls (2 blinks
- break - 2 blinks) - proceede with step 2�
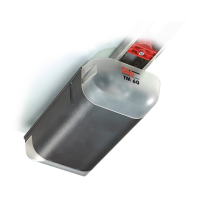
2
Setting the speeds
Press the LEARN-button followed by the TEST-button and keep
both pressed for approx� 3 seconds� Release the buttons once
the red LED starts blinking�
The red LED will blink for up to 8 times followed by a break�
The mode for programming the speeds is active�
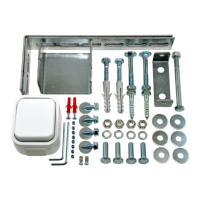
3
Setting the closing speed
The number of blinks of the red LED indicates the entire speed
setting:
8 blinks = maximum speed
1x blink = minimum speed
By means of the black TEST-button the speed can be reduced;
each press reduces the speed by one step� Wait for the break
after the blinks and then start counting to evaluate the entire
speed setting�
By means of the red LEARN-button the speed can be increased�
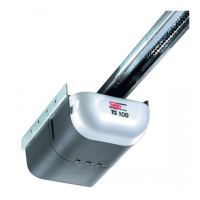
4
Conrm the selected speed
Press the LEARN-button followed by the TEST-button; keep
both pressed for approx� 1 second and release them�
You are automatically in the mode for setting the opening
speed�
The program is now in the mode to set the opening speed�
5
Setting the opening speed
After completing step 4 the red LED is blinking up to 8 times followed by break� Setting the opening speed is made the
same way as described in step 3 and 4�
After confirming the selected opening speed the LED and the operators‘ lighting will be blinking regularily, the speeds have
been set successfully�
6
Starting the learning cycles
Shortly press the LEARN-button� The operator will first run in
opening direction and hit the upper limit block� If you wish
to keep the standard soft-stop in closing direction, no further
action is required� Wait until the operator has completed the
learning cycles (the door will then remain in closed position and
the operators‘ lighting will stop blinking)� The programming
then is completed�
7
Changing the length of Soft Stop
Once the learning cycles have started and the upper limit block was hit, the operator will run in closing direction� During
this first run in closing direction the soft stop may be altered: press the red LEARN-button and keep it pressed� The operator
will increase speed� Release the LEARN-button where you want the soft stop to start in later operation� The speed will be
reduced and the new soft stop setting will be safed� Wait until the operator has completed the learning cycles, then the
programming is completed�