508.366.1488 | www.semshred.com
18
5. Clean any excess debris from the transition area and vacuum all other loose debris.
6. Clean all surfaces inside and outside with the multi-purpose cleaning solution and a rag.
7. Vacuum any dust in the vacuum filter bin.
8. Wipe down the vacuum fan system with the multi-purpose cleaning solution and a rag.
Lubrication
Caution: Always de-energize the unit using proper lockout-tagout (LOTO) procedures when cleaning,
lubricating, or performing any other maintenance, troubleshooting, or repair.
For optimum performance, lubricate the unit regularly.
Tools and PPE Required:
• Cut resistant gloves, safety eyewear, and a face mask
• Grease gun with standard fitting and a flexible tube nozzle
• Non-flammable mineral oil in a spray container
Stage 1 cutting chamber lubrication:
• Frequency: Every 72 hours of operation
• Lubricant: Non-flammable mineral oil
• Lightly spray the non-flammable mineral oil onto the cutting heads.
Stage 2 cutting chamber lubrication:
• Frequency: Twice yearly or as needed
• Lubricant: Multi-purpose grease or
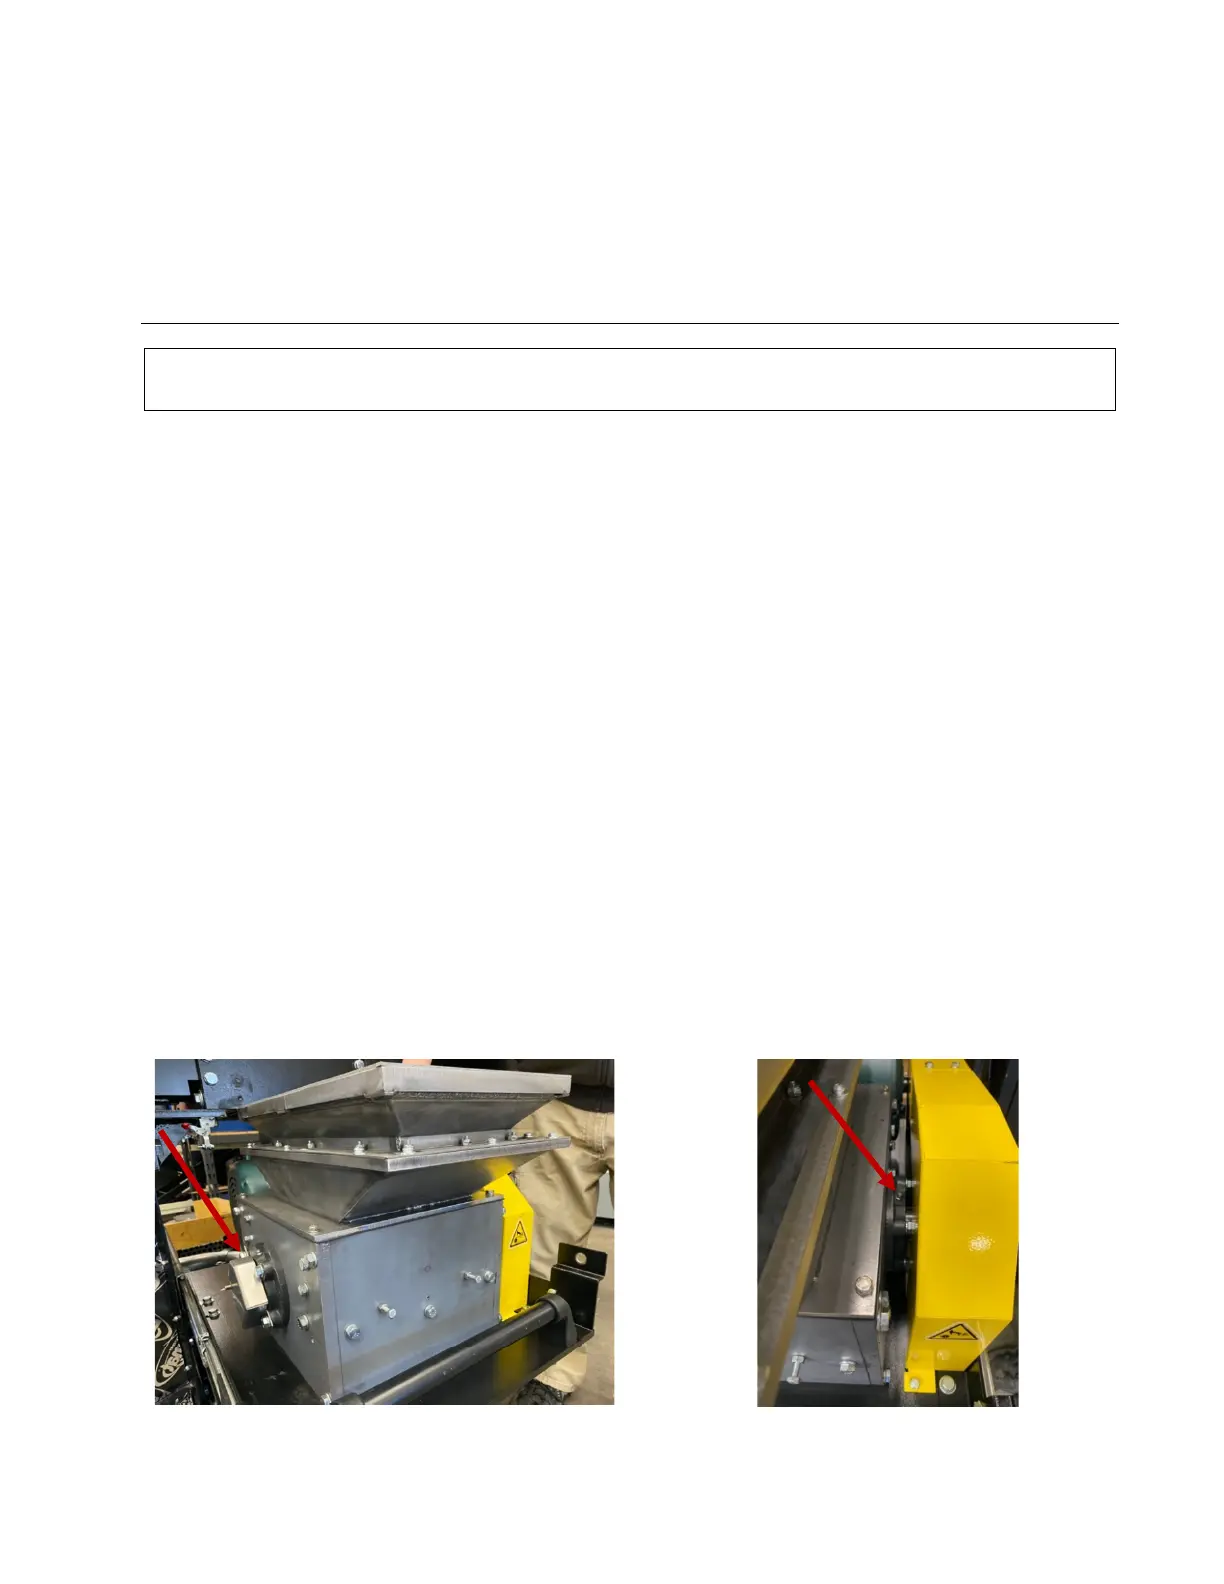
• Location: Grease fittings are located on top of the rotor bearings on each side of the Stage 2 cutting
chamber (Figure 9). Pull the drawer out for access.
• Pump 2-3 pumps on each fitting (Figure 9). Do not over-lubricate.
• Fan: None
Figure 9. Grease fittings on top of the rotor bearings