508.366.1488 | www.semshred.com
31
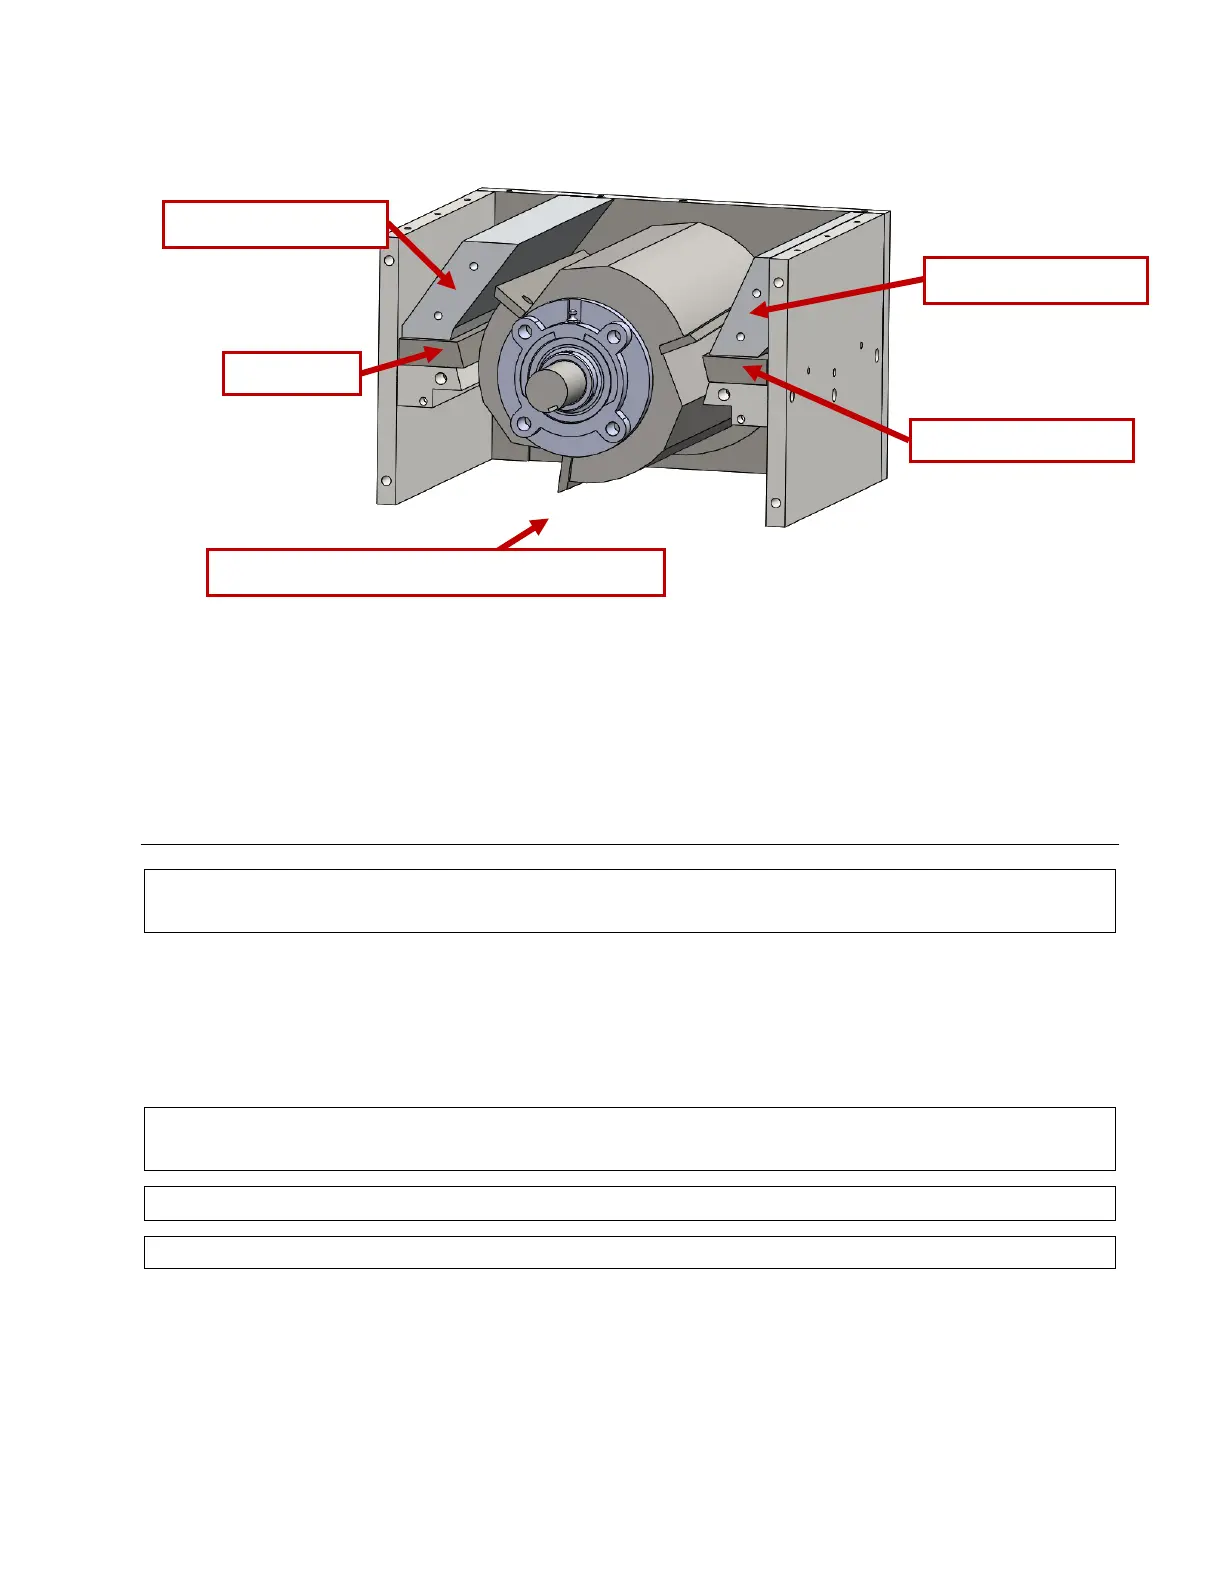
Figure 34. Second chamber, view with drive plate removed
Spare knives and sharpening: To avoid downtime, keep a spare set of sharp knives on hand at all times. SEM
offers spare knives and sharpening services. Contact SEM customer service for details.
Screen: It is recommended to remove the screen from the chamber while changing the knives.
Changing the Rotor Knives: Accessing Stage 2 Cutting Chamber and Removing the Screen
Caution: Always de-energize the unit using proper lockout-tagout (LOTO) procedures when cleaning,
lubricating, or performing any other maintenance, troubleshooting, or repair.
To remove or inspect the screen you need to access the Stage 2 cutting chamber. The screen will be exposed
under the cutting chamber drawer. Follow the instructions in the next section to access the Stage 2 cutting
chamber.
;55"77&'()*+")<*0(")=)4/**&'()4+0#9"1))>,"8$1")4+0'(&'()!$*$1)?'&%"7@)
Caution: Always de-energize the unit using proper lockout-tagout (LOTO) procedures when cleaning,
lubricating, or performing any other maintenance, troubleshooting, or repair.
Warning: NEVER reach into the cutting chamber with bare hands.
Caution: Always wear proper PPE, including cut resistant gloves, when accessing the cutting chambers.
Tools and PPE Required:
Cut resistant gloves
7/16”, 1/2”, 9/16”, and 3/4” wrenches or sockets
1. De-energize the unit using proper lockout-tag out (LOTO) procedures.
2. Open the Stage 2 cutting chamber access door. See Figure 35.
(Drive plate removed to show interior)