508.366.1488 | www.semshred.com
34
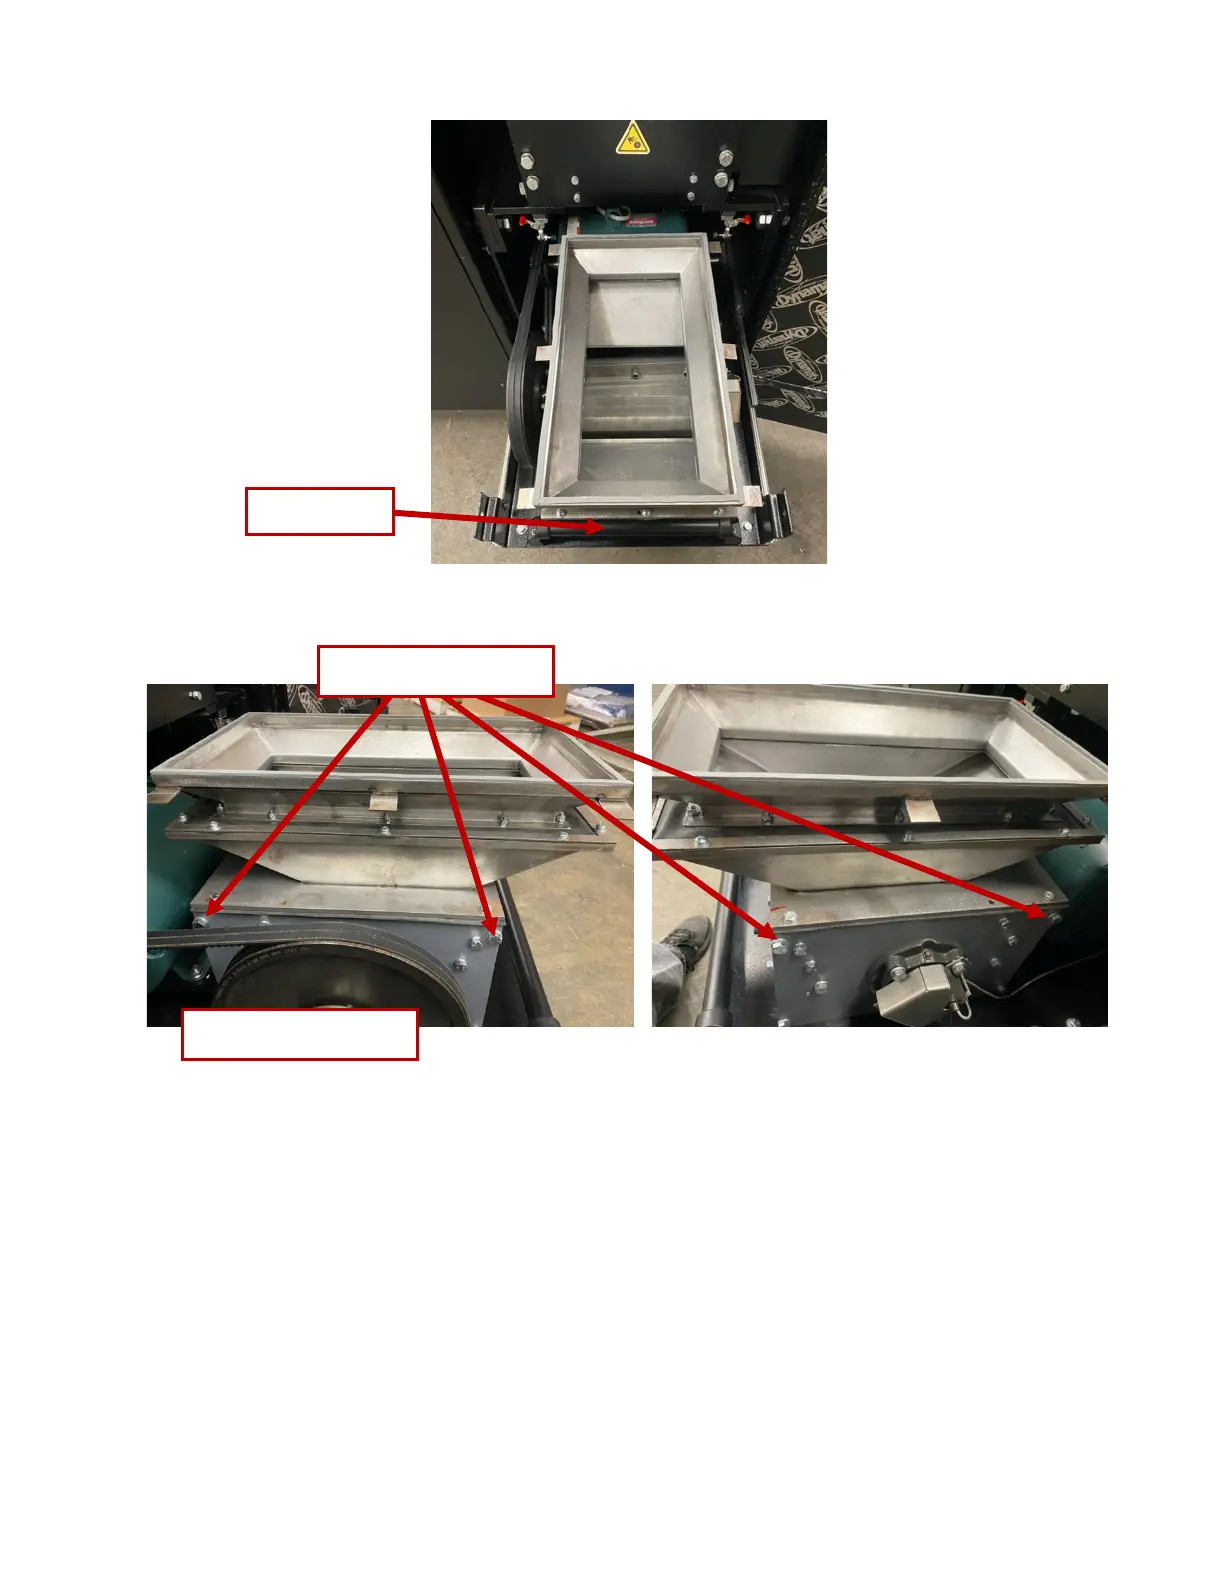
Figure 39. Removing bolts securing the hopper
!"#$%&'()*+")<51""')>,"8$1")4+0'(&'()!$*$1)?'&%"7@)
1. Using a 9/16” socket, remove the four 3/8”-16 bolts holding the transition onto the bottom of the shelf.
See Figure 40. Note that two bolts are in the front and two in the back.
2. Using the 1/2” deep socket with extension, remove six 5/16” nuts and their lock washers from the
screen, Figure 41.
3. Lower the screen carefully to prevent spilling any remaining material.
4. Inspect the screen for damage. Particle size integrity cannot be guaranteed if screen is damaged. If
screen is damaged, contact SEM for replacement.
Note: Material resting on the screen is not considered to be adequately destroyed. Only material that has
passed through an undamaged screen is considered destroyed.