5. Switch power on.
6. For
the remainder oi the procedure hold the front panel or arrange it so the TO and
FROM
TAPE
LEDs
can be viewed, yet there
remains enough access to adjust the
eighteen voice
trimmers.
7. Either the TO TAPE or FROM
TAPE LED will be lit, and the SEQ 1 LED is lit. The
system is now
waiting
for
you
to
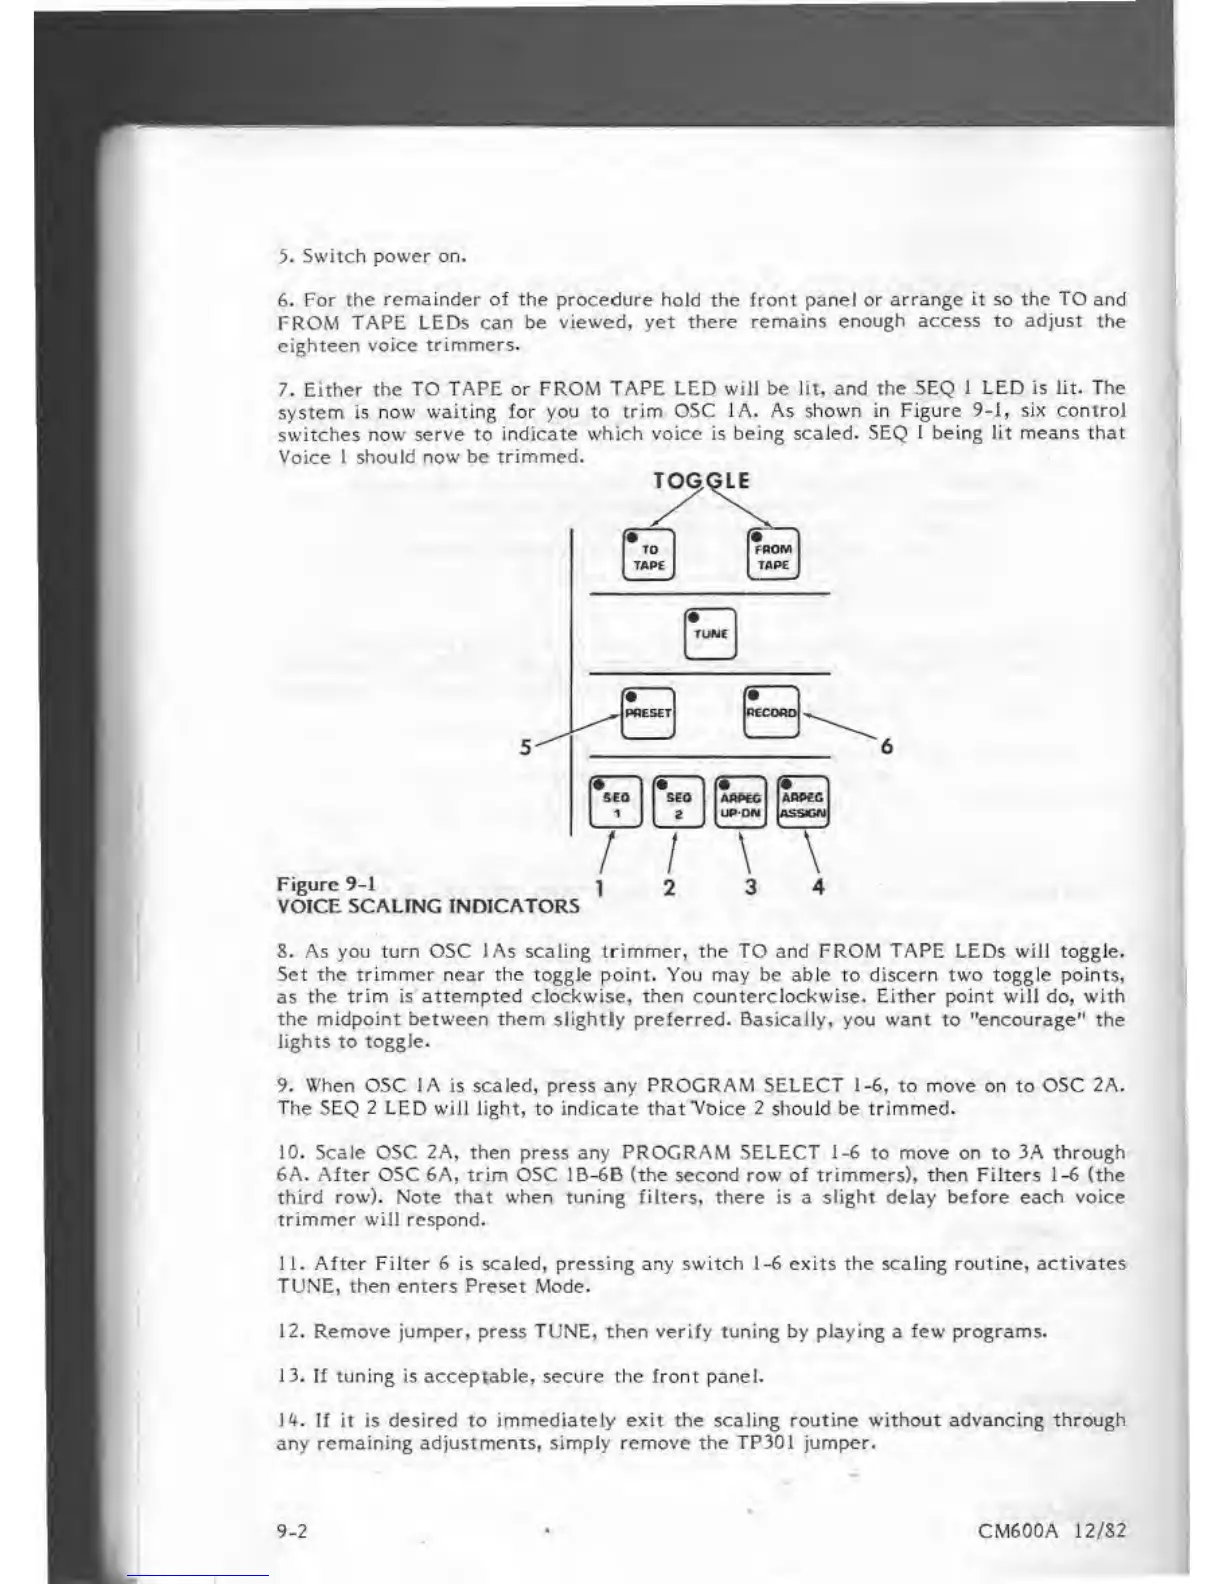
trim OSC 1A. As shown in Figure
9-1, six control
switches
now serve to indicate which voice is being scaled.
SEQ I being lit means that
Voice 1 should now be trimmed.
TOGGLE
Figure
9-1
VOICE SCALING
INDICATORS
8. As you turn OSC
lAs
scaling trimmer, the TO and FROM
TAPE
LEDs
will
toggle.
Set the trimmer near the toggle point. You may be able to discern two toggle points,
as
the trim is attempted clockwise, then counterclockwise. Either point will do, with
the midpoint between them slightly preferred. Basically, you want
to
"encourage" the
lights
to
toggle.
9. When OSC IA
is scaled, press any
PROGRAM SELECT 1-6,
to
move on
to
OSC 2A.
The SEQ 2 LED will light,
to
indicate that"Voice 2 should be trimmed.
10. Scale OSC 2A, then press any PROGRAM SELECT
1-6
to move on
to
3A through
6A. After OSC 6A, trim OSC 1B-6B (the second row of trimmers), then Filters
1-6
(the
third row). Note that when tuning filters, there is
a
slight delay before each voice
trimmer will respond.
11.
After Filter 6 is scaled, pressing any switch i-6 exits the scaling routine,
activates
TUNE,
then enters Preset Mode.
12. Remove jumper, press TUNE, then verify tuning by playing a few programs.
13. If tuning is acceptable, secure the front
panel.
U.
If it
is desired to immediately exit the scaling routine without advancing through
any remaining adjustments, simply remove the TP301 jumper.
9-2
CM600A 12/S2