Section 2 Installation Instructions
Part Number 020003997 4/12 2-15
ADA KEY PADS
These instructions are for installations with this option.
1. Remove power from the unit.
Merchandiser Removal
2. Loosen the two knurled fasteners located in the top of
the merchandiser that hold the merchandiser in place.
3. Remove the merchandiser by lifting up and tilting
forward.
Splash Panel Removal
4. Remove the splash panel from the unit by removing the
two (2) phillips head screws holding it in place.
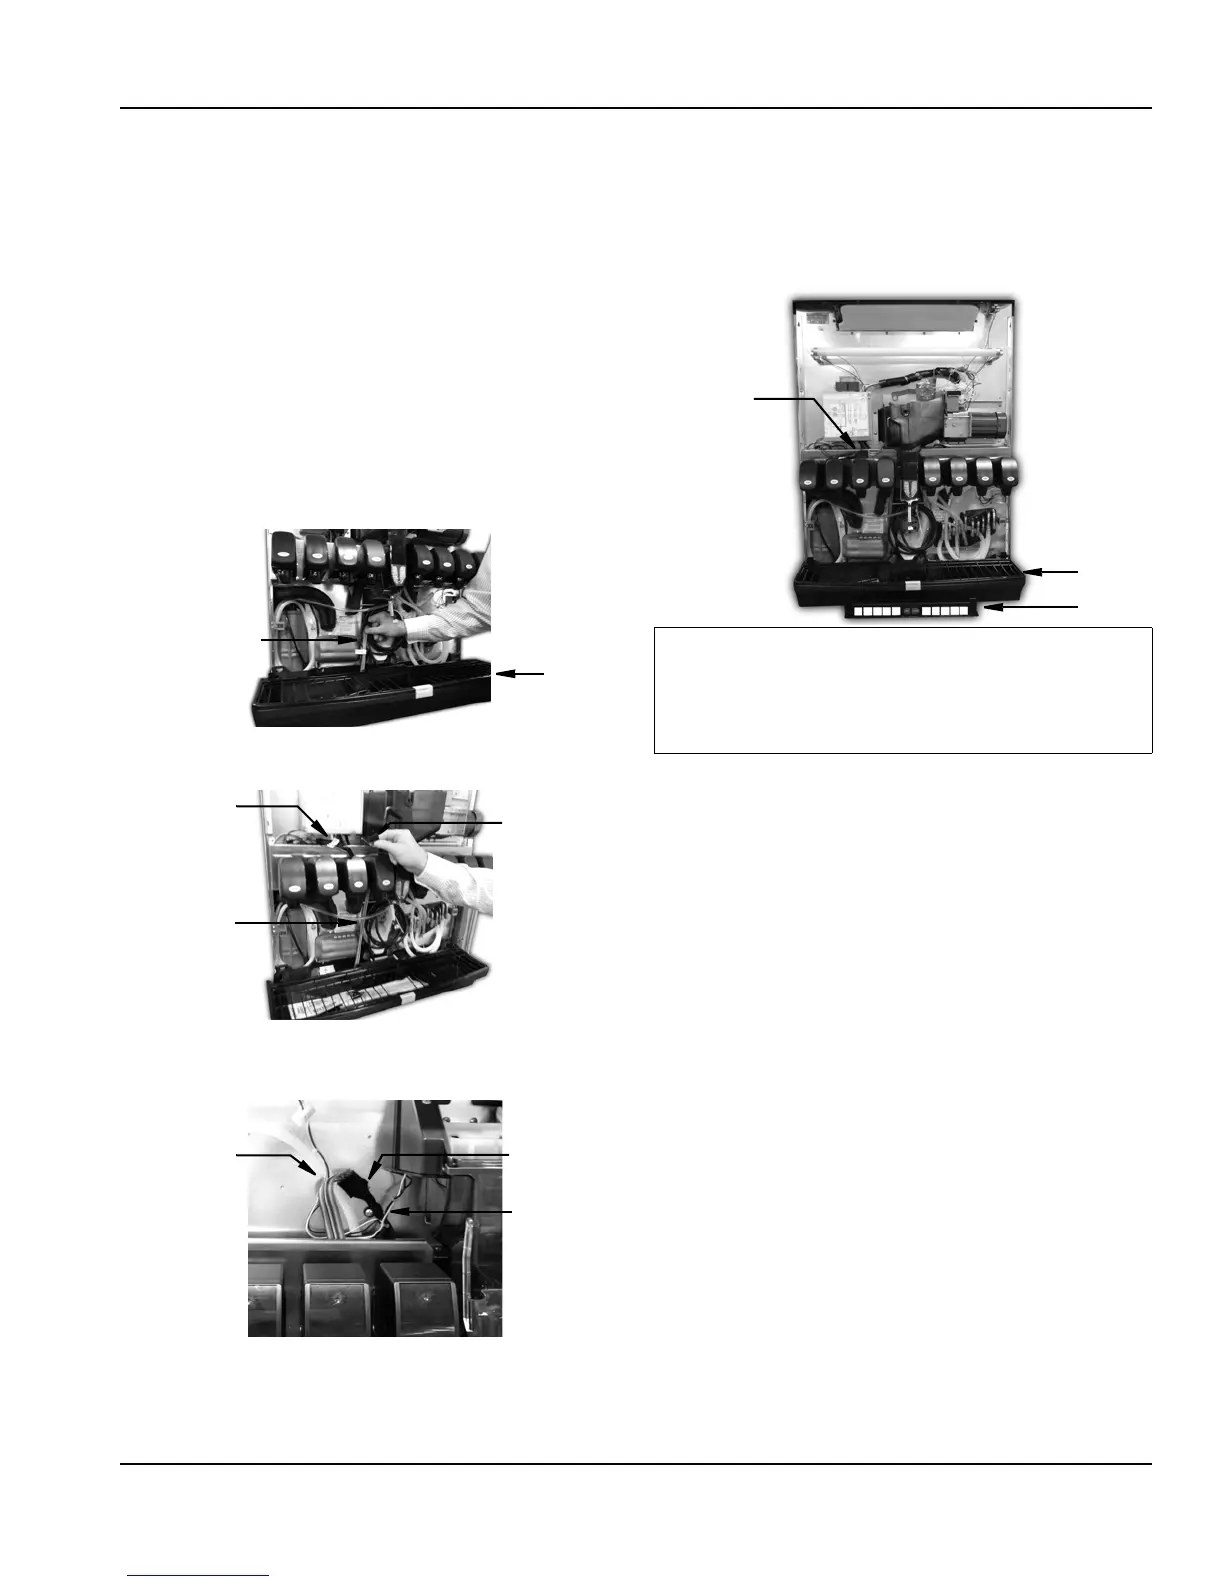
ADA Wiring
5. Route the ADA ribbon cable under the drain pan.
6. Continue routing the ADA cable behind the valve mount
cap on the left hand side of the unit.
7. Connect the ADA ribbon cable to the ADA wire harness
located to the left of the ice chute and held to the foam
front by a wire clip.
8. Neatly tuck in and take up any slack remaining in the
ADA ribbon cable so it will not be in the way of any
moving parts or panels when they are placed back on
the unit.
Drain Pan & ADA Touch Pad Box
9. Attach the drain pan to the unit.
10. Center the ADA Key Pad Box with the unit in front of the
drain pan and secure into place.
11. Apply corresponding drink labels to the ADA key pads.
NOTE: Drinks correspond from left to right on the left side of the
unit, and right to left on the right side of the unit. If buttons are
not used they will be blanked out. The Cubed/Crushed buttons
are only utilized on units configured with the Selectable Ice
feature. (Figure )
Drain Pan
ADA Ribbon Cable
ADA Harness
ADA Box
Ribbon Cable
ADA Box
Ribbon Connector
ADA Box
Ribbon Cable
ADA Harness
ADA Wire
Harness Clip
If mounting the ADA Box directly in front of the drain pan
on the counter top leave a minimum of 1 inch space
between the bottom edge of the drain pan and the ADA
Box to allow space for drain pan removal.
Connected ADA
Cables
Drain Pan
ADA Box