MX-M503N MX-PNX1 5 – 2
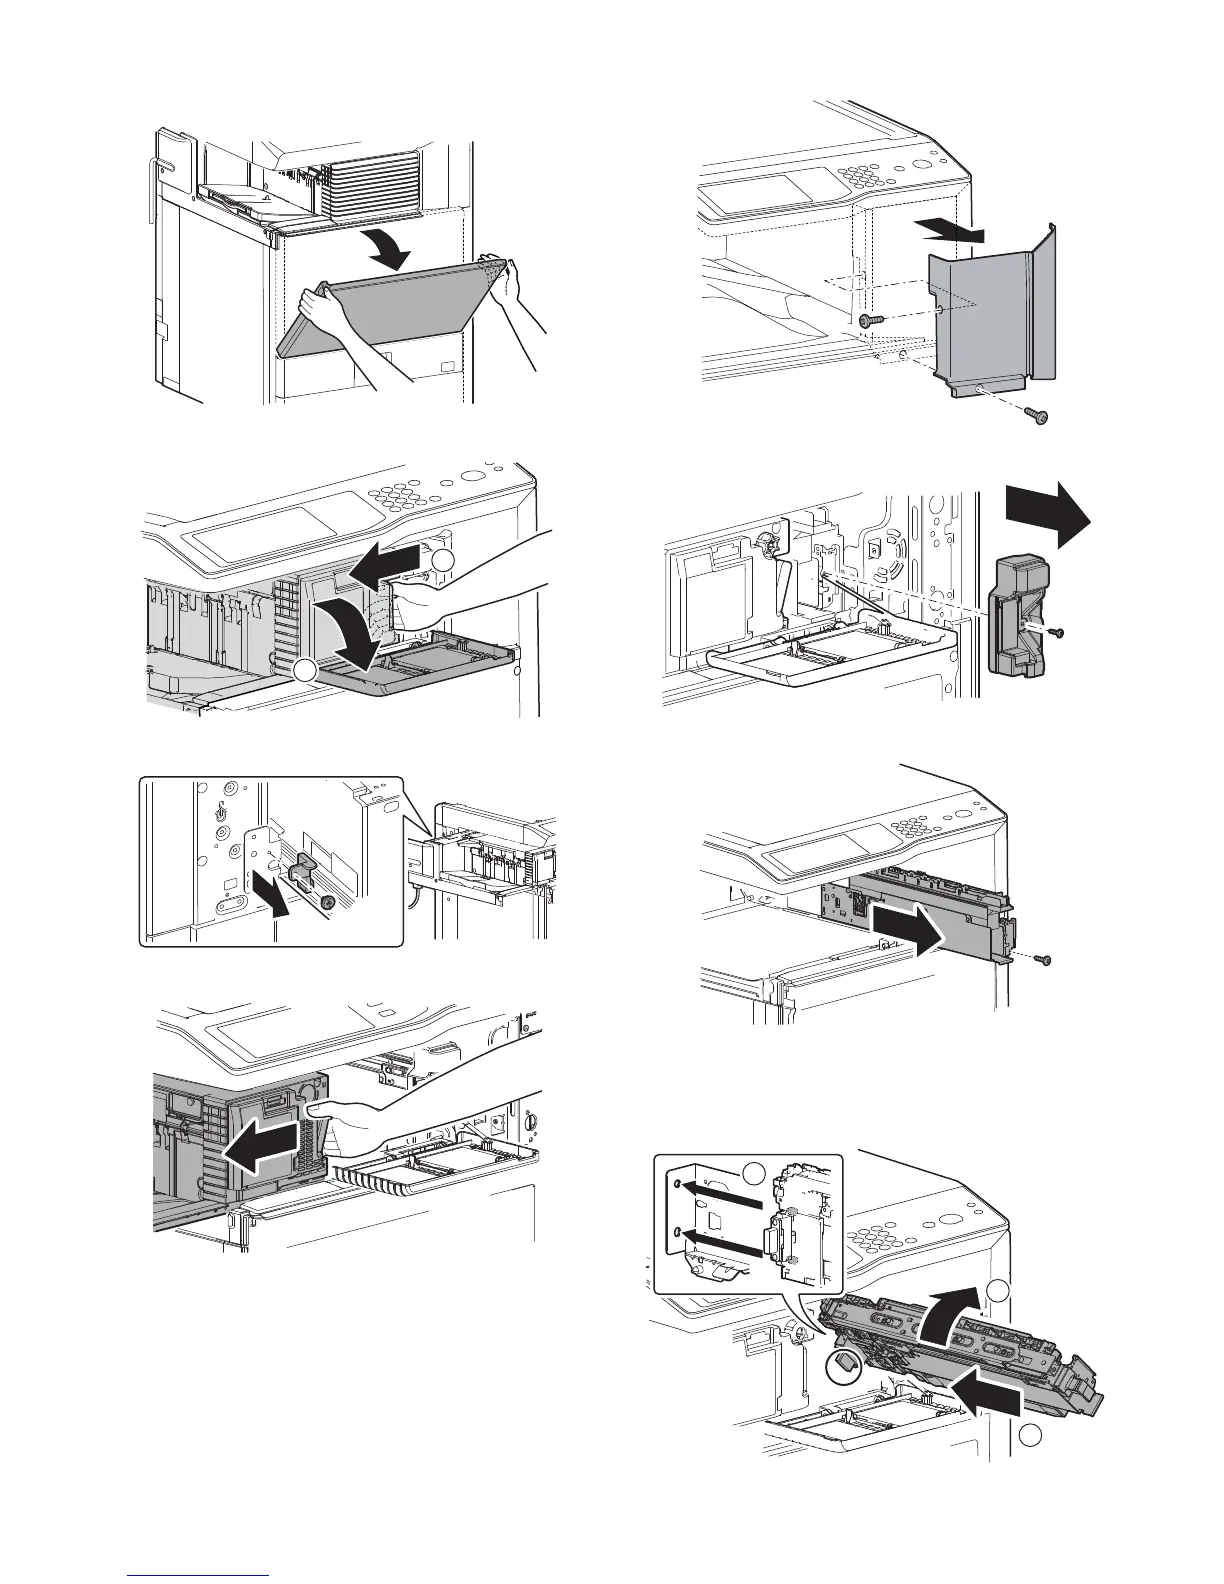
B. Installation of the punch unit
1) Open the front cabinet.
2) Open the front cover and slide the inner finisher to the left.
3) Remove the coin screw, and remove the finisher slide stopper.
4) Slide the inner finisher further more.
5) Remove two screws, and remove the front cabinet upper.
6) Remove the screw, and remove the band and the punch cover.
7) Remove the screw, and remove the dummy punch unit.
8) Fix the punch unit with a screw.
* When installing the punch unit, be careful not to bump it
against the drawer connector.
* Fit the positioning pin and insert it.
2
1
 Loading...