Sending to the UP-700
Page / 11
Designs and specifications are subject to change without notice.
1. Connect the UP-700 to the PC using the previously specified RS-232 cable.
2. From the Main Form using the drop down menu, select one of the following functions to be
performed;
(1) Send Logo1 when the image data is for the header
(2) Send Logo2 when the image data is for the footer
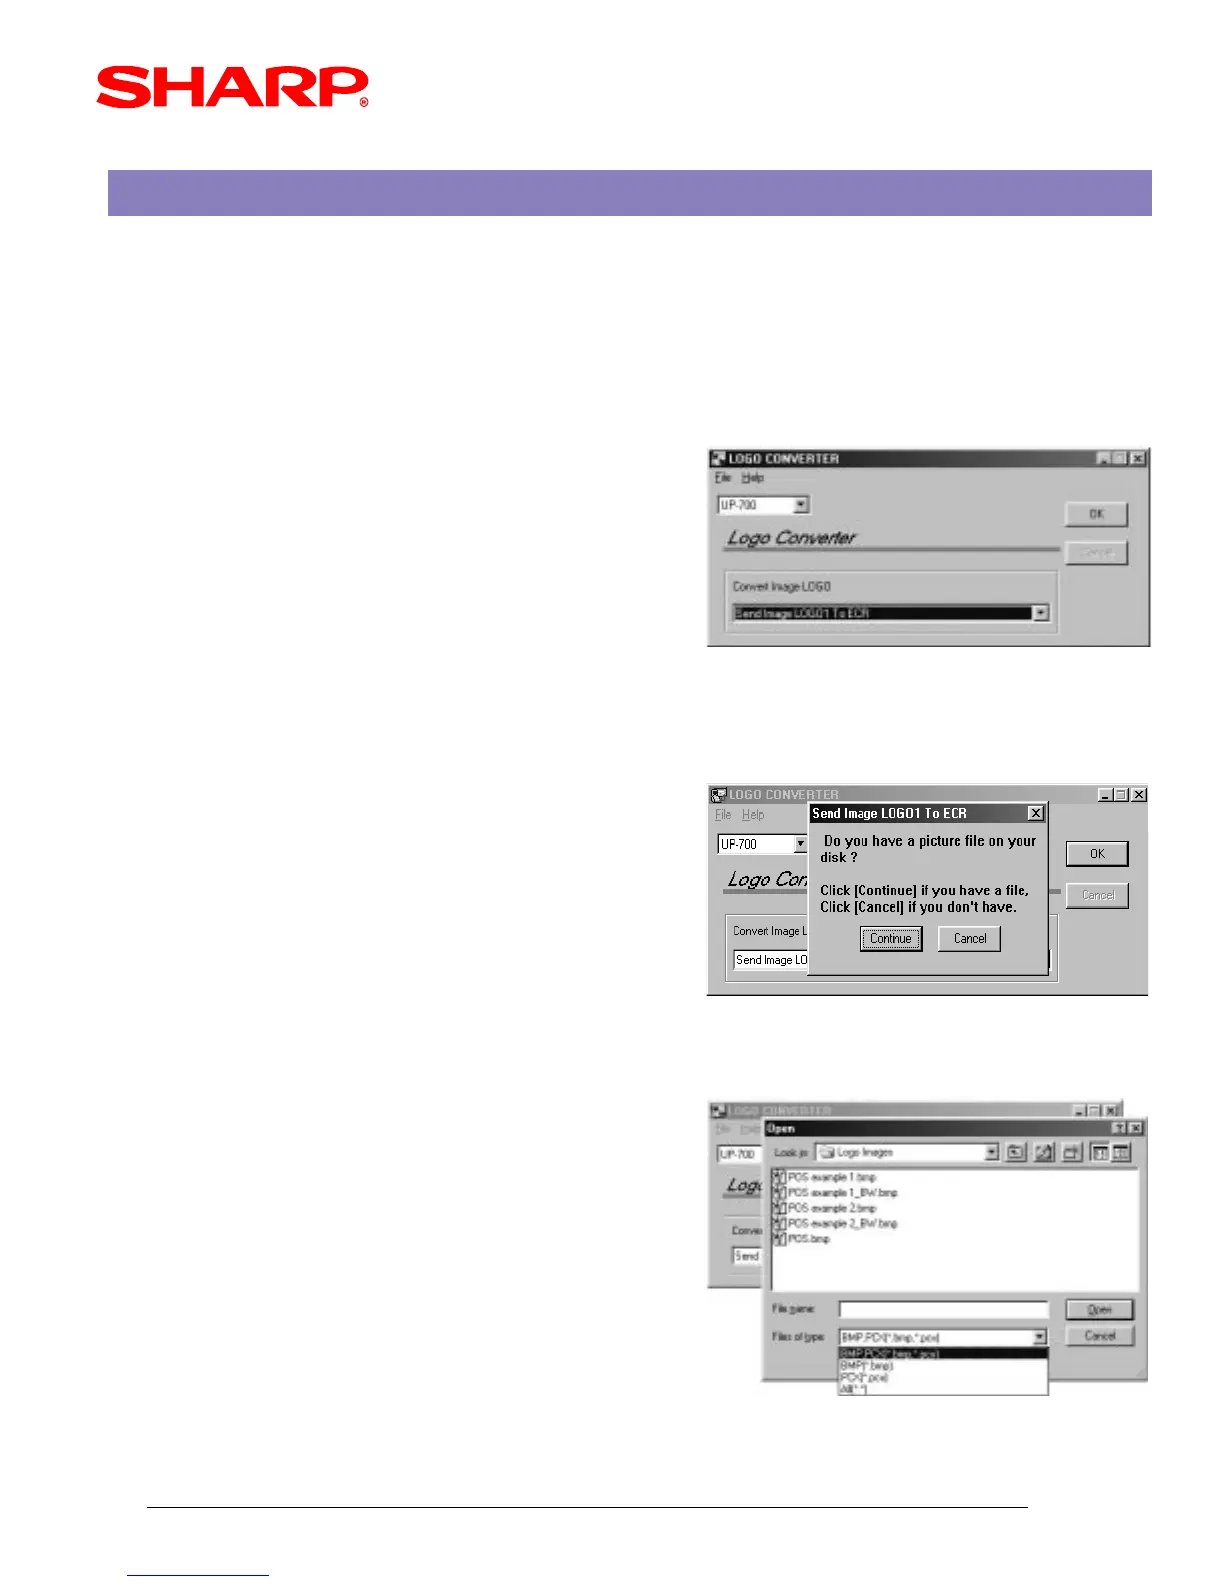
3. Click [ OK ] (Fig. 12)
4. The LOGOCONV.exe will prompt you if you have an image file ready for transfer to the UP-700.
Click [Continue] if you have a file that has been prepared. (Fig. 13)
5. Navigate to the applicable folder where the image data is stored and select the image. (Fig. 14)
FROM PC TO UP-700
(FIG.12)
(FIG.13)
(FIG.14)