1 – 8
UX-40DE
FO-50DE
[5] Quick reference guide
ENTERING YOUR NAME AND NUMBER
1. Press:
FUNKTION
3
Display shows: OWN NUMBER SET
2. Press:
3. Enter your fax number (max. of 20 digits) by pressing the number keys.
• To insert a space between digits, press the # key. To enter "+", press the
key.
• If you make a mistake, press the SPEED DIAL key to backspace and clear the
mistake.
4. Press:
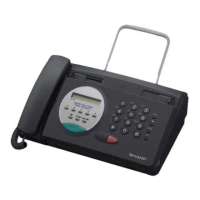
5. Enter your name by pressing the appropriate number keys as shown below.
• To enter two letters in succession that require the same key, press the SPEAKER
key after entering the first letter.
SENDING FAXES
AUFLÖSUNG/
EMPFANGSART
FAX
TEL
FAX
TEL
05—NOV 10:30
ANRUFB.
TEL/FAX
ANRUFB.
TEL/FAX
05—NOV 10:30
FAX
TEL
FAX
TEL
05—NOV 10:30
ANRUFB.
TEL/FAX
ANRUFB.
TEL/FAX
05—NOV 10:30
START
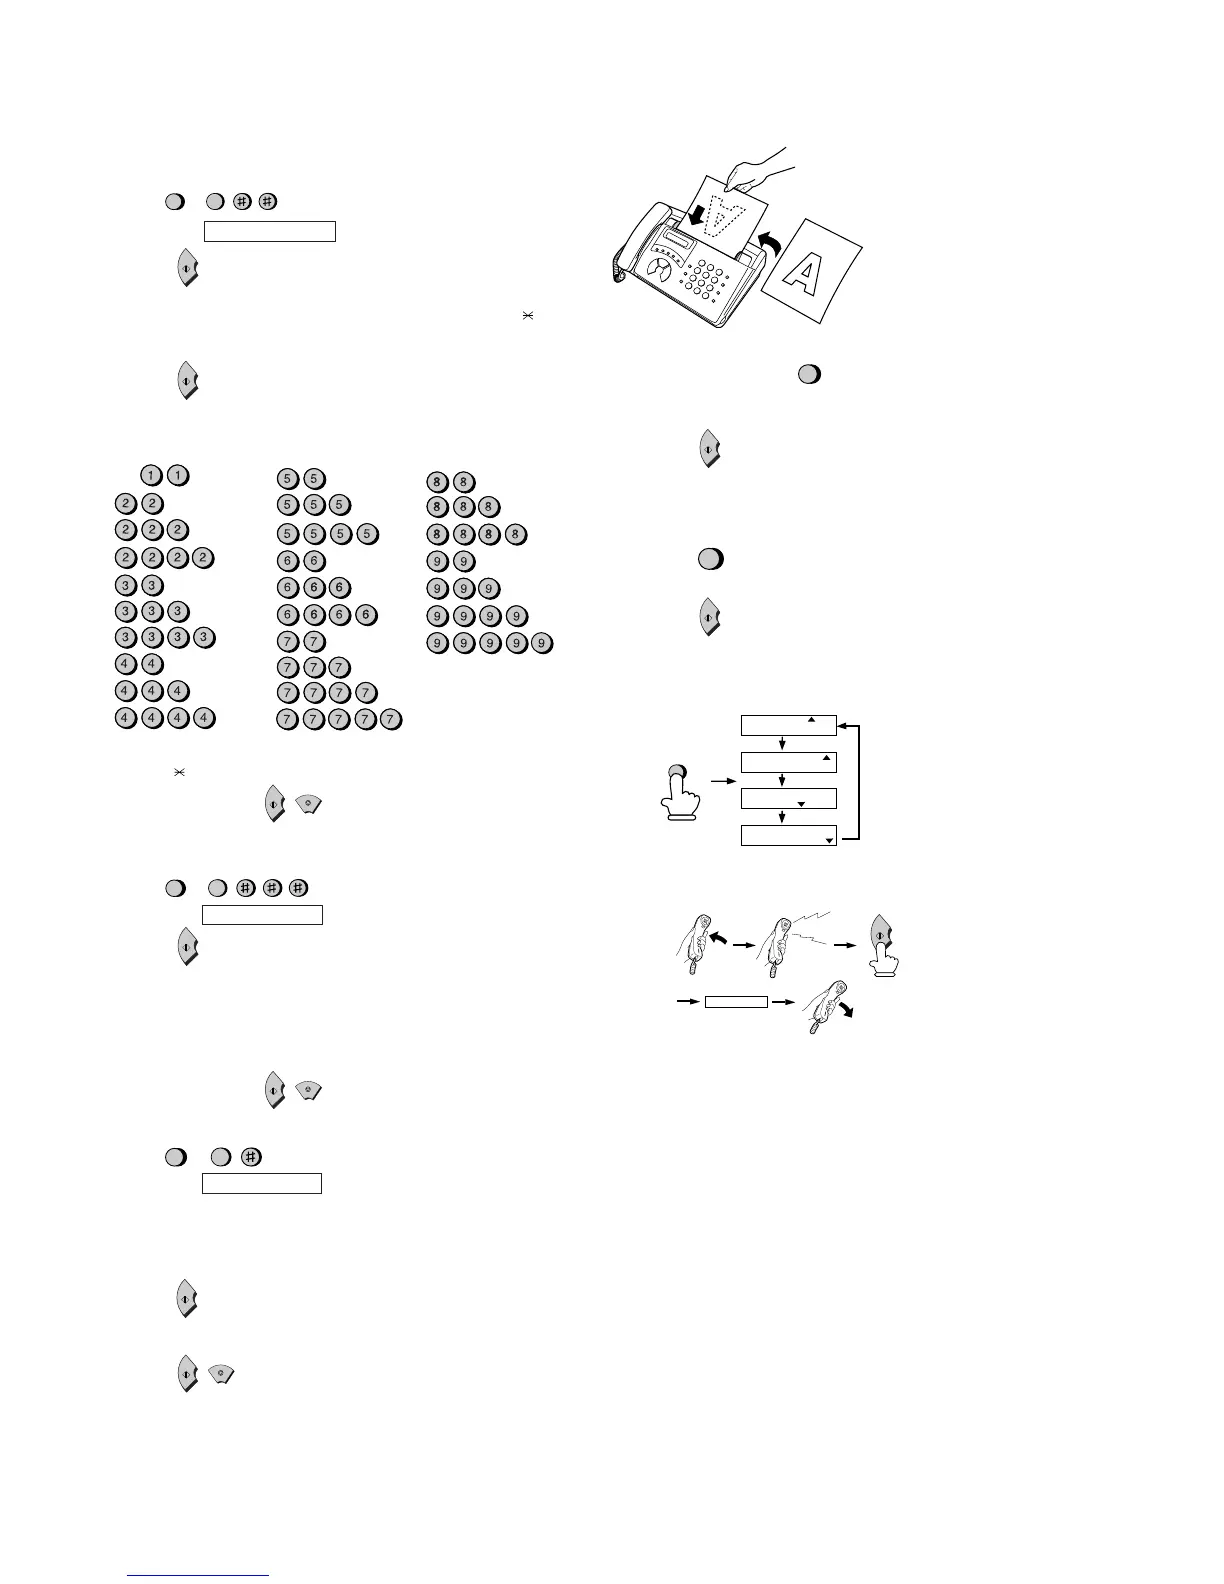
Place your document (up to 5 pages)
face down in the document feeder.
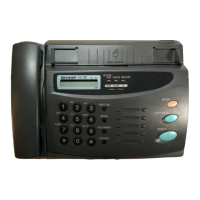
Normal Dialing
1. Lift the handset or press
2. Dial the fax number.
3. Wait for the reception tone (if a person answers, ask them to press their Start
key).
4. Press:
Rapid Key Dialing
Press the appropriate Rapid Key. Transmission will begin automatically.
Speed Dialing
1. Press:
2. Enter 2-digit Speed Dial number.
3. Press:
RECEIVING FAXES
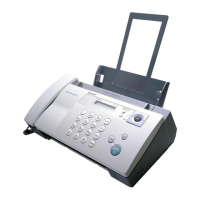
Press the RESOLUTION/RECEPTION MODE key until the arrow in the display
points to the desired reception mode (make sure the document feeder is empty).
LAUTSPR.
FAX mode: The fax machine automatically answers on the set number of rings
and receives the incoming document.
TEL mode:
TEL/FAX mode: This mode is convenient for receiving both faxes and voice calls.
When a call comes in, the fax will detect whether it is a voice call (including manu-
ally dialed fax transmissions), or an automatically dialed fax.
A.M. mode: Select this mode when an answering machine is connected to the fax
and the answering machine is turned on.
START
START
START
SETTING THE DATE AND TIME
1. Press:
Display shows: DATE & TIME SET
2. Press:
3. Enter two digits for the Day (01 through 31).
4. Enter two digits for the Month (01 through 12).
5. Enter four digits for the Year (Ex: 1999).
6. Enter two digits for the Hour (01 through 23).
7. Enter two digits for the Minute (00 through 59).
8. When finished, press:
STORING AND CLEARING AUTO DIAL NUMBERS
1. Press:
Display shows: FAX/TEL # MODE
2. Press 1 to store a number or 2 to clear a number.
3. Enter a 2-digit Speed Dial number (from 01 to 05 for Rapid Key Dialing, or 06 to
40 for Speed Dialing) (If you are clearing a number, go to Step 7.)
4. Enter the full fax/telephone number.
5. Press:
6. Enter the name of the location by pressing number keys (Refer to the letter
entry table in
ENTERING YOUR NAME AND NUMBER
.)
7. Press:
A =
B =
C =
D =
E =
F =
G =
H =
I =
J =
K =
L =
M =
N =
O =
P =
Q =
R =
S =
T =
U =
V =
W =
X =
Y =
Z =
SPACE =
• To change case, press the REDIAL key.
Press # or to scroll through symbols and special characters.
6. When finished, press:
START
STOP
FUNKTION
3
START
FUNKTION
3
START
STOP
START
START
STOP