35Installation manual – NewMotion Home Advanced 2.1 / 2.2 - 071NMEN13
6.4. Configuring the DPM module
If you have installed the DPM module, please use the Installer App, or contact your local NewMotion Installation desk
for conguration of the Dynamic Power Management.
Write down before contacting:
1. The amperage of the main grid connection;
2. The value of the overcurrent protection device used in the charge point installation;
3. The maximum amperage of the charge point, in case the charging speed needs to be limited.
6.5. Test charge point
Test if the charge point is properly working by starting ve successive charge sessions using an EV charging test
adaptor connected to a heavy load, such as a hot air gun.
6.6. Regular use
6.6.1. Start charging
1. Connect your car to the charge point by plugging in the charge cable.
- If you are using Plug&Charge the session will start automatically.
- If you have to identify rst;
2. Swipe your charge card above the LED.
- First the LED will ash green to authenticate the card, after authentication, the session will start.
- When the car has delayed charging congured, the LED will remain green, until charging can start from car and
charge point.
NOTICE If the LED ashes red, the session is not authorised.
6.6.2. Stop charging
1. Identify.
2. Unplug.
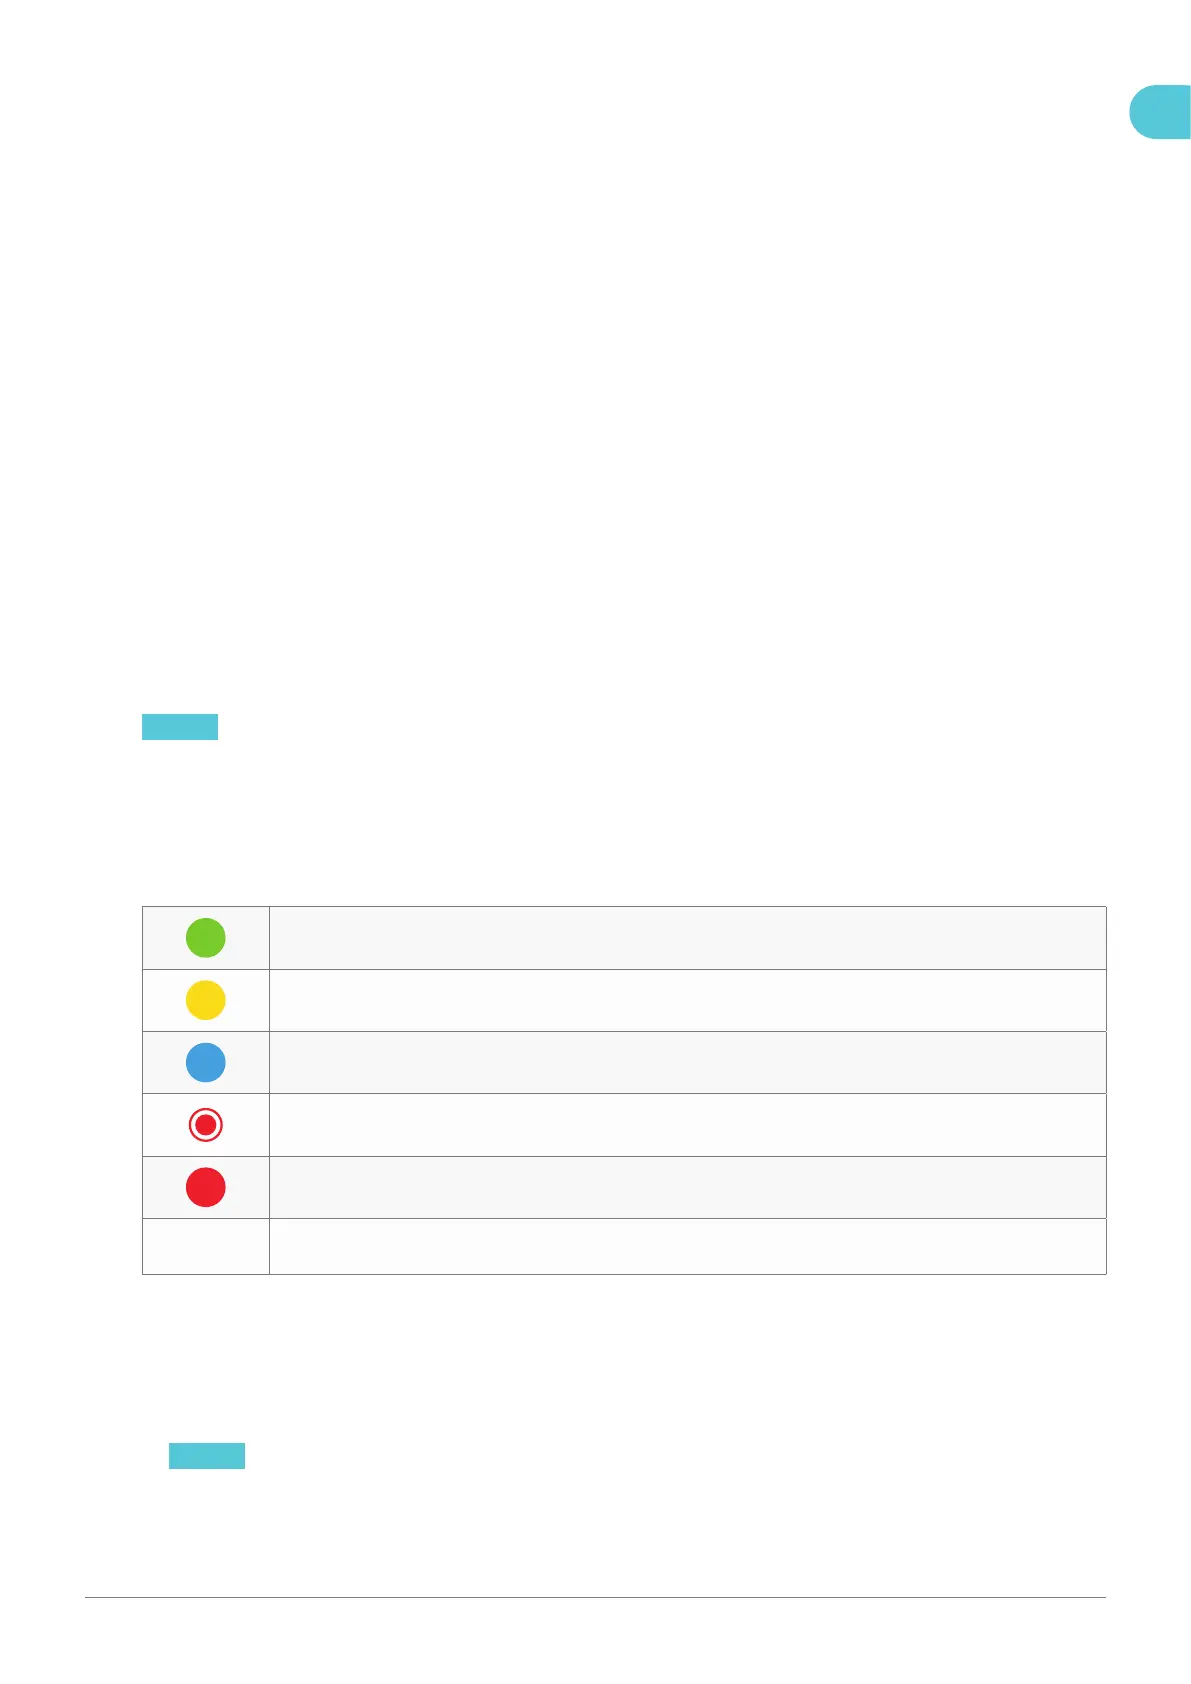
6.6.3. Explanation of the LED colors
Full or waiting to charge
Plug in or identify
Charging
Not accepted
Error
Flashing green
or multi colors
Rebooting procedure or software update procedure for charge point.
6.7. Tethered cable
If you have purchased a charge point with tethered cable functionality. After a charge session do the following:
1. Make sure the cable is unlocked from your car.
2. Roll the cable around the back of the charge point.
3. Connect the connector into the dummy socket of the charge point.
NOTICE By placing the connector back into the dummy socket of the charge point, it’s protected against water and
dirt.
EN