23
4. BRAKE INSTALLATION
WARNING! Proper installation and adjustment of the brakes, cables and housings is critical for
your safety and should only be performed by an Authorized Specialized Retailer. Before your first
ride, the brake assembly should be tested in a controlled environment to ensure safe operation.
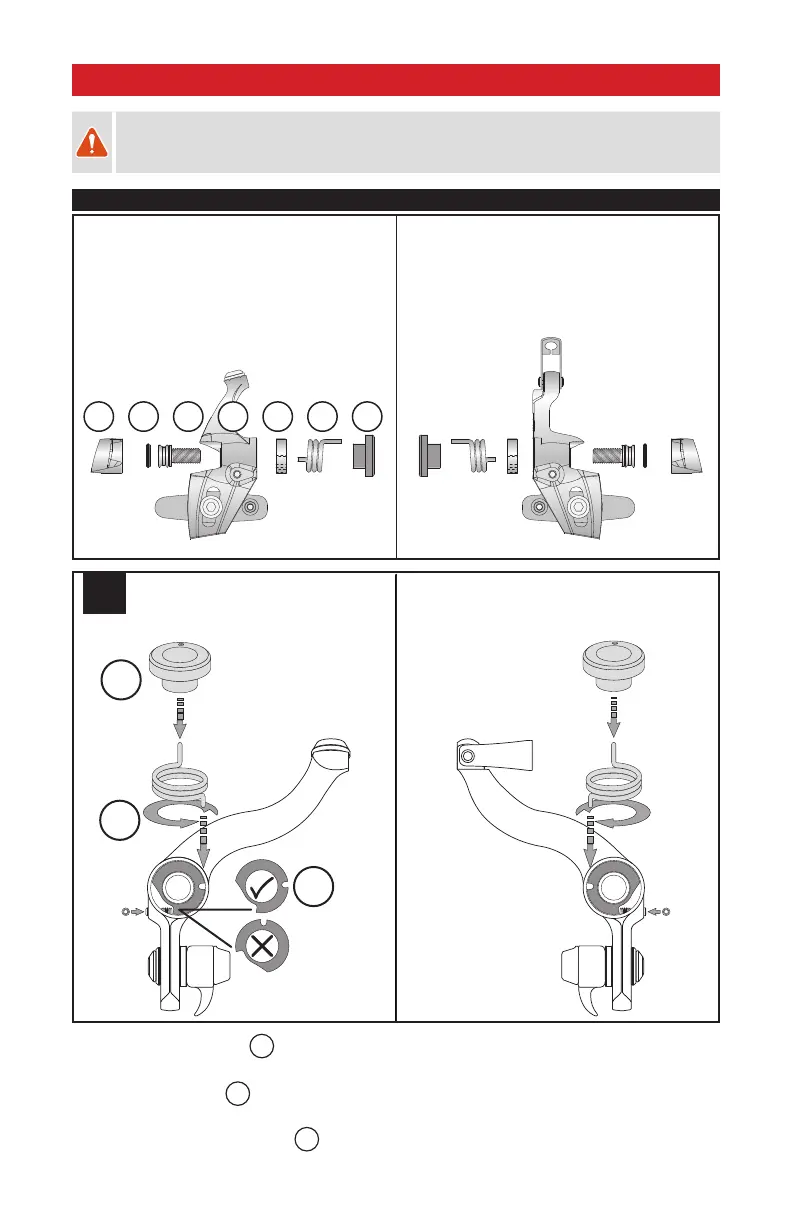
1. FRONT AND REAR BRAKE ASSEMBLY (Exploded view)
1. Aero bolt cap
2. Brake bolt O-ring
3. Brake pivot bolt
4. Brake arm
5. Spring plate
6. Spring
7. Spring cover
7654321
Non-drive-side Drive-side
5
6
7
Place long spring
tip facing out
Clockwise
wound
Counter-
clockwise
wound
NON-DRIVE SIDE (Rear View) DRIVE SIDE (Rear View)
1
Fig.1: Place the spring plates
5
in the brake cavity. Make sure they’re facing the correct direction with the flat
edge against the adjuster screw. The spring plate is reversible for either side brake.
Fig.1: Install the springs
6
, clockwise for the drive-side brake, counter-clockwise for the non-drive-side brake.
The shorter of the two spring pins goes in the brake.
Fig.1: Install the brake spring covers
7
.