EasyManuals Logo

Siemens Clinitek Advantus Operator's Guide

Siemens Clinitek Advantus
57 pages
To Next Page IconTo Next Page
To Previous Page IconTo Previous Page
Page #31 background imageLoading...
Page #31 background image
C
l
i
n
i
t
e
k
A
d
v
a
n
t
u
s
O
p
e
r
a
t
o
r
s
G
u
i
d
e
8
3
S
t
m
C
o
n
f
i
g
u
r
t
i
o
n
7.
While re
movi
ng the stri
p, run the e
dge aga
inst th
e side of the co
ntai
ner
.
This removes excess liquid.
8.
Plac
e the rea
gent str
ip onto t
he suppo
rts of the st
rip loa
ding st
ation
, with
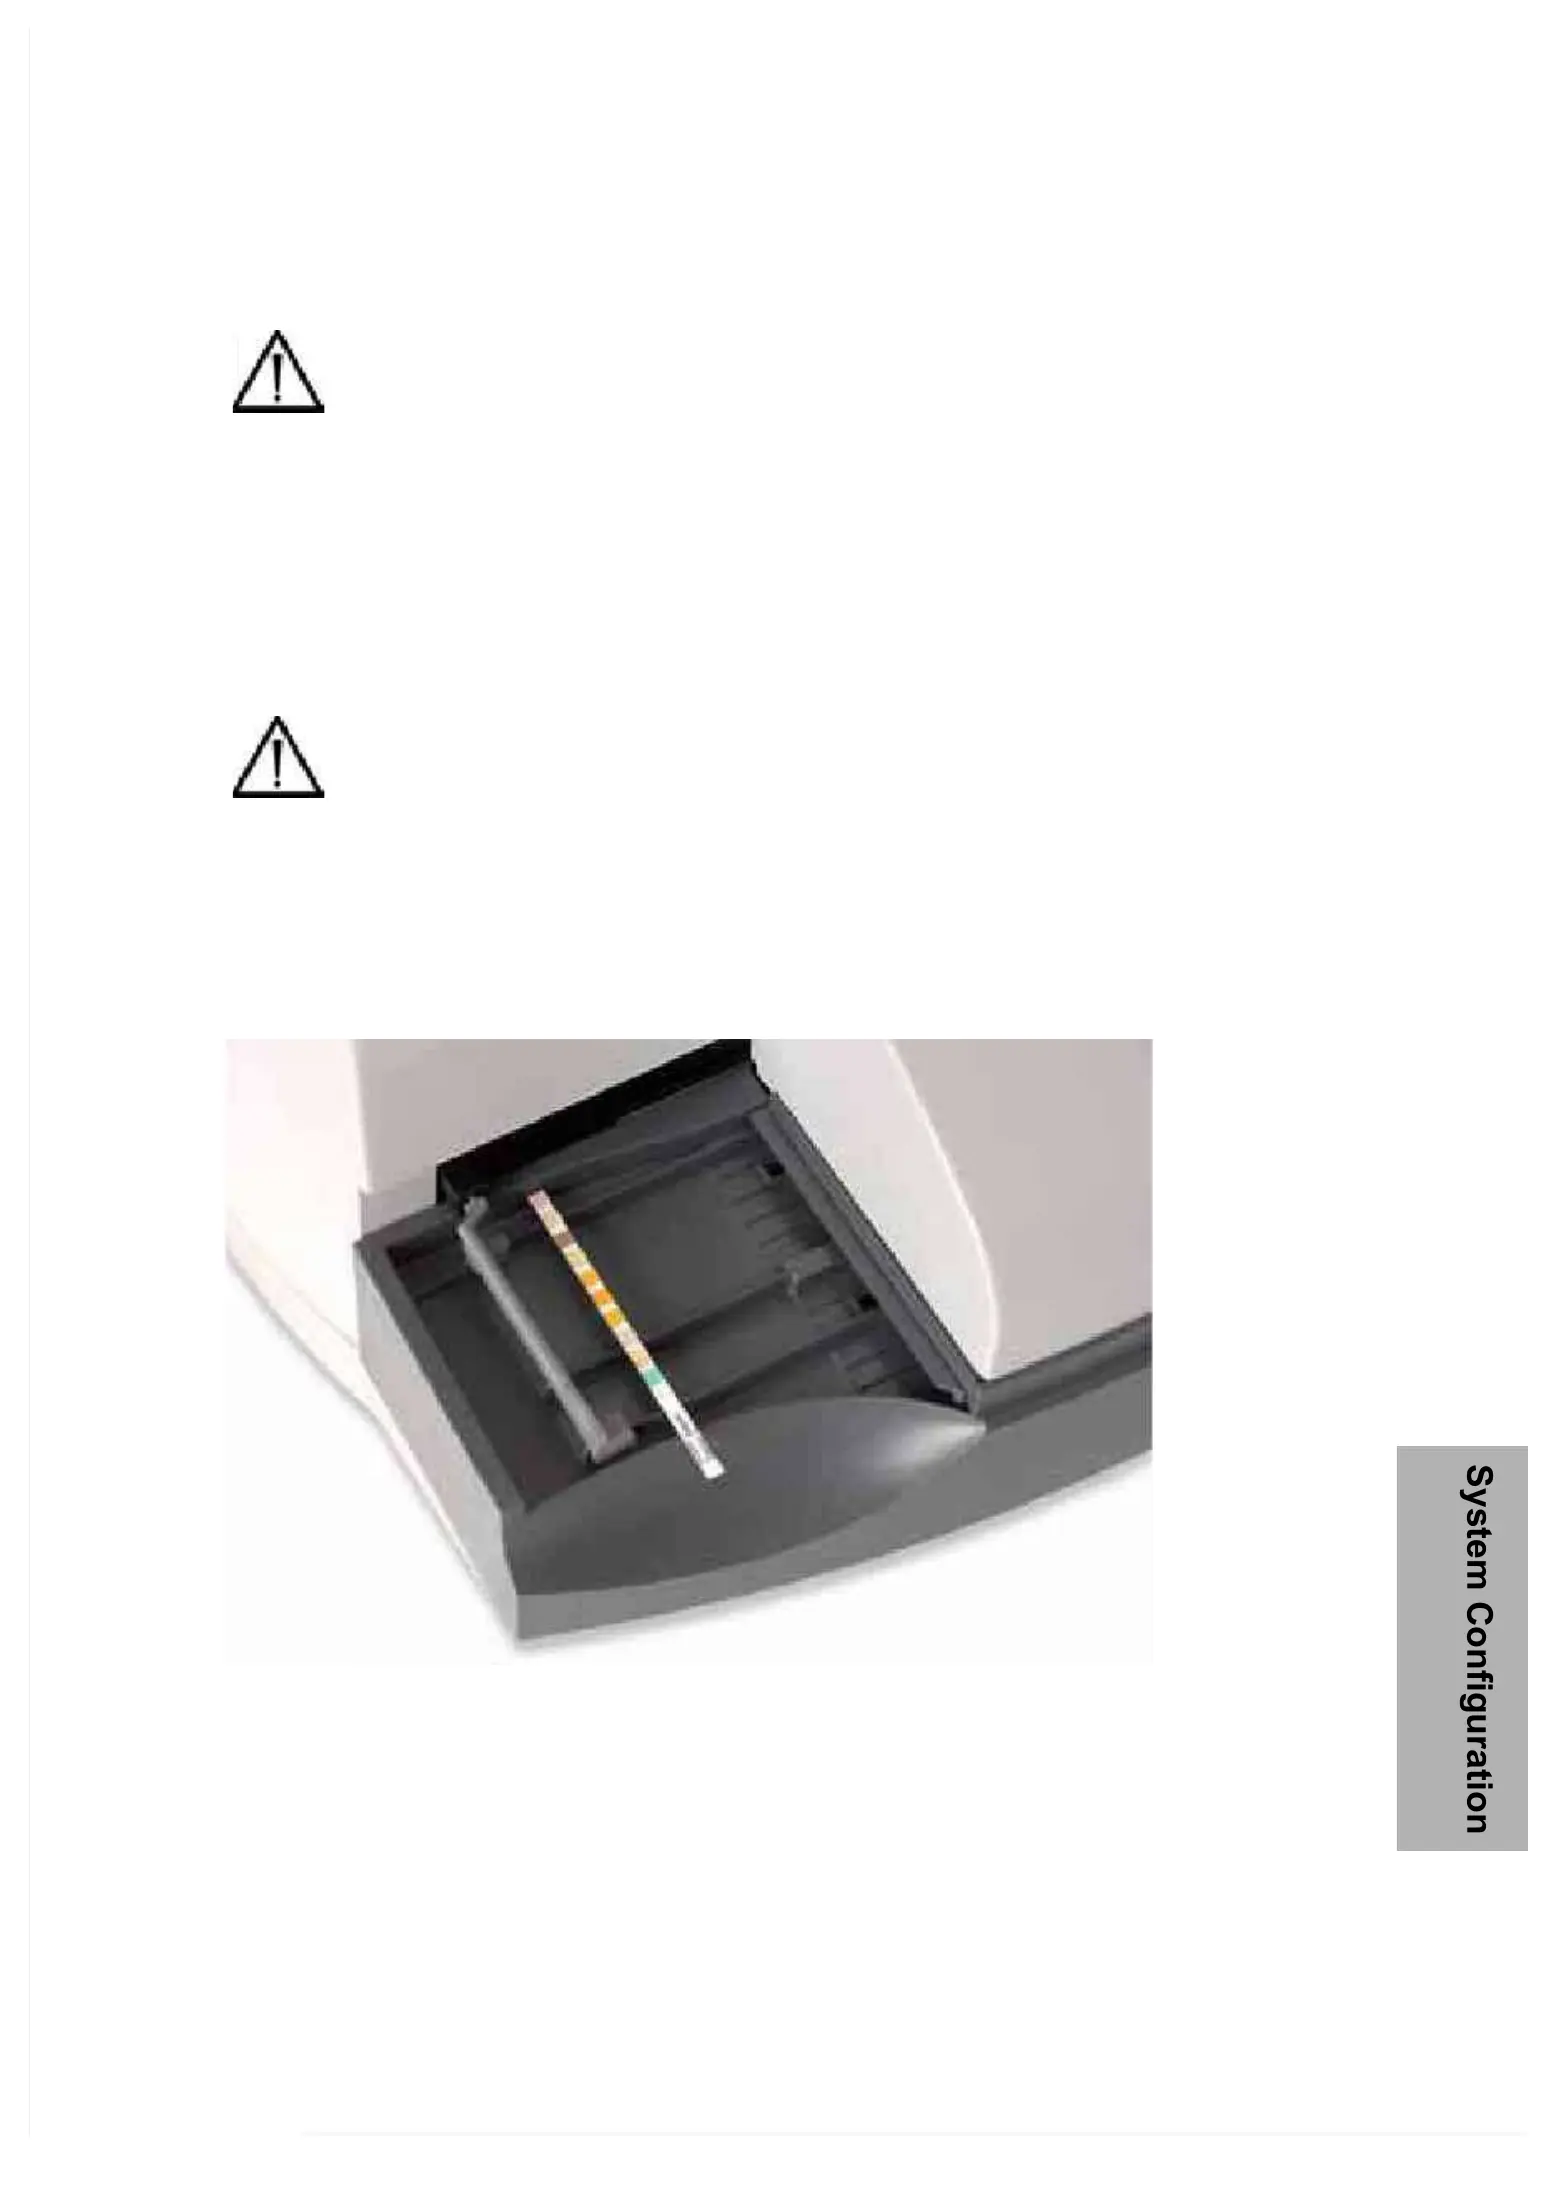
the reagent pads facing up.
Place the strip to the right of
and parallel to the push bar. Ensure that the
end of the strip is
against the back wall of the
platform and that it is not
touching the bottom of the strip loading station.
The push bar
moves almost immediately
, pushing the strip
into the read
area. Most of the keys
on the display become inactive.
Figure
30
Placement
of
Reagent
Strip
After the strip is rea
d, the internal printe
r prints the test result
s. The
analyzer produces a result for each
reagent pad that is within the limits
given in the package insert for the control solution.
CAUTION
Do not blot the edge of
the strip. This could affect results.
CAUTION
Improper placement may cause the analyzer to jam or
the strip to
incorrectly align under the readheads.

Table of Contents

Other manuals for Siemens Clinitek Advantus

Questions and Answers:

Question and Answer IconNeed help?

Do you have a question about the Siemens Clinitek Advantus and is the answer not in the manual?

Siemens Clinitek Advantus Specifications

General IconGeneral
Test TypesUrinalysis
InterfaceRS-232, USB
CalibrationAutomatic calibration
Measurement PrincipleReflectance photometry
Sample TypeUrine
Power Supply100-240 VAC, 50/60 Hz
TypeUrine analyzer
DisplayTouchscreen
Reagent TypeTest strips
Measurement ParametersGlucose, Bilirubin, Ketone, Specific Gravity, Blood, pH, Protein, Urobilinogen, Nitrite, Leukocytes

Related product manuals