Mounting and installation
3
12 | 59 A6V10877569_en--_e
4. Disconnect all the labeled wires and then remove your old thermostat.
NOTICE! Do not dispose of your old thermostat as part of household if it
contains mercury in a sealed tube. Contact a thermostat recycling
organization, for example, www.thermostat-recycle.org, for safe disposal
of your old thermostat.
5. Check whether you need to have more wires connected to the power unit to be
installed. If so, prepare the wires and label them accordingly. Normally, at least
three wires are needed for the thermostat to work properly. We strongly
recommend to hire installers to connect the wires.
6. Seal the conduit box or the installation tube to prevent entry of cold or hot air
and make sure the temperature readings of the internal sensor are correct.
7. Screw the mounting plate tightly on the conduit box using a screwdriver, make
sure the mounting plate is placed correctly (part with the upward arrow placed
on the top).
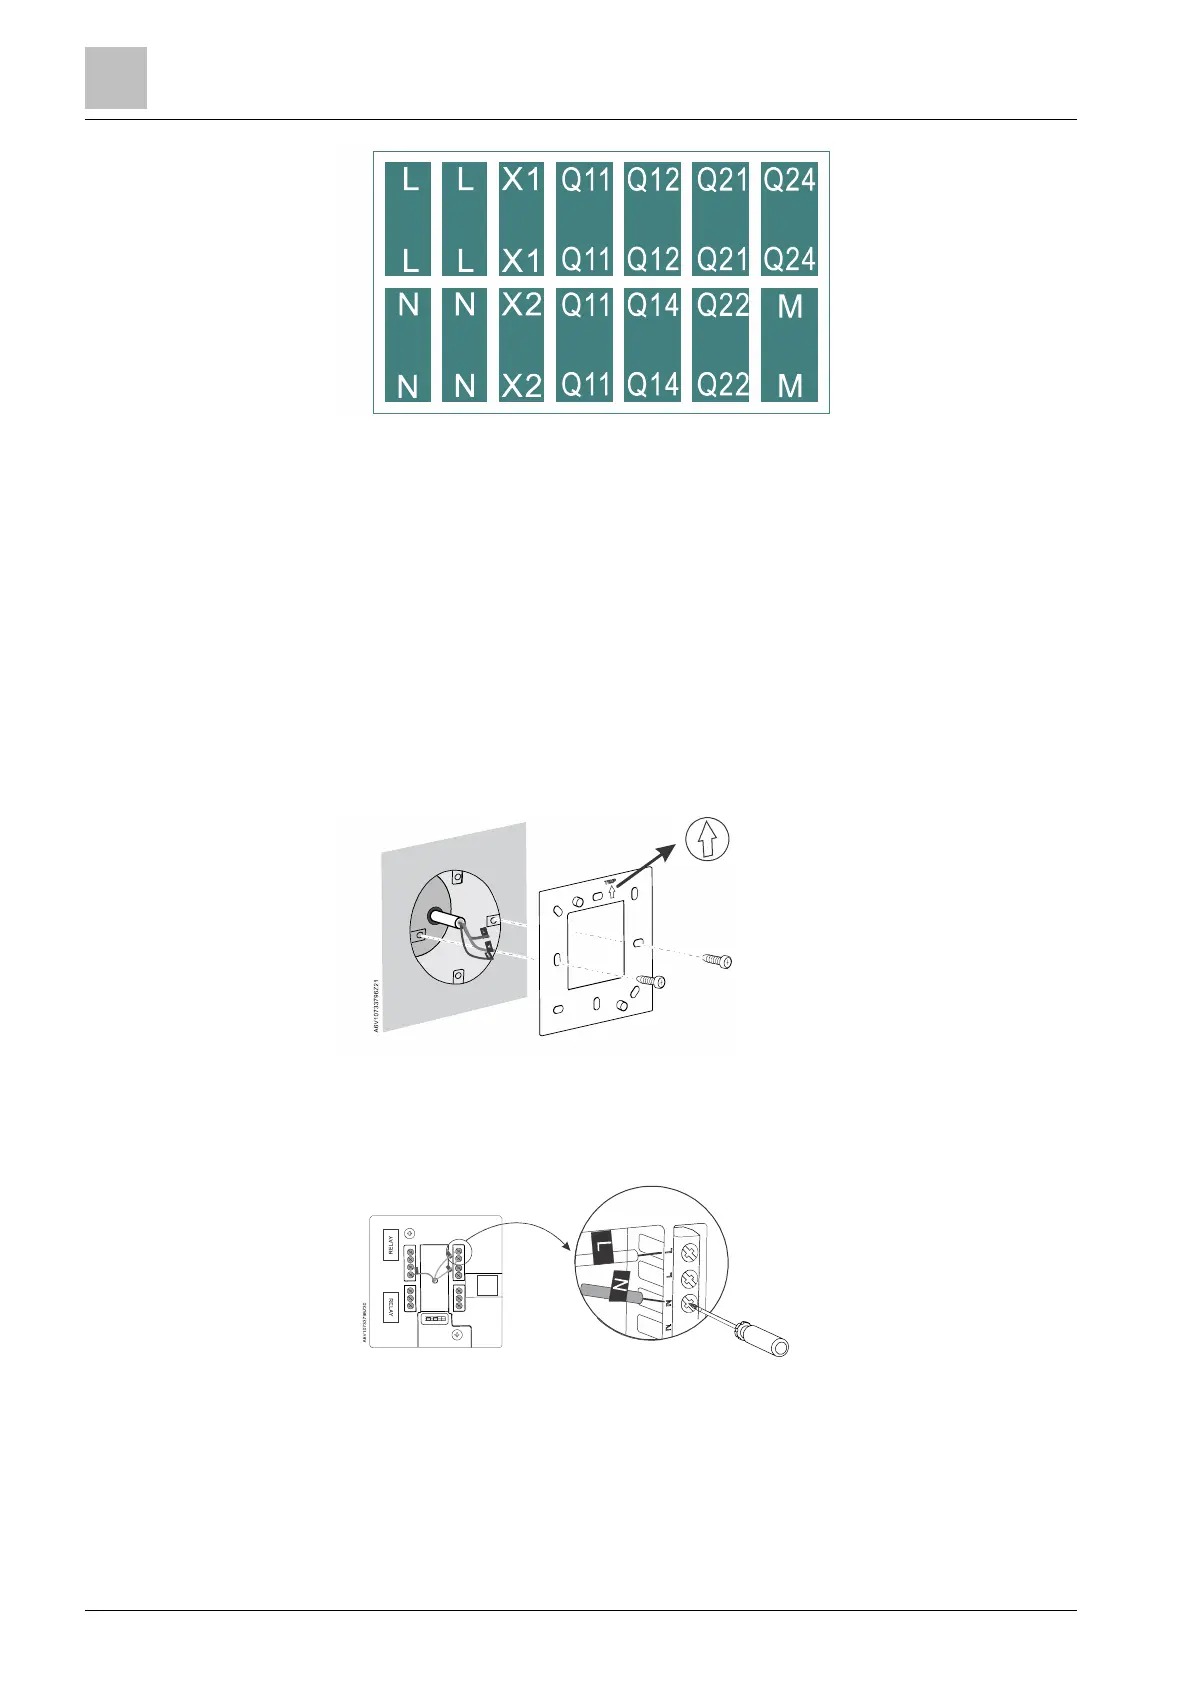
8. Connect tightly the labeled wires to the terminal as per your thermostat terminal
designations (see picture in Step3), and tighten all inserted wires by screwing
down the screws. Note that the wiring for your application may differ from the
drawing below.