Technica EU Operating manual - English
Copyright Silca 2005 13
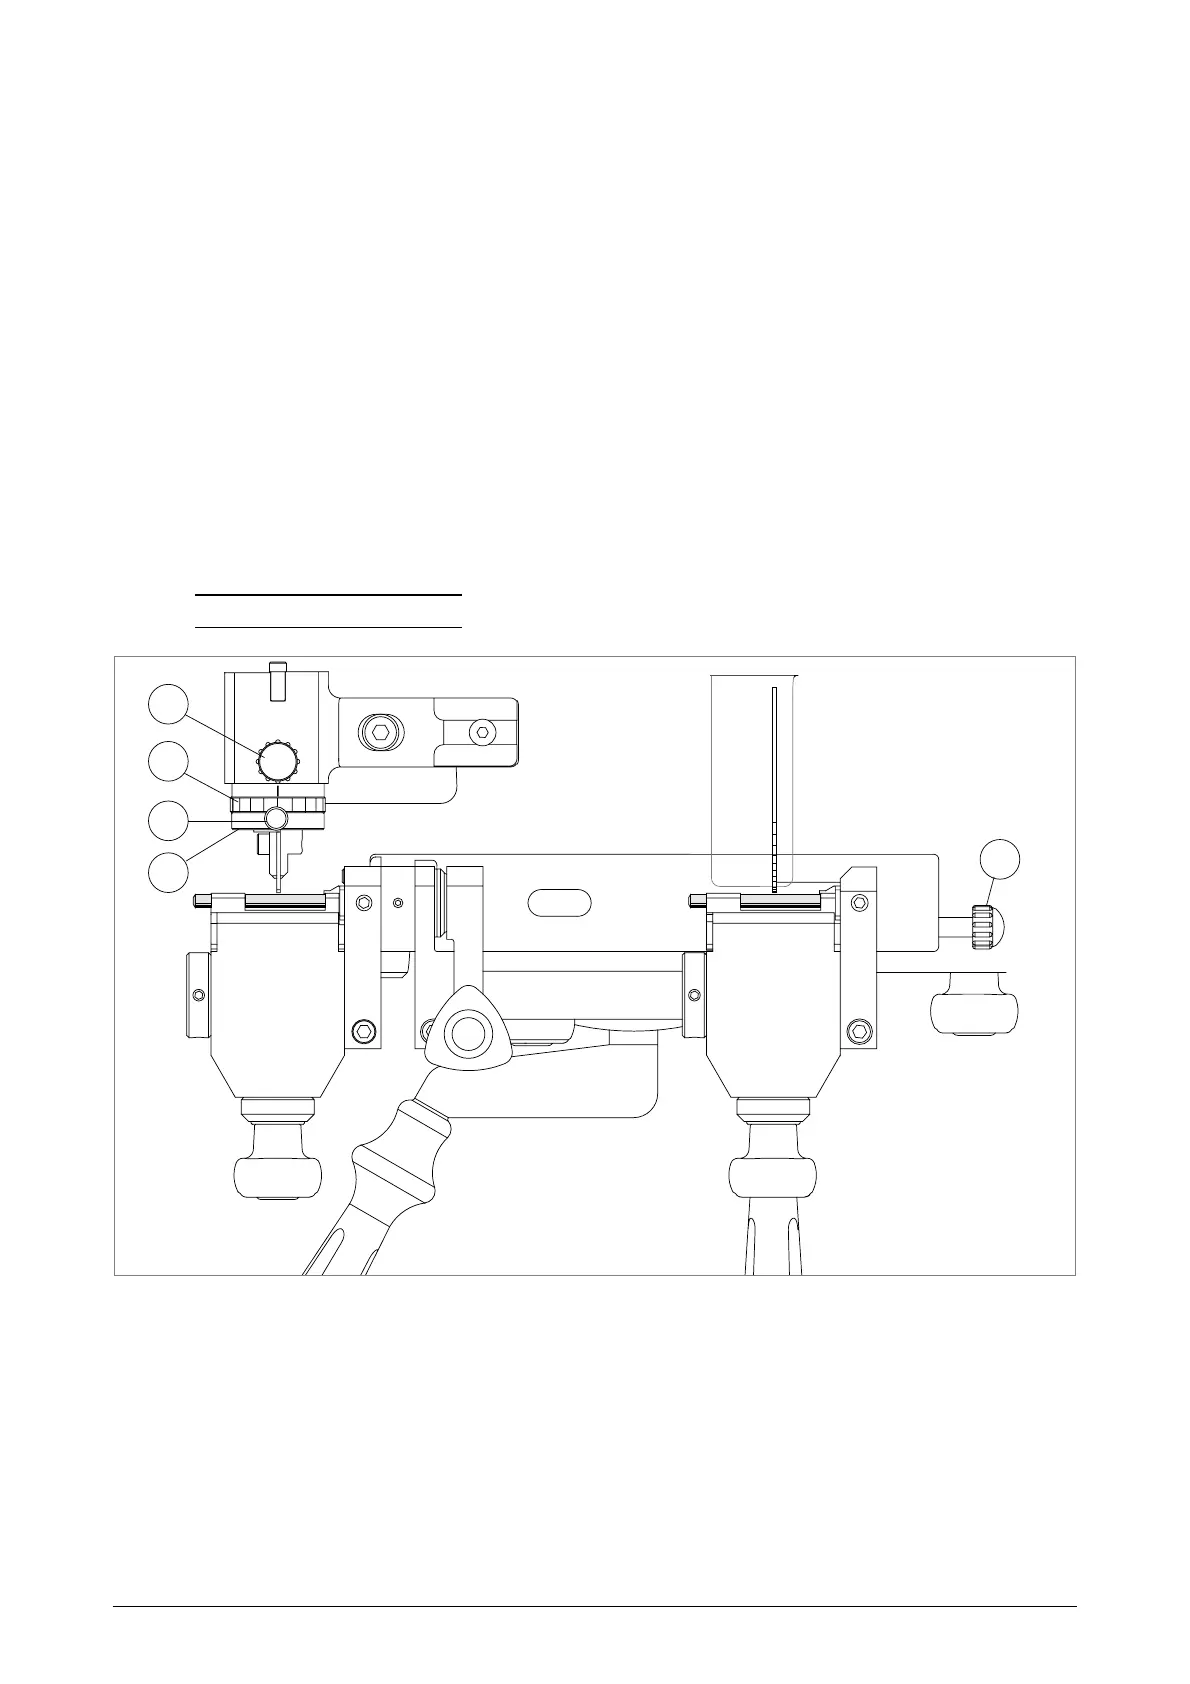
4.6.2 DEPTH GAUGING
Depth calibration is regulation of the cutting depth
(fig. 14, page 12).
Depth gauging should be checked periodically to ensure perfect efficiency for the machine, and whenever the
cutter or tracer point is replaced (due to wear or job changeover
.
CHECKING DEPTH GAUGING
:
1)
Turn the machine off and unplug it
.
2) Use the knob (S) to lock the right-hand clamp in a horizontal position;
3) Place the adjusting pins (provided) on the clamps (fig. 17);
4) Disable the tracer point spring (chap. 4.2, page 10).
5) Release knob (D5) placed on ring nut (N).
6) Raise the carriage and take the setting pins into contact with the tracer point and cutting tool (fig. 17).
7) Turn the cutting tool anticlockwise manually and check that it skims the adjusting pins in several places.
8) If necessary, regulate the cutting depth by means of the tracer point, as described below:
c) turn the nut (N) clockwise to advance the tracer point (cut less deep).
d) turn the nut (N) anticlockwise to move the tracer point back (cut more deep).
9) Repeat these operations until the cutting tool skims the setting pins in several points.
10)Once obtained the corret gauging, lock ring nut (N) by tightening knob (D5).
11)After having locked ring nut (N) turn the other ring nut (N1) until the red indicator is aligned with the notch on
the tracer point.
Note: when the 2 ring nuts are turned together, each notch moves them 0.05 mm (with (D1) knob released).
Fig. 17
S
D1
N
N1
D5