Technica EU Operating manual - English
Copyright Silca 2005 17
5.4 Replacing the cutter
ATTENTION:
turn the machine off and unplug it
.
1) Loosen the 3 screws (C2) on the cutter shield and remove (fig. 23).
2) Remove the carriage (see chap. 5.2).
3)
Place the locking bar into the special hole in the cutter shaft
(fig. 24).
4) With the spanner provided loosen the cutting tool locking nut.
ATTENTION: the thread is left-handed.
5) Remove the worn cutter.
6) Carefully clean the new cutting tool and all the parts which come into contact with it.
7) Replace the cutting tool and tighten the nut.
ATTENTION:
the tool rotates clockwise
.
8) Remove the locking bar.
9) Fit the cutter shield and secure with the 3 screws (C2).
10)Re-calibrate the machine, following the procedure described in chap. 4.6.2, page 13.
Fig. 23
Fig. 24
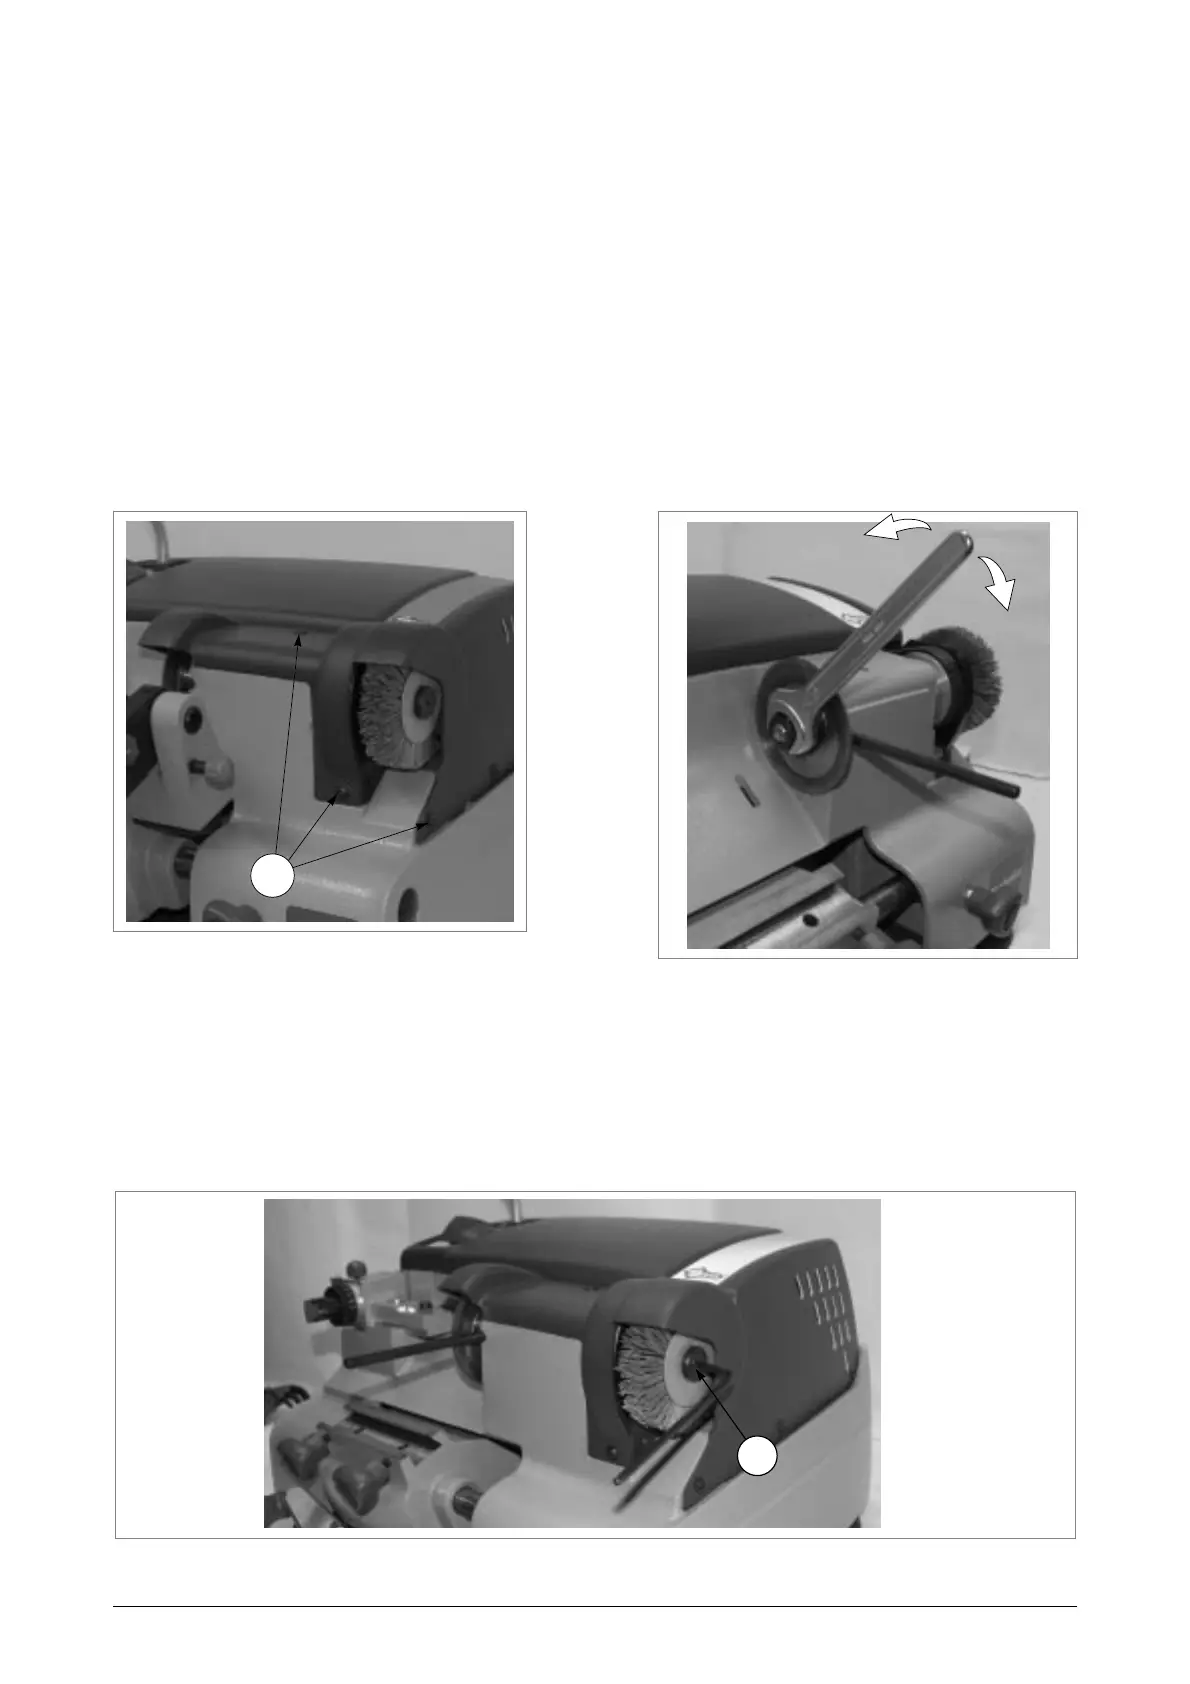
5.5 Replacing the brush
ATTENTION:
turn the machine off and unplug it
.
1) Remove the carriage (see chap. 5.2).
2) Place the locking bar into the special hole in the cutter shaft (fig. 25).
3) Use the Allen wrench to loosen the screw (U1) holding the brush in place (fig. 25).
4) Replace the brush and tighten the screw (U1) with the Allen wrench.
Fig. 25
open
closed
C2
U1