12
Input Settings
What follows are a series of step-by-step examples showing
how to configure all the various “INPUTS” options, followed
by all other system type options.
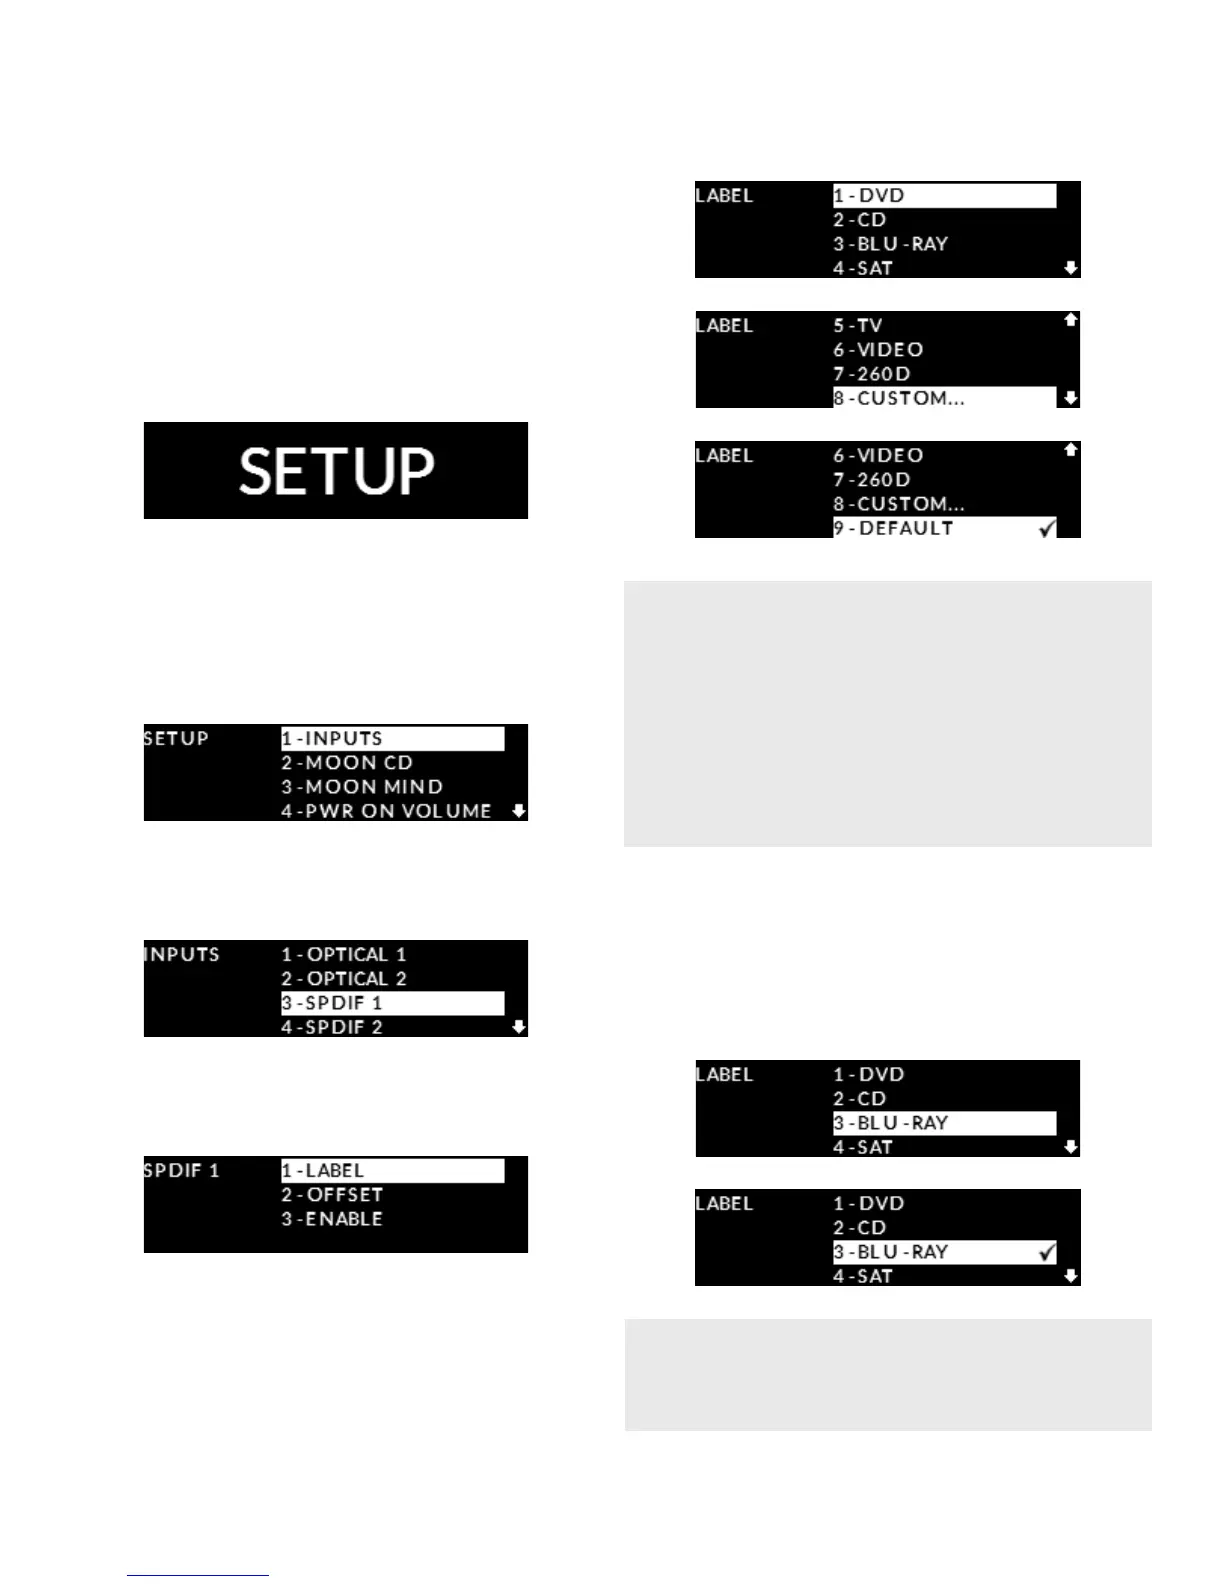
To enter the Setup mode, begin by pressing the
“Setup” button; “SETUP” will briey appear on
the display window (actual screen may dier):
Renaming an input
Rotate the volume control clockwise until
“INPUTS” is highlighted on the display; then press
“OK to enter the Setup “INPUTS” menu:
Rotate the volume control clockwise until “SPDIF 1”
is highlighted (for this example); then press “OK”:
“LABEL” will appear highlighted on the display.
Press “OK”:
By rotating the volume control clockwise, you will
scroll through a series of generic choices - DVD, CD,
BLU-RAY, SAT, TV, VIDEO, 260D – an option named
“CUSTOM” which allows you to create your own text
label of up to 12 characters in length, and nally
“DEFAULT” which represents the default input
name, in this case “SPDIF 1”:
When the generic label name you wish to assign to
the “SPDIF 1” input is highlighted on the display, press
the “OK” button to select it, in this example “DVD”.
A small check-mark will appear beside this label
to conrm that it has been selected:
(i) In the middle image, you will see two arrows
located on the far right of the display, on top and
on bottom. These indicate that there are more
options (or information) available to be displayed; use
volume control accordingly to scroll up or down
to see them. (ii) The check-mark symbol located
to the right of “DEFAULT” indicates that this is the
currently selected option.
The “USB”, “PHONO” and “MP IN” inputs do not
provide the facility to assign a preset name (ie. DVD,
CD, BLU-RAY, etc.) to the input label.