EasyManua.ls Logo

Simplex 2606-9101 Series - User Manual

Simplex 2606-9101 Series
24 pages
Print Icon
To Next Page IconTo Next Page
Loading...
Foundation Series 2606-9101 LCD
Annunciator Installation Guide
579-1434 Rev B
*05791434B*
Question and Answer IconNeed help?

Do you have a question about the Simplex 2606-9101 Series and is the answer not in the manual?

Summary

Cautions, Warnings, and Regulatory Information

Introduction

Compatibility

Details compatibility requirements for the LCD Annunciator with FACU revisions.

Reference Documents

Lists related documents for programming and using the remote Annunciator.

Module Overview

Specifications

Provides technical specifications including dimensions, power requirements, and environmental limitations.

Mounting Instructions

Mounting the Annunciator Using the Surface Mount Box

Step-by-step guide for attaching the annunciator to a surface mount box.

Installing the LCD Annunciator

Configuring the 2008 LCD Annunciator

Instructions for setting up the 2008 LCD Annunciator via its interface.

Configuring 2008 FACU for LCD ANN using Panel PC Tool

Guide to configuring the 2008 FACU using the Panel PC Tool.

Configuring 2250 and 2050 LCD Annunciator using Annunciator UI

Steps to configure 2250/2050 annunciators via the Annunciator UI.

Configuring 2250 and 2050 FACUs for LCD Annunciator using PC tool

Guide to configuring 2250/2050 FACUs using the PC tool.

Wiring Guidelines

General Wiring Guidelines

Covers general rules for wiring copper conductors, lengths, and splices.

Specific Wiring Guidelines

Details power limiting, supervision, and wire type requirements.

Wire Lengths

Discusses limitations for wire lengths and calculations for supported distances.

Checkout Procedure

Executing the Lamp Test

Steps to perform a lamp test to verify indicator functionality.

Accessing the User Interface

Enabling Access to the User Interface

Procedure to unlock the user interface using the keyswitch.

Disabling Access to the User Interface

Procedure to lock the user interface using the keyswitch.

Maintenance

Cleaning

Instructions for cleaning the FACU using a soft, damp lint-free cloth.

Overview

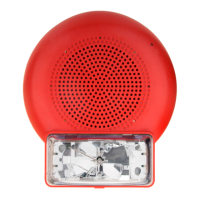
The Simplex Foundation Series 2606-9101 LCD Annunciator is a remote annunciation device designed for use with fire alarm control units (FACUs), specifically the 2008-9101, 2050-9101, and 2250-9101 panels. Its primary function is to provide visual and audible status indications of the FACU. The device features an LCD display and LEDs for visual status, complemented by a piezo sounder for audible annunciation.

Function Description:

The LCD Annunciator serves as a remote interface to monitor the status of a fire alarm control unit. It displays critical information on its LCD screen and uses LEDs to indicate various states such as ALARM, SUPERVISORY, TROUBLE, SILENCED, and POWER ON. The integrated piezo sounder provides audible alerts for events, ensuring that personnel are promptly notified of any changes in the fire alarm system's status.

The annunciator supports both conventional and addressable modes, selectable via a switch (SW9.1) on the back of the unit. In addressable mode, it communicates with the FACU to provide detailed status updates. For the 2008-9101 FACU, up to four annunciators can be installed, while the 2050-9101 and 2250-9101 FACUs support a maximum of eight annunciators. Compatibility with FACUs requires specific firmware revisions: the 2008 FACU must be at revision 1.07 or higher, and the 2250 FACU at revision 1.03 or higher. The LCD Annunciator itself must be at revision 1.01 or greater when used with 2250 and 2008 FACUs.

The annunciator includes several control buttons on its front panel:

  • Up/Down buttons: Used for navigating through menus and adjusting settings.
  • Enter button: Confirms selections and enters detailed settings.
  • ACK (Alarm Acknowledge and Buzzer Silence) button: Acknowledges alarms and silences the audible buzzer.
  • SILENCE (NAC Silence) button: Silences notification appliance circuits (NACs).
  • RESET button: Resets the system after an event.
  • Key switch: Enables or disables access to the annunciator's switch functions, providing a layer of security.

Usage Features:

The LCD Annunciator offers a user-friendly interface for configuration and operation.

Installation and Mounting:

The annunciator can be mounted using a surface mount box. The installation process involves opening the backplate, marking screw locations, mounting the backplate, and then reattaching the housing. For surface mounting, a UL listed RACO 698 3-1/2D 4 GANG MASONRY BOX or 2975-9239 surface mount box is required. Wiring involves connecting RS485 COMM and power lines, with specific diagrams provided for addressable and conventional panels. Termination resistors are necessary at the last annunciator and the fire panel for proper communication.

Configuration:

  • Conventional Mode (2008 LCD Annunciator):
    • The address switch SW9-1 must be in the OFF position.
    • Initial power-up requires holding the RESET key before applying power, then releasing it after 5 seconds, and waiting for a "Comm Failure" message to appear.
    • Accessing the configuration menu is done by holding the ENTER key for at least 5 seconds.
    • Users can navigate through options like "Set Annunc Address," "Set Ann. Language," "Software Rev," "Contrast," and "Brightness" using the Up/Down keys.
    • Address values for the 2008 FACU range from 4 to 7.
    • Language options include Spanish, English, and Portuguese.
    • Display contrast and brightness can be adjusted from 0% to 100% in 10% steps.
    • A 30-second timeout is implemented in the configuration menu to prevent unintended changes, automatically logging out the user if no key is pressed.
  • Addressable Mode (2250 and 2050 LCD Annunciator):
    • The address switch SW9-1 must be in the ON position.
    • Similar to conventional mode, initial power-up involves holding the RESET key, applying power, waiting 10 seconds, releasing the RESET key, and waiting for "serial link is DOWN" to be displayed.
    • The ENTER key is pressed and released to prompt for an address, which can be set from one to eight using the Up/Down keys.
    • After setting the address, the annunciator needs to be enrolled from the FACU's Program menu (option 1-Auto).
    • Configuration options are accessed by holding the ENTER key for at least 5 seconds, displaying options like "Annunciator ID," "View list," "View Log," and "LCD Settings."
    • LCD settings include "Set Backlight" and "Set Contrast," adjustable using the Up/Down keys.
  • PC Tool Configuration (2008, 2250, and 2050 FACUs):
    • For 2008 FACUs, annunciators can be enabled or disabled using the "Conventional Panel Programmer" PC tool under the "Hardware" tab, in the "Optional hardware" section.
    • For 2250 and 2050 FACUs, the "Addressable Panel Programmer" PC tool allows configuration by selecting "General Options," then the "Annunciator" tab, and checking the "Enable Annunciator" checkbox.

Wiring Guidelines:

  • All wiring must be copper conductors and power-limited and supervised.
  • Wire lengths should not exceed maximum limits.
  • Underground wiring must be free of water.
  • Wires should not be run through elevator shafts.
  • Splices are permitted if soldered with rosin-core solder, crimped in metal sleeves, or encapsulated with epoxy resin, with proper insulation and shield continuity.
  • Communication and power wiring must meet requirements for overvoltage protection (e.g., Simplex 2081-9044 overvoltage protectors).
  • 14 AWG to 22 AWG twisted pair wiring is required for RS485 communications.
  • Maximum total wire length for bus style wiring is 4000 ft. For T-Tap style wiring with 2050 and 2250 panels, it's 2500 ft.
  • The maximum number of 2081-9044 Over Voltage Protectors on a single communication loop is four.
  • A formula is provided to calculate maximum wire length based on AWG and the number of connected annunciators, accounting for resistance and current consumption.

Checkout Procedure:

After installation, a checkout procedure ensures proper functionality:

  • Execute a lamp test to verify that all LEDs and LCDs are working. This is done by inserting the key into the keyswitch, turning it anticlockwise to the unlock position, and holding the RESET key for at least 10 seconds.
  • Verify communication with the FACU; error messages and audible signals indicate wiring issues or communication failure.

Accessing the User Interface:

  • The key switch controls access to the user interface. In the vertical (locked) position, access is disabled.
  • To enable access, insert the key, rotate it 90 degrees anticlockwise to the unlock position, and press the tab on the edge of the door to open it. The key cannot be removed in the unlock state.
  • To disable access and remove the key, turn the key clockwise to the lock position.

Maintenance Features:

Regular maintenance is crucial for the annunciator's reliability and includes:

  • Log Book: Maintaining a log book to record all maintenance test results, faults, and problems, along with details of the maintaining company.
  • Functional Tests:
    • Daily: Check for normal operation.
    • Weekly: Test at least one sensor, manual call point (MCP), or zone to check the panel and audible alarms.
    • Quarterly: Check log book entries/actions, battery state/charger voltage, remote manned center links, and perform weekly tests.
    • Annually: Test all devices and perform a visual inspection of cable fittings and equipment.
  • Cleaning: The annunciator can be cleaned periodically by wiping it with a soft, damp, lint-free cloth. Solvents should not be used.

The annunciator's LCD backlight turns on for 30 seconds when any key is pressed. In the event of an alarm or other event, the backlight remains on until the event is handled by the panel. If AC supply fails, the backlight turns off after 30 seconds following an event report. If communication with the FACU is lost for more than 60 seconds, the annunciator displays "Serial Link Down" and activates its buzzer, which can be silenced by pressing the ACK key.

Simplex 2606-9101 Series Specifications

General IconGeneral
CategoryFire Alarms
MountingSurface or semi-flush
ColorRed
ResetKey reset
CompatibilitySimplex fire alarm control panels
Humidity10 to 93% RH, non-condensing
Humidity Range10 to 93% RH, non-condensing

Related product manuals