9 - 5
9 Torque Generator Repair
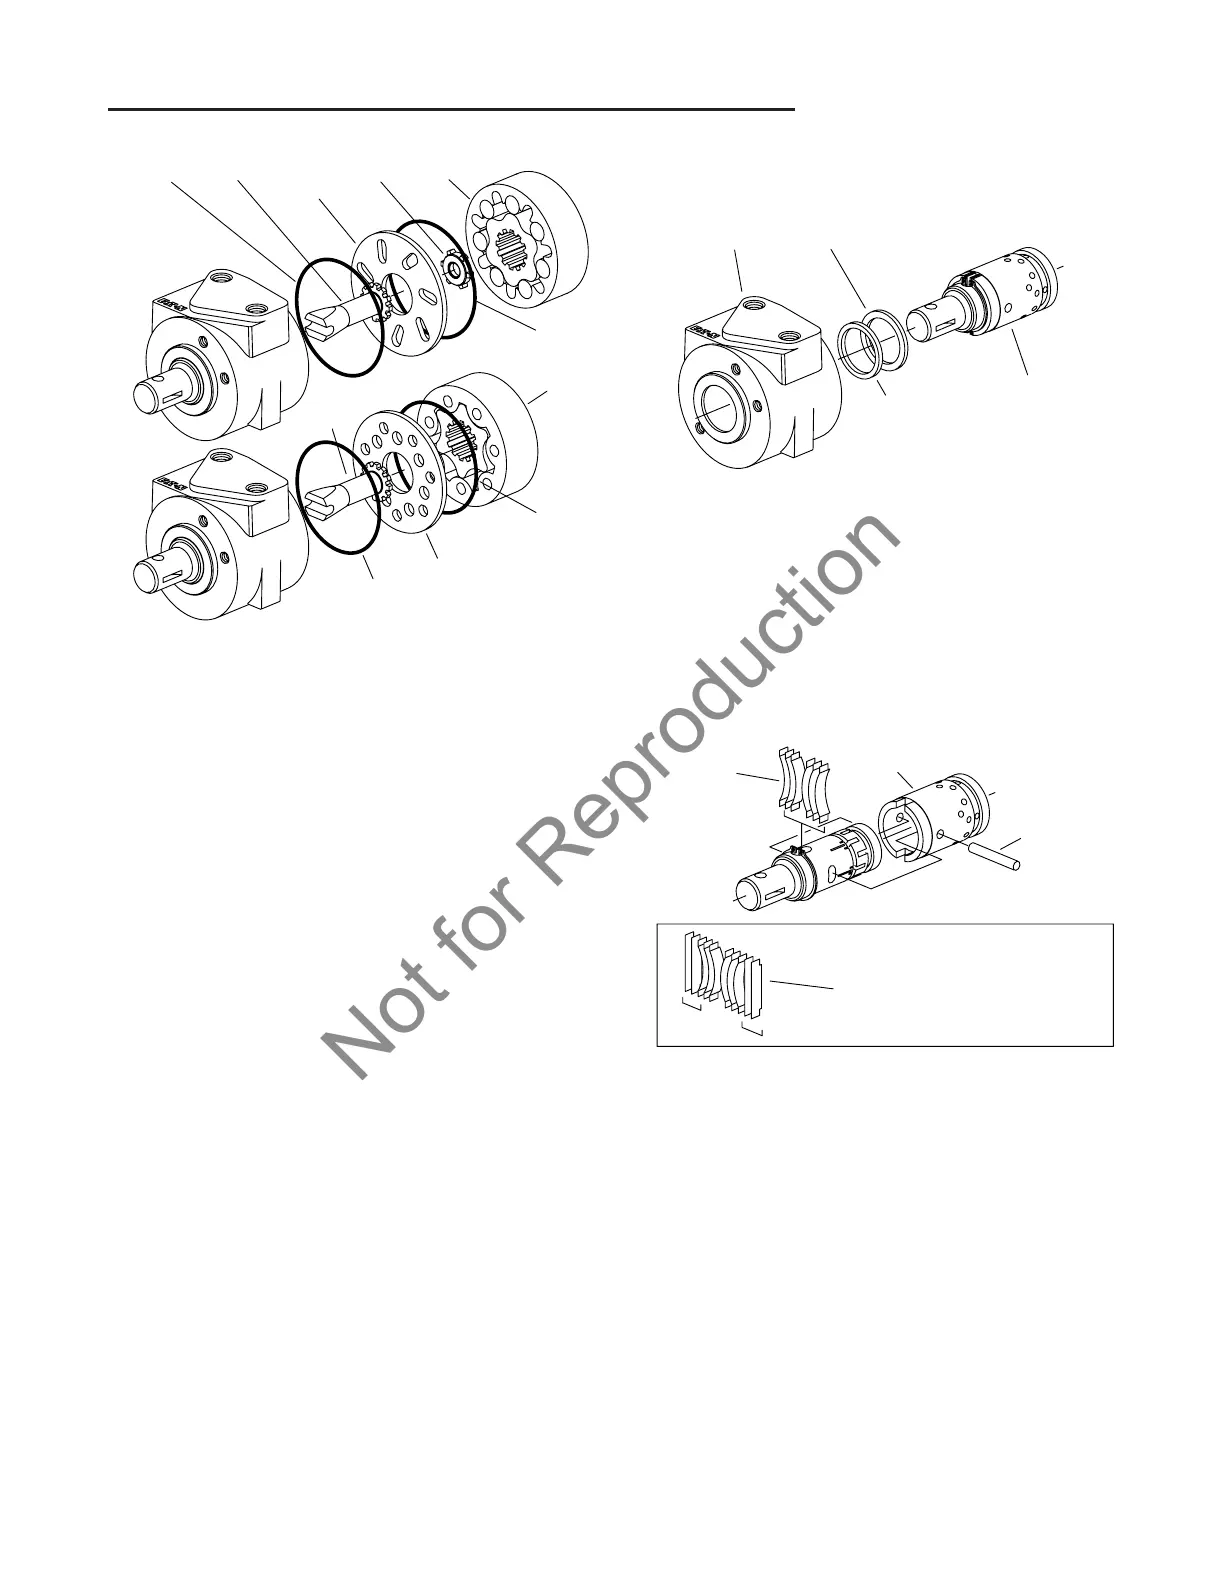
Tear-Down
NOTE: Remove the gerotor or Gerotor, try to keep all
parts together, Gerotor has 7 rolls to retain along with the
star (step 10).
10. Remove the gerotor or Gerotor.
11. Remove the spacer (217 Series will not have this
spacer).
12. Using a small screwdriver or similar tool, remove the
o-ring from the spacer plate.
13. Remove spacer plate from the valve housing.
14. Again using a small screwdriver or similar tool,
remove o-ring from the valve housing.
15. Remove the control end drive from the spool/sleeve
assembly in the valve housing.
OUT
IN
AUX
OUT
IN
AUX
Valve
Housing —
227 Series
Valve Housing — 217 Series
O-ring
Spacer Plate
O-ring
O-ring
Spacer
Plate
Geroler
Gerotor
O-ring Drive
Drive
Spacer
16. Re-position valve housing, shaft horizontal and
remove the spool/sleeve assembly.
17. Re-position valve housing shaft end up. Use a small
screwdriver or similar tool to remove shaft seal.
18. Remove the washer from spool/sleeve assembly.
OUT
IN
AUX
Sleeve
Spool
Centering Springs
Retaining Ring
and Cross Pin
Valve Housing Washer
Shaft Seal
(can be
Quad Seal
or Lip Seal)
19. To separate spool from the sleeve, the cross pin
must be removed. To remove the cross pin, use a
small screwdriver or similar tool and push pin from
the spool/sleeve.
20. With cross pin removed, push spool forward to disen-
gage the control spool and centering springs from the
sleeve.
NOTE: To prevent possible loss of the (six) centering
springs, cover the control spool and springs with a clean
shop towel when pushing springs from the spool. This
will help contain springs in one location (step 21).
21. Remove centering springs from the control spool
(and if applicable, four spring spacers). Retaining ring
on spool need not be removed if no damage is appar-
ent.
6 Springs and 4 Spacers
for Increased Input Torque
Spool (Special for Increased Input Torque)
6 Springs
(Standard)
Spool and Retaining Ring
Pin
Sleeve