9 Torque Generator Repair
Tear-Down
9 - 4
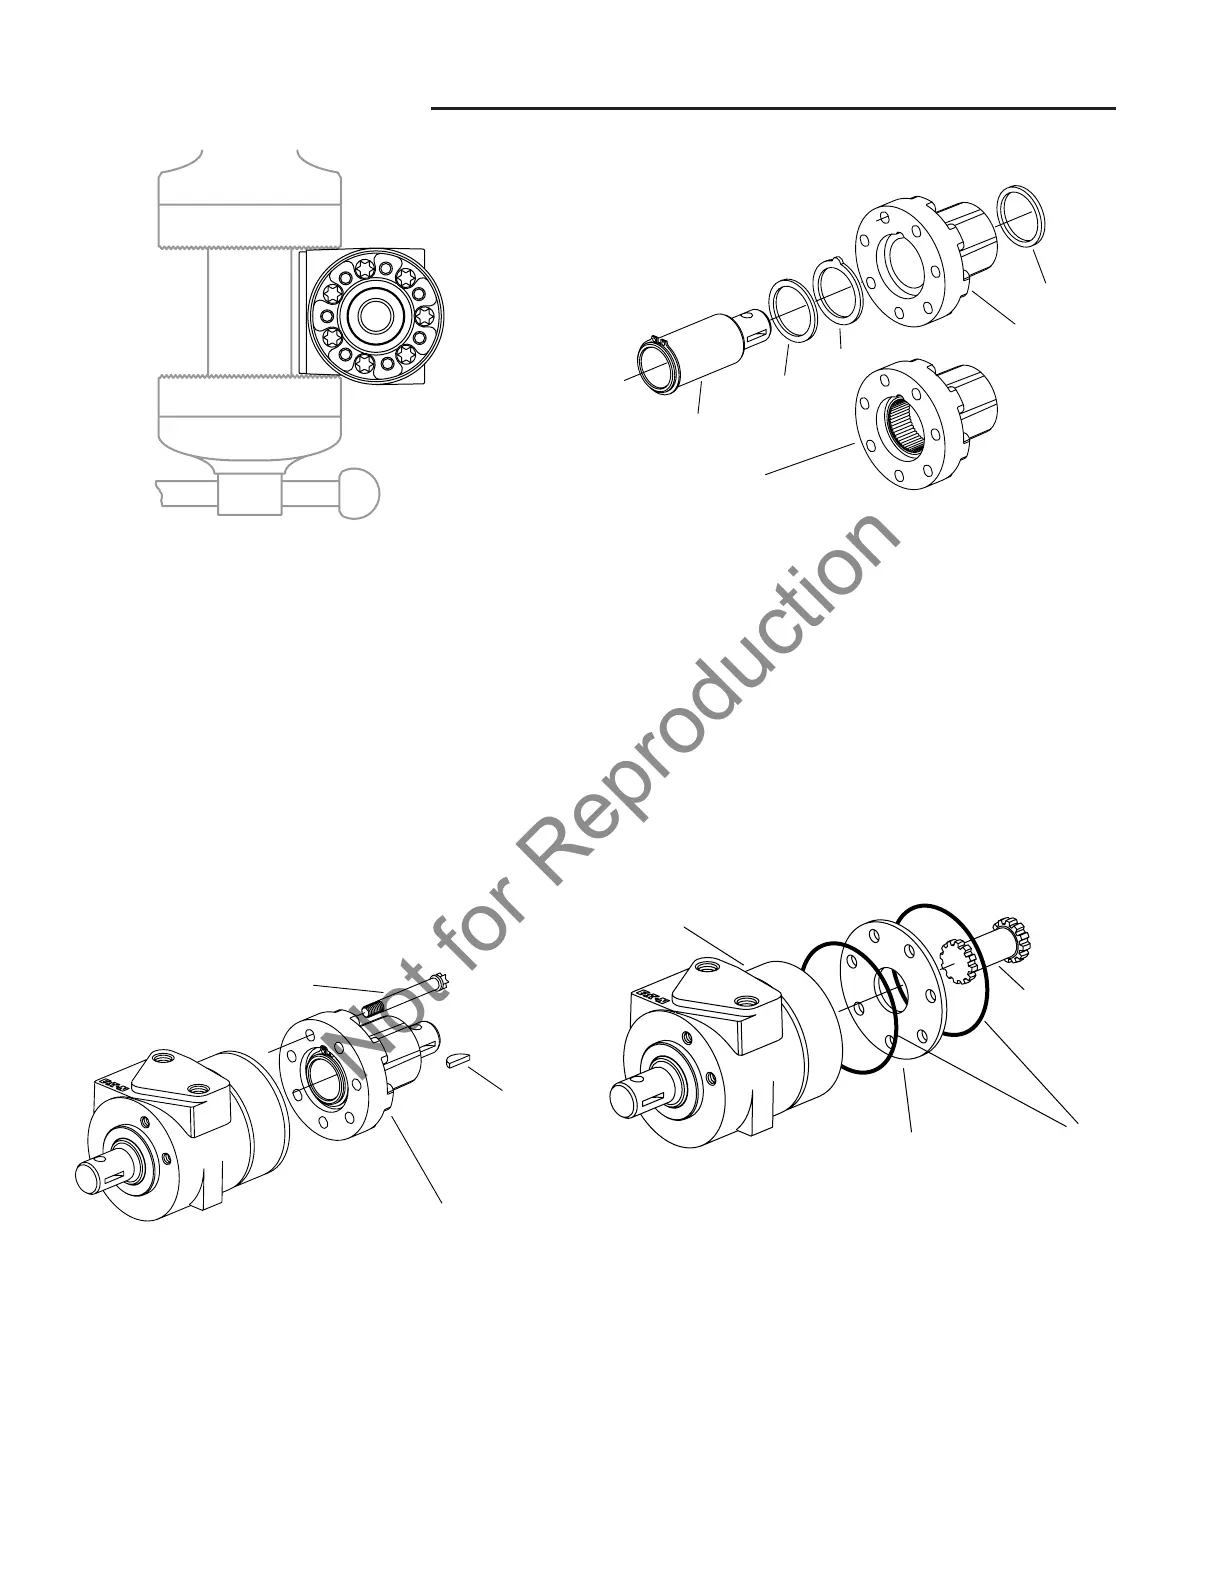
Output Shaft
(power end) Up
Vise Jaws
(top View)
OUT
IN
AUX
Key
Cap Screw
Housing and Shaft Assembly
TEAR-DOWN AND REASSEMBLY
Tear-Down
1 To disassemble the torque generator, first support
the unit in a vertical position with the seven cap
screws up and control end shaft down.
NOTE: When a bench vise is used to support the torque
generator, do not to use excessive clamping pressure on
the control housing. Excessive pressure can distort the
housing. When using a vise, CLAMP ACROSS PORT
FACE SIDES ONLY.
2. With the torque generator firmly supported, use a 6
point drive socket wrench and remove seven cap
screws (early production units used 12 point drive
screws).
3. Remove the housing (power end) and shaft assem-
bly.
4. Turn the housing and shaft assembly over and
remove the shaft with retaining ring in place.
NOTE: In most cases it is not necessary to remove the
retaining ring from the shaft.
Quad Seal
Housing (Standard)
Housing (bearings—needle type)
Washer
Washer
Shaft and Retaining Ring
(power end)
OUT
IN
AUX
Drive
(power end)
O-ringSpacer Plate
Gerotor or Geroler
5. Remove both washers from the housing (power end),
and re-position the housing with seal end up. Use
small screw- driver or similar tool to remove quad
seal from the housing. Housing with two bearing sets
(needle type) use the same output shaft, quad seal,
washers, and retaining ring as the standard housing,
however if bearings are to be replaced they are not
sold separately as replacement parts.
6. Use a small screwdriver or similar tool to remove o-
ring from the spacer plate.
7. Remove spacer plate from the gerotor or Gerotor.
8. Remove drive (power end) from the gerotor or
Gerotor.
9. Remove o-ring from the gerotor or Gerotor.