7 Electrical System Service
Wiring Diagram
7 - 8
TOPIC: REPLACING PLASTIC BODIED IGNITION SWITCHES
MODELS AFFECTED: Products Using Plastic Body Ignition Switches
MANUFACTURING,
INC.
Service Bulletin
99-7
Field reports indicate failures of plastic ignition switches. To correct these failures, replace plastic ignition switches
with a metal switch kit 1686734. Switch kit 1686734 is a direct replacement for most 5-pin, and 6-pin metal and plas-
tic bodied switches. NOTE: If equipped with 6-Pin, plastic bodied ignition switch 1718305 requires the tractor harness
to be rewired. See the following instructions for switch identification and rewiring instructions.
NOTE: Ignition key for kit 1686734 is P/N 1717163.
WARNING
Before beginning any service work turn off the
PTO, set the parking brake, turn off the ignition,
and disconnect the spark plug wire(s). Also
disconnect the negative battery cable.
S
L
M
B
G
A
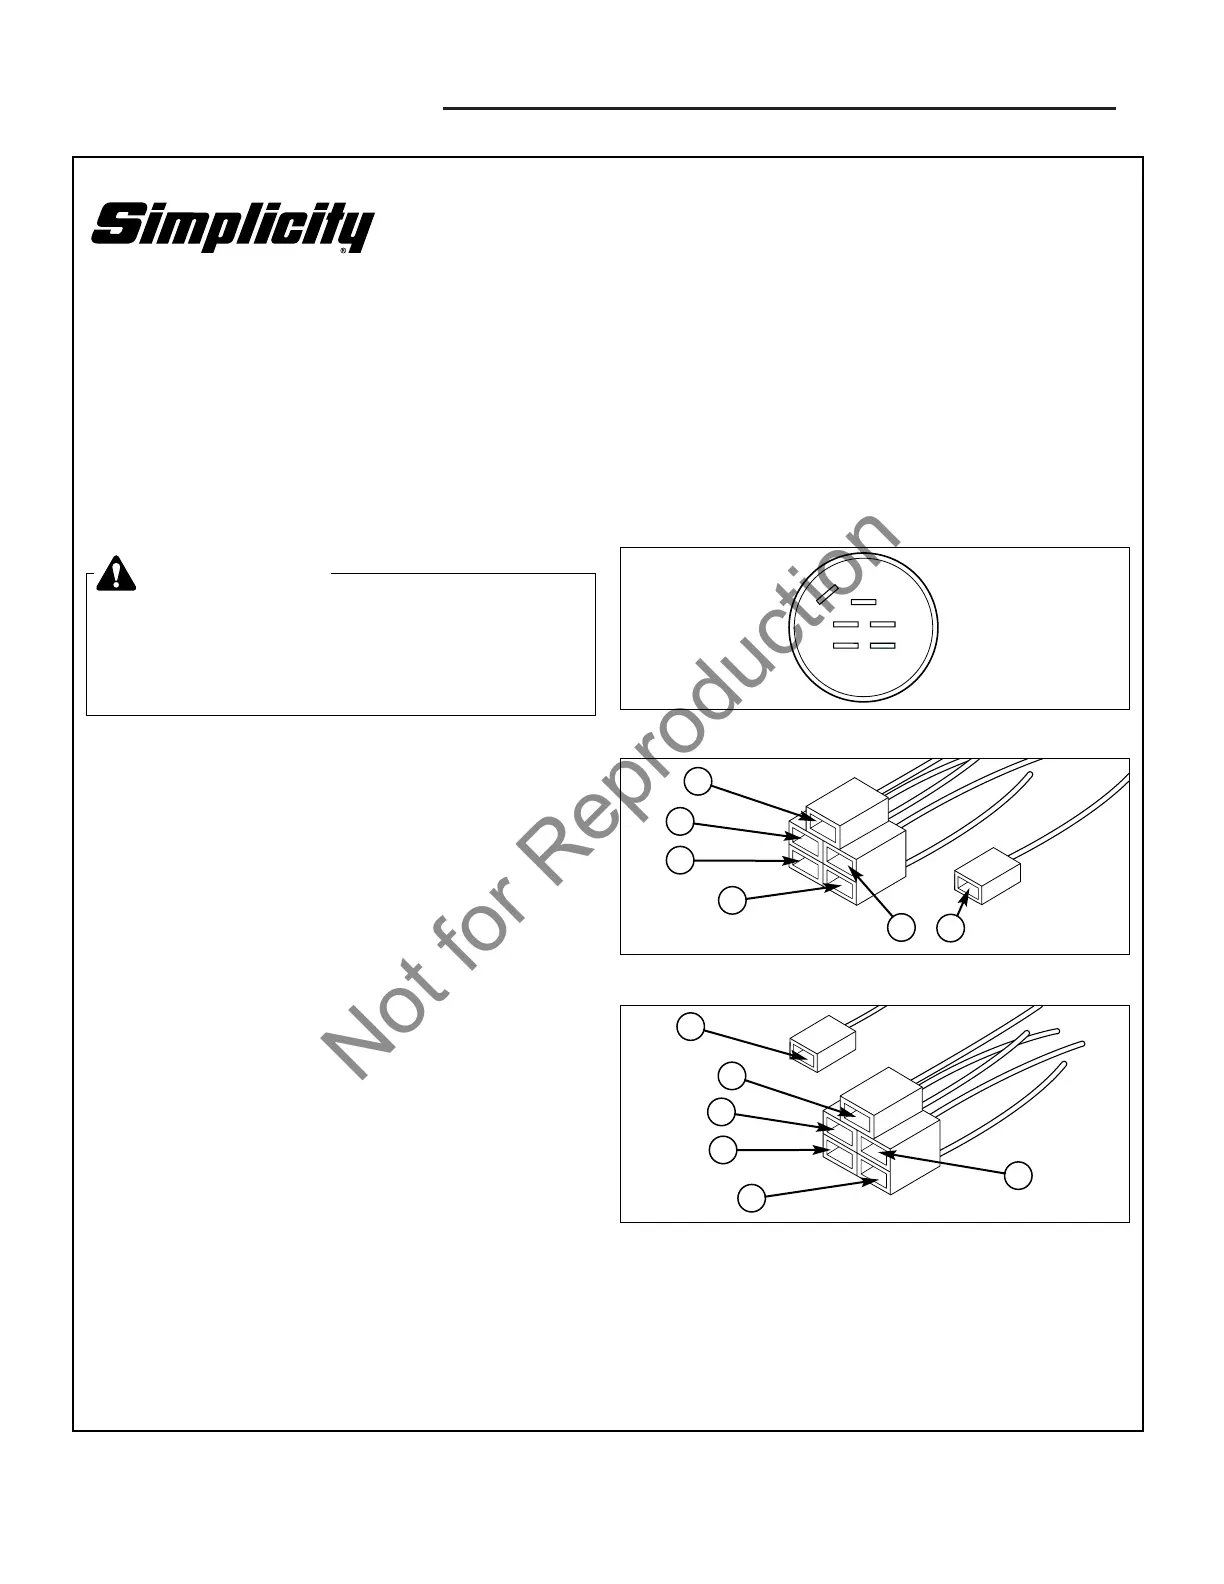
Figure 2. Label Wires & Remove from Harness
S
B
G
L
M
Figure 3. Reinstall Wires Into Harness Connector
A
NOTICE
NOTE: 5-Pin switches do not use the “A” terminal. In
those applications leave the boot on the “A” terminal.
Kit 1686734 is a direct replacement for several metal
ignition switches and requires no modification of the
tractor’s wire harness.
This kit is also a direct replacement for several plastic
ignition switches with the following exception:
If kit 1686734 is used to replace 6-pin plastic ignition
switch 1718305, the tractor ignition switch plug must be
rewired. Use the procedure below to identify your switch
and, if necessary, to rewire the tractor harness.
Identify 1718305 Switch
The 1718305 is a 6-pin, plastic bodied switch that can be
identified by the letters stamped into the switch body
next to the terminals. If the terminal labels of your
ignition switch match those in Figure 1, use the following
procedure to rewire the tractor wire harness.
Rewire Ignition Switch Plug
1. Remove the 5-pin main plug and single plug from the
back of the ignition switch.
2. Label the plug wires of the 5-pin plug as shown in
Figure 2.
3. Using a small screwdriver, remove the wires from the
plastic harness plug.