10.
By
aliding hinge pin with blower secured
toward front
01
rear,
as
required,
align
small
pulley
167032
on blower with Iorge blower
driving pulley
16
7022 on transmitter.
Place
tw
o collars
54
369
in
Position
1 and 2,
Fi
g. 54
firmly Oio
in
st
belt tightener brackets, os
shown
and securely tighten two set screws
465
in
each
of th
ose
collars.
11.
Assemble bolt
tens
ion brocket
167020
to
••·
tension
167239
with two screws 1
40548.
12.
P la
ce
blower drivi
ng
belt
167019
in belt
grooves of blower driving pulley
1670
22
and
blower pulley
167032.
13. Ins
ta
ll
te
nsion
brocket and
its
extension
on
blower,
as
shown
usin
g two
sc
r
ews
199.
14. The lower
saew
199
octo
as
o pivot; upper
screw 199 permits ad
ju
stment. Before lighten-
ing
these two screws
sw
in
g tension brockot
167020
un
til
its
b
ump
er
A is in line with
IOJgt
head
of
scf'ew 8 on tron$miHer. Tighten two
sc
rews
199.
15.
Loo
se
n two screws
140548
and
adjust
length
of
brock
et
assembly to obtain correct tension
of blower
dri
ving belt
167019.
Securely tighten
two
screws
140548.
16.
I
nstall
elbow
167244
and wosto·throad
col·
lector
167025,
as
shown.
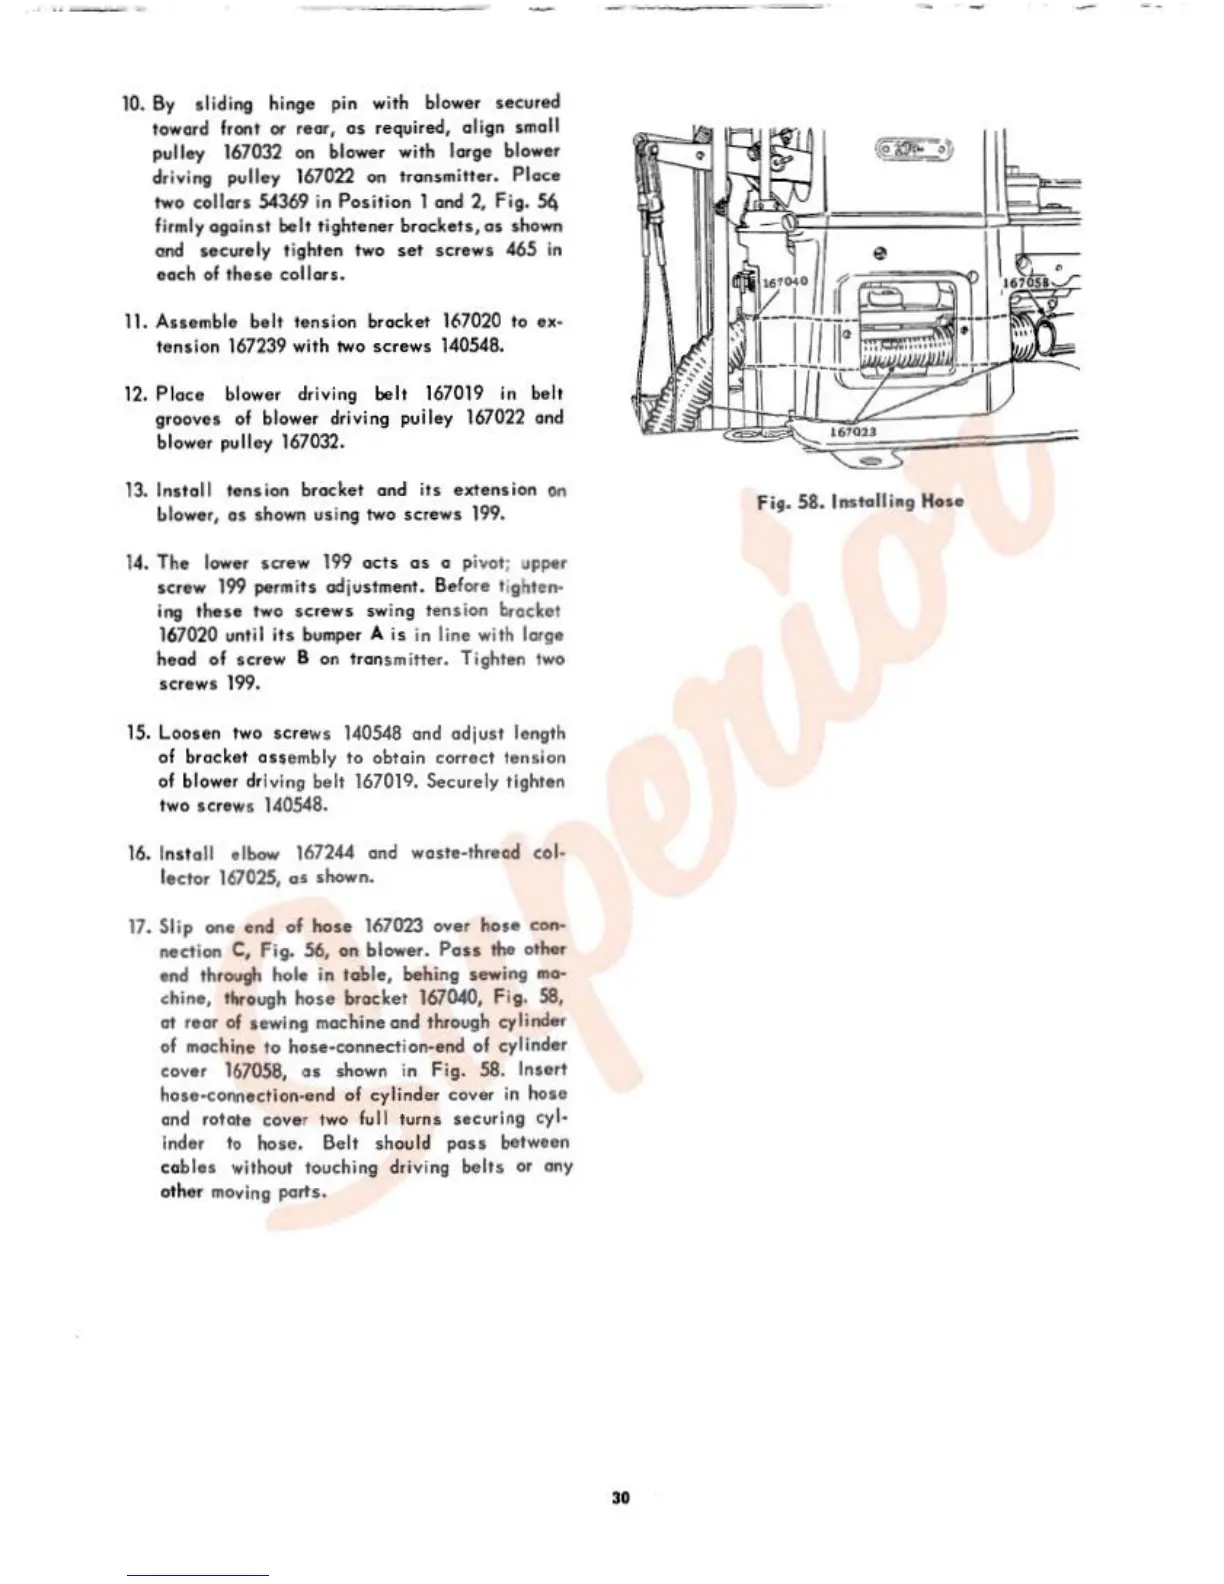
17.
Sl
ip
ont
end
of
hose
167023
over
host
con·
nection
C,
Fig. 56, on blower.
Pass
the
otho.
ond throuvh hole in table, behing sewing
ono-
chine, through
hose
brocket 167040, Fig. 58,
at
roar
of
sowing machine
and
through cylinder
of mochine
to
hose-connec;ti
on--end
of cylinder
covtr
167058,
as
shown in
Fig.
58. Insert
hose-c:omection·ond
of
c-y
linder cover in
hoso
and
rotate cover two full turns securing
cy
l•
inder
to
hose. Belt shou
ld
pass
between
cabl
es
without touching driving
belts
or
any
other moving ports.
fi9
.
58.
lnstalliog
Hose
30