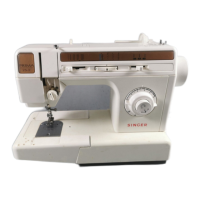
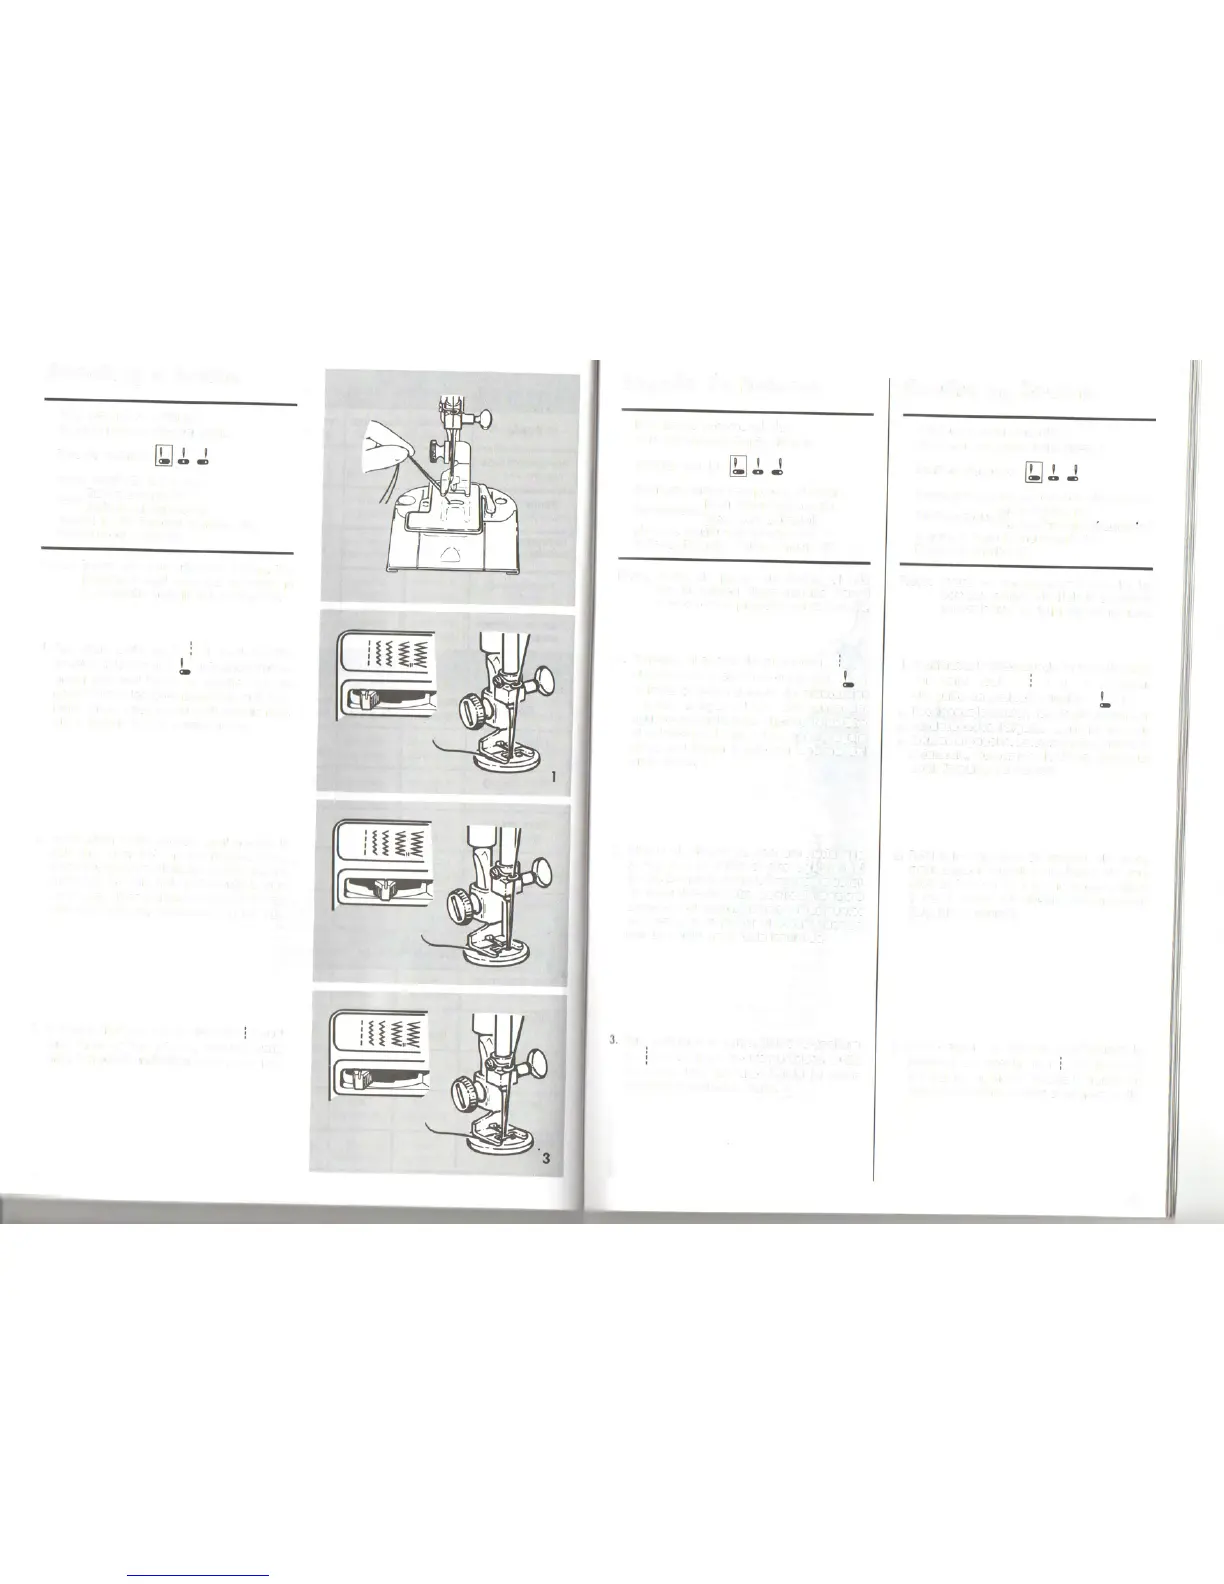
Attaching a button
Recommended settings
Stitch Selection: Zig-Zag Stitch
Needle Position:
Stitch Width: Tosuit Button
Foot.Button Sewing (H)
. (Additional Accessory)
Needle Plate: General Purpose (A)
Attach Feed Cover (F)
Note: Beforevou can attach a button, the
bobbin thread must be brought up
through the hole in the feed cover.
1. Set stitch width at ( ), and needle
position selector at ( '). Positionbutton
under foot and lower the needle into the
center of the left hole. Lowerthe foot. Turn
hand wheel toward vou until needle rises
out of button and is above the foot.
2. Move stitch width selector until needle is
over the other hole in the button. Then,
when vou begin to stitch,the needle should
enter into the right hole of the button. Take
sixor more zig-zagstitchesto attach button
and finish with the needle on the left side.
3. Tofastenstitching, adjust width to ( ) and
take three or four stitches. Remove work,
draw threadsto underside,fasten,and trim.
46
2
Pegado de botones
Posiciones recomendadas
Selecci6n punto: Punto zig-zag
Posicionaguja:
Anchura punto: Apropiada al boton
Prensatelas:Paracoser botones (H)
(Accesotioadlclonal)
Plancha aguja: Usogeneral (A)
Colocar Plancha Cubre Arrastre(F)
Nota: Antes de pegar un boton, el hilo
de la bobina debe sacarse por el
agujero de la plancha cubre arrastre.
1. Coloque el ancho dei punto en ( )
V
el selectorde posiciOnde aguja en ( ' ).
Colocar el boton debajo dei prensatelas
V
bajar la aguja dentro dei centro dei
agujero izquierdo.Bajarel prensatelas.Gire
el volante hacia Vd. hasta que la aguja
salga dei botOn
V
esté por encima dei
prensatelas.
2. Mueva el selector de anchura hasta que
la aguja esté sobre el otro agujero dei
boton. Entonces,cuando empiece a coser,
la aguja deberia entrar dentro dei agujero
derecho dei botOn. De seis
0
mas puntos
en zig-zag para pegar el botOn
V
ocabe
con la aguja en el lado izqulerdo.
Paraasegurar el punto, ajuste la anchura
a ( ),
V
de tres
0
cuatro puntadas. Quite
la labor, lIeve los hilos hacia la parte
posterior,anudelos
V
corte.
Coudre un bouton
Réglages recommandés
Sélecteur de point: point zig-zag
Positiond'aiguille:
Largeur de point: en fonction du bouton
Pied resseur:pied bouton (H)
p (Accessoirecomplementaire)
Plaque
à
aiguille universelle (A)
Plaque
à
repriser (F)
Note: Avant de commencer
à
Coudre les
boutons,remontezle fil de la canette
à
traversle trou de la plaque
à
repriser.
1. Positionnezle sélecteur de largeur de point
sur point droit ( ) et le sélecteur
d'aIguille en position gauche ( ).
Positionnezle bouton sousle pied presseur
et descendez l'aiguille dans le trou du
bouton
à
gauche. Baissezle pied presseur.
A la main, tournez le volant versvouspour
sortir l'aiguille du bouton.
2. Réglez le sélecteur de largeur de point
pour assurer l'aiguille au-dessus du trou
droit du bouton. Pourfixer le bouton, faites
5 ou 6 points de zig-zag en terminant
l'aiguille
à
gauche.
3. Pour arrêter la couture, positionnez le
sélecteur de largeur sur ( ) et piquez 3
à
4 points sur place. Retirezle travail en
tirant versl'arrière.Arrêtezet coupez lesfils.
47