Use and Operation
6-6
6.1.2 Imaging Function Area
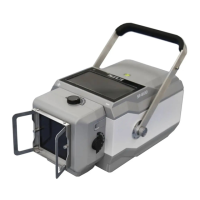
a) Toggle the rocker switch on the back cover of the portable X-ray machine to
"ON" and press
button, Power up the device and turn on it to have a
self-test. After the self-test the buzzer beeps 3 times, and the control panel is
displayed. If an error occurs during the self-test, the control panel is not
displayed.
b) After the system self-test passes, the system displays the remaining power
percentage of the device on the control panel. If the power is low, the system
will automatically shut down.
c) The distance between the portable X-ray machine and the imaging device can
be determined by a measuring ruler, press the button
, and the
collimator positioning light is on. Adjust the knobs on top and on the side of the
collimator. Adjust the light field on the X-ray detector so that the light field is
slightly larger than the part to be imaged, and ensure that the center cross of the
collimator and the center cross of the imaging device coincide.
d) Click the exam regional select area and body type, select the corresponding
APR exposure parameter combination.
e) Adjust the exposure parameters with
button.
f) Select the proper exposure parameter.
When using the exposure hand switch, press the hand switch Level 1. When
is displayed, the device enters Exposure Level 1 Ready state. After
displaying
Exposure Level 1 is ready, press Exposure Level 2.
OR when using the exposure remote control, press the "A" key, the remote control
indicator turns on and the X-ray machine makes a "Di" sound. Press the "
B" key
within 3 seconds, the remote control indicator turns on and the X-ray machine
makes a "Di" sound. Wait for
being displayed, which means
exposure level 1 is ready.