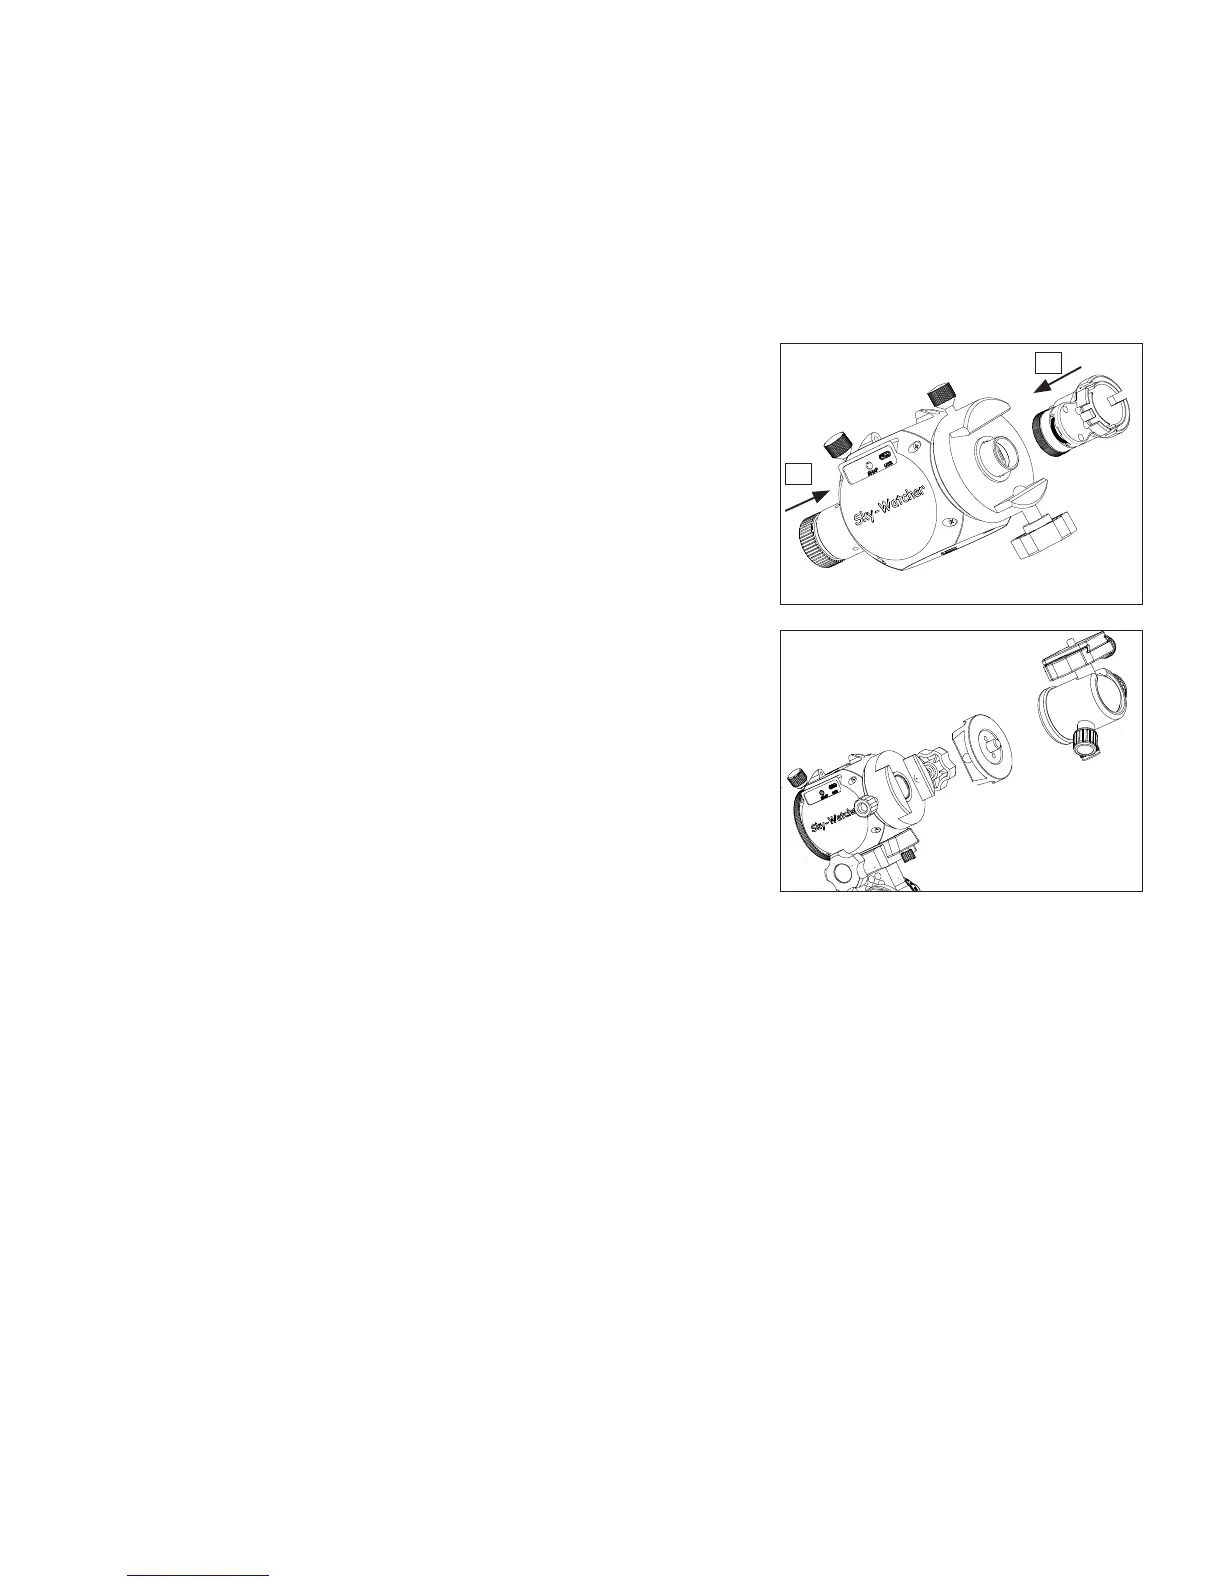
Seng Up the Polar Scope
Carefully remove the Rear Mounng Plate from the back of SAM and fully
insert your Polar Scope into the exposed hole. If you have set things up
correctly to this point, you should be looking directly north when looking
through the Polar Scope.
Aach the Polar Scope Illuminator to the other end. This will help make the
recule paern in the Polar Scope eyepiece more visible in dark condions.
Adjust the intensity of the illuminator by turning the dial. Make it bright
enough to see the recule paern, but not so bright as to wash out your view
of Polaris.
Rotate the Polar Scope so that the “0” label on the recule paern is at the
12 o’clock posion (i.e., at the top). When posioned correctly 3 will be seen
at the right, 6 and the boom and 9 to the le.
Using the Altude and Azimuth Adjustment Knobs on the wedge, adjust the
view in your Polar Scope unl you can see Polaris in the eld of view. It can be
anywhere in the eld of view at this point. You will adjust to its exact locaon
in a moment.
Using the Polar Clock Ulity to Fine-Tune Your Polar Alignment
Now tap on the Polar Clock Ulity in the Main Menu of the Star Adventurer
mini Console. Tap on Northern Hemisphere if it is not already selected.
The app shows you a drawing that matches the view in the Polar Scope. Note
the posion of the small black dot. It represents Polaris and shows where
Polaris should be located relave to the NCP at the me o your session.
Turn your Altude and Azimuth Adjustment Knobs unl Polaris as seen in the
view nder of your Polar Scope matches the posion of the black dot. You are
now precisely polar aligned with the NCP (represented by the intersecon at
the centre of your eld of view) and can increase the the focal length of your
lenses and/or exposure mes of your photos with condence.
Carefully remove the Polar Scope Illuminator and Polar Scope making sure
that you do not disturb the posion of the tripod. Now you can aach your
1
2
32
 Loading...