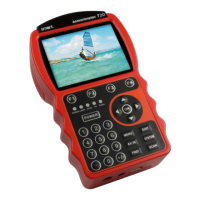
ports are
located underneath the black cover on the top of the
smartmeter T20. Remove the cover to access these
ports.
4.3 Switching on the Meter
1. Ensure that the battery switch on the underside of the meter is set to
an
ON
position.
2. Press the
POWER key to switch on the meter.
If the power supply is plugged in, the battery-switch will
be useless, meaning that the smartmeter T20 can con-
sistently be switched on regardless of the switch posi-
tion.
After first switching-on or after resetting, various windows will open:
4.3.1 Language
By default, the smartmeter T20
Menu Language
is preset to
Deutsch
[German].
1. Please ensure that the setting is correct; you may change your settings
by correspondingly pressing the keys ▲/▼.
2. Press
OK to confirm and to go to the next window
Time zone
.
4.3.2 Time zone
1. Select your time zone by using the keys ▲/▼. For example, the time
zone of Germany, Austria and Switzerland is
GMT +01:00
.
2. Press
OK to confirm and to go to the next window
Area Configuration
.
4.3.3 Area Configuration
1. Press the keys ▲/▼ to select the area, where you operate the
smartmeter T20.
2. Press
OK to confirm and to go to
Main Menu
.