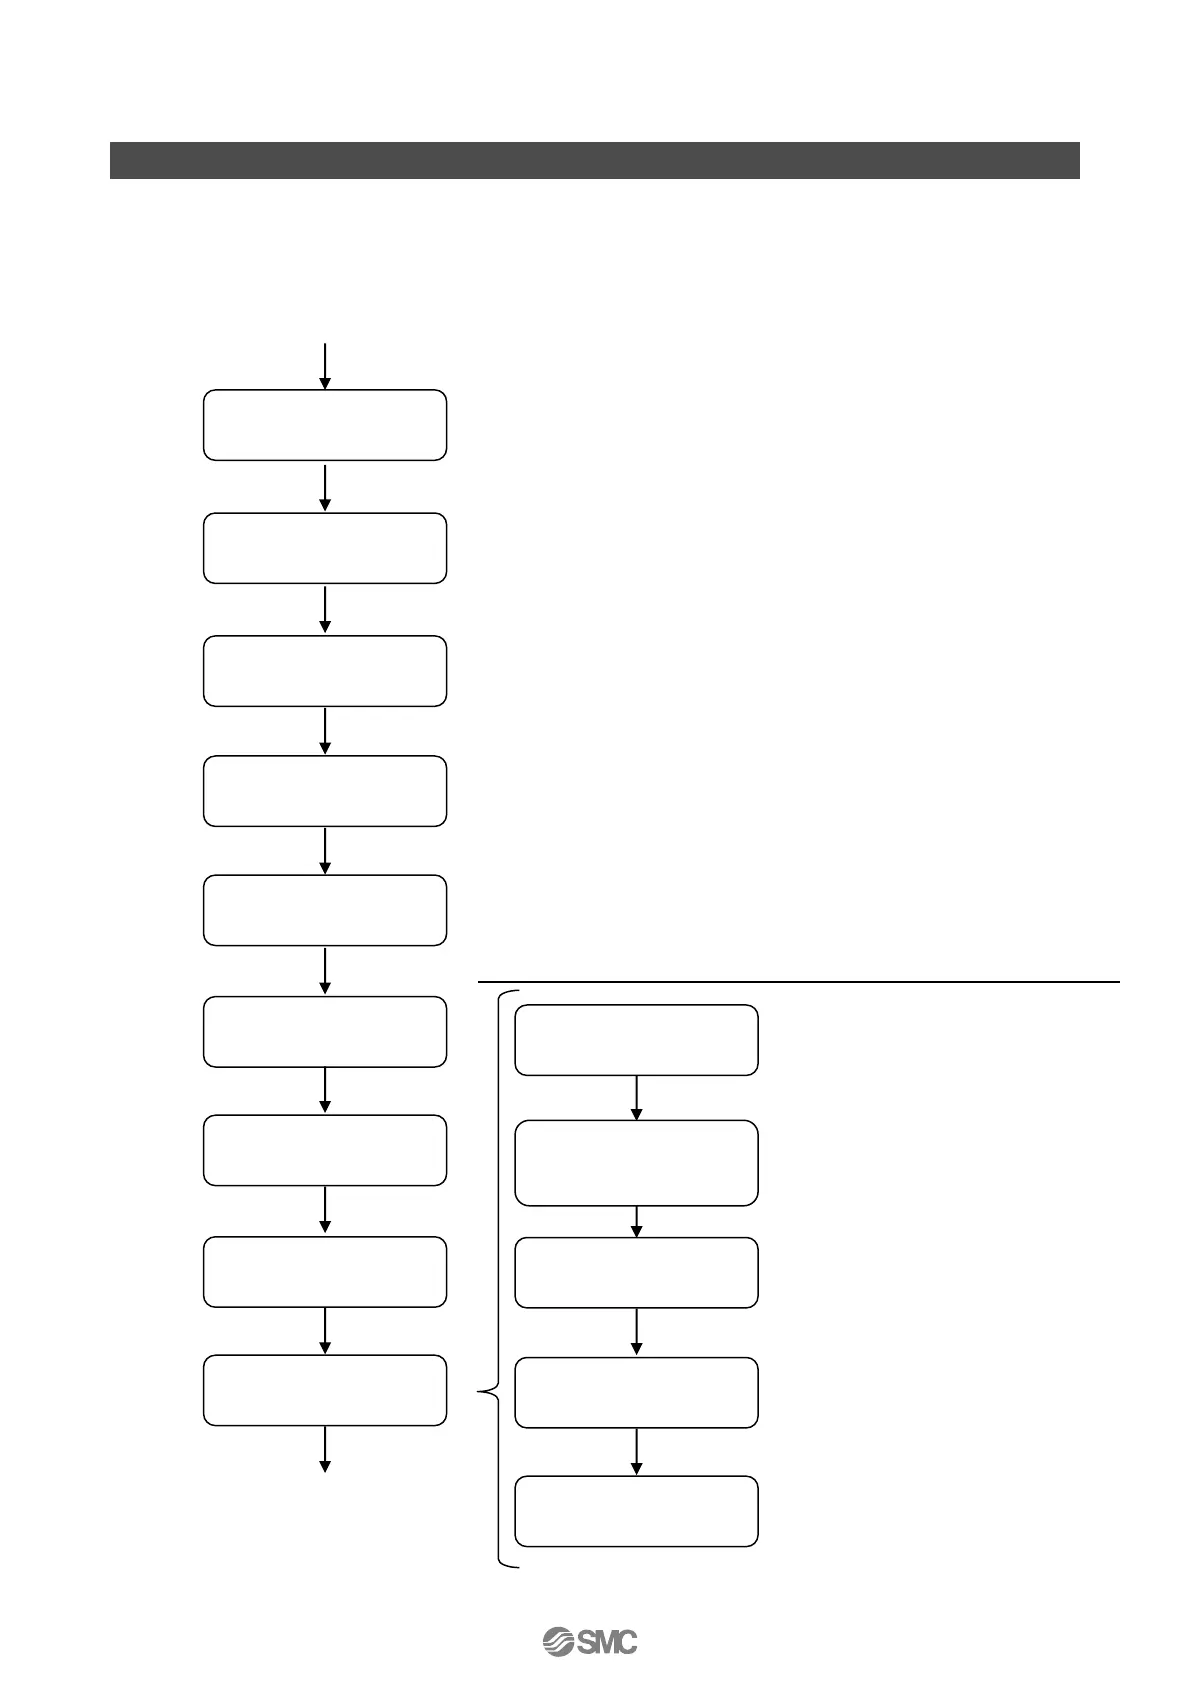
Workflow of IP8001 Positioner Setup
The workflow of IP8001 smart positioner from setup to initial adjustment is shown below. Follow this
flow when performing setups and adjustments of the positioner.
Check the specification and ensure the positioner is
suitable for the connected actuator and application.
1. Select calibration
mode
3. Simple balance
current adjustment
5. Calibration of input
current
With reference to “■Piping Layout”, select the
piping method suitable for the application.
Select the mode used for initial
adjustment.
Perform zero point/span adjustment
and PID constant settings suitable for
the connected actuator.
Perform calibration of the input
current as necessary. Normally, this
is not required.
With reference to “■Example of Mounting on
Actuator”, select the bracket suitable for the
application.
Adjust balance current simply.
Check each
part’s description
Check the contents on
the LCD display
<Perform initial adjustment in the following order along with this manual>
With reference to “■Connection of Feedback
Lever”, connect the feedback lever with the valve
stem of the actuator.
Connect the positioner to the actuator with the
feedback lever.
Check the angle of the feedback
lever as shown in “■Mounting”.
2. Check the angle of
the feedback lever
 Loading...