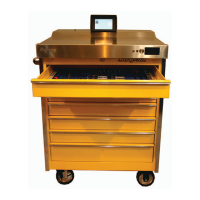
11
Networking
ADDING THE TOOLBOX TO A WIRED NETWORK
Both an external USB keyboard and a USB mouse
may be required when setting up the wired network
connections. There are 2 USB ports on the back of
the unit for this purpose. The wired network must be
active to complete the following procedure.
1. Connect the wired network to the ethernet port on
the back of the ATC unit.
2. Plug the power cord into a 100-240~ volt, 4-2A,
60-50 Hz.wall outlet.
3. From the back of the unit switch the power switch
to the on position.
4. After several seconds the ATC’s Home Menu will
appear.
5. If this is the initial ATC installation a Snap-on
service representative will enter the ATC service
code on the keyboard to gain access to the box.
If this is not the initial installation use a previously
congured user card and the card reader on the
front right of the ATC to log into the system. This
user card must have been given full administra-
tion privileges to this ATC unit.
6. Using your mouse pointer click on <Setup> but-
ton. If a mouse is not used a simple nger touch
will select any button when touched.
NOTE: THE SERIAL NUMBER IS AT THE BOT-
TOM OF THE OPTIONS SCREEN. MAKE
NOTE OF THIS SERIAL NUMBER AS IT
WILL BE USED WHEN CONNECTING THE
SYSTEM ADMINISTRATOR PC WITH THE
ATC TOOLBOX.
7. Select the “Systems” tab at the top of the page.
8. Select the <Network Settings> button.
9. Any specialized network conguration changes
required by the individual responsible for the ATC
local area network should be performed at this
time.
10. The Windows LAN connection menu will now
display that the unit is connected to the system.
Click on the “X” in the upper right corner to exit
this menu.