12
Operation Saving and Managing Screenshots
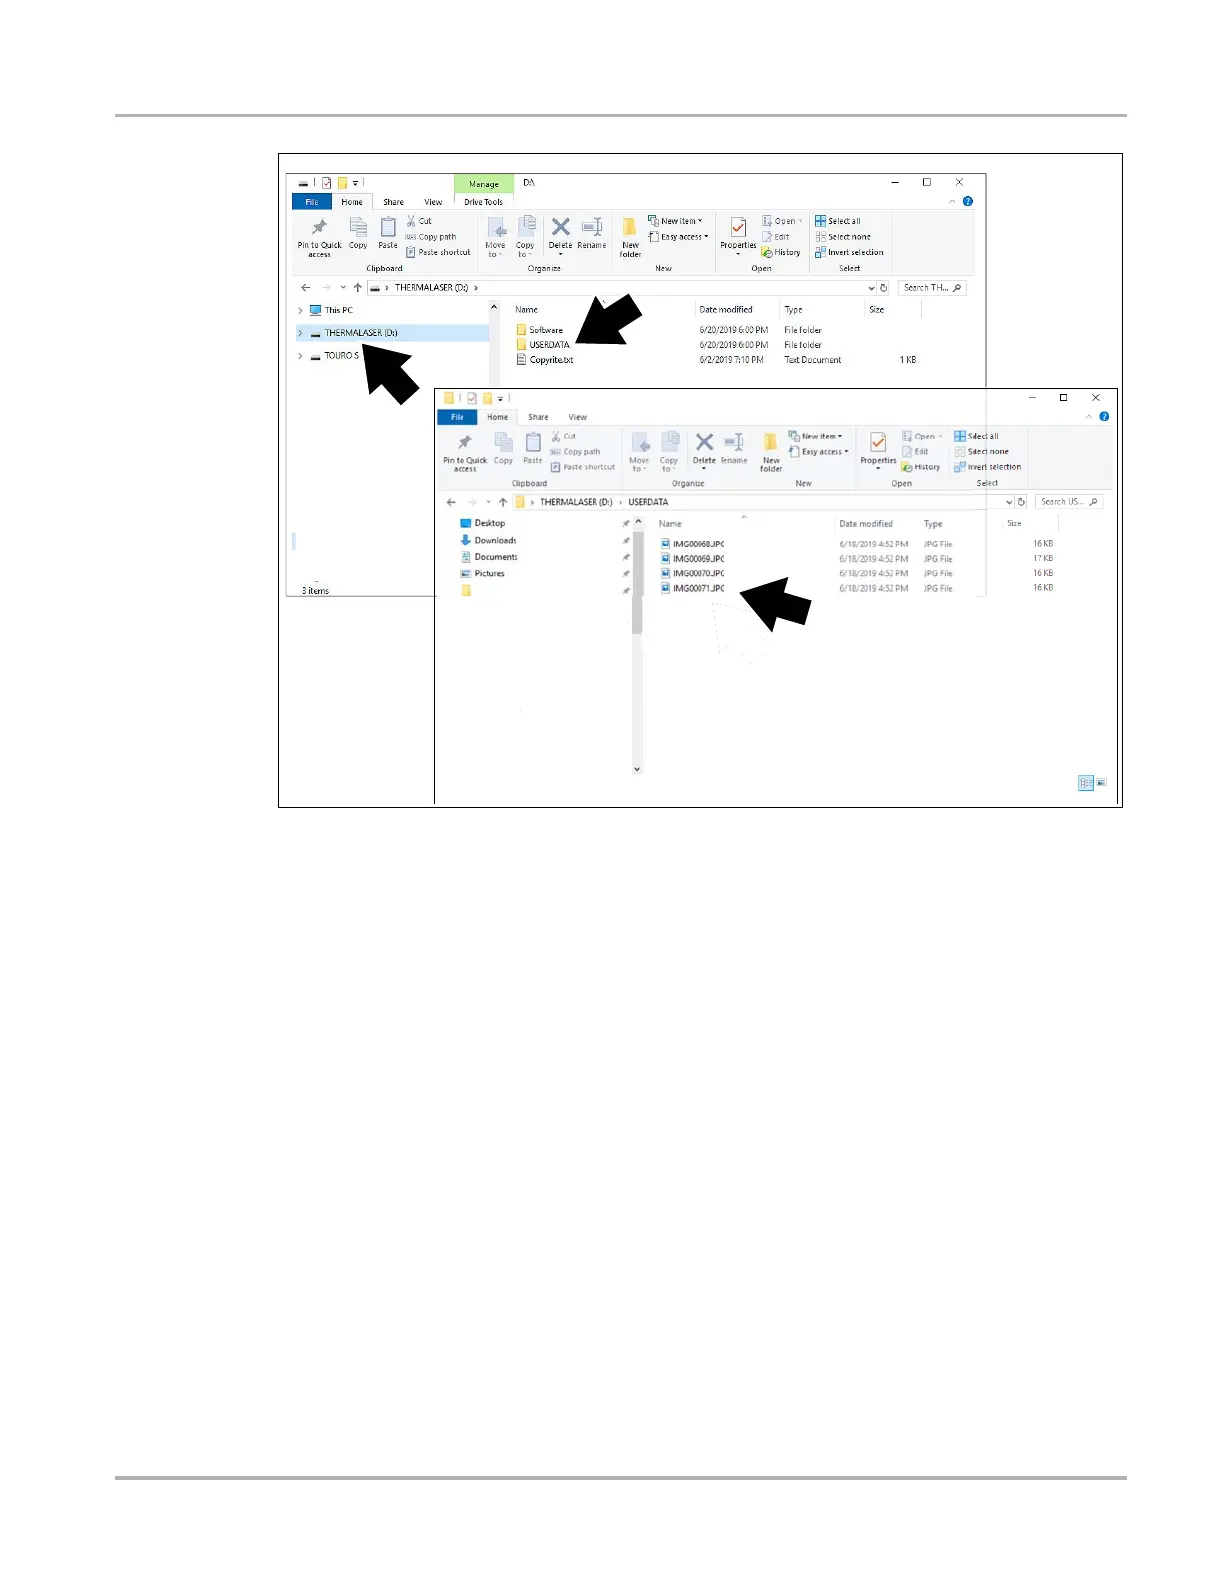
Figure 4-11
5. Using the standard Windows applications on your PC (e.g. Windows Explorer or Computer),
select your saved screenshots from the “USERDATA” folder (Figure 4-11).
6. Select the files to copy / move from the Thermal Laser to your PC.
7. When finished, (if required) perform any Windows procedures to “Safely Remove Hardware or
Eject Media” to stop communication with the Thermal Laser.
8. Disconnect the USB cable from the PC, and the Thermal Laser.
9. Close the protective cover.

 Loading...