EN – 7
DRAINING FUEL SYSTEM
1. Move unit to an open, well-ventilated area with no
flames or sparks.
2. Remove cap from fuel tank and siphon fuel into a
clean, clearly-marked gasoline container.
3. Reinstall fuel tank cap and tighten.
4. Start engine to burn remaining fuel in fuel system and
leave engine running until it “runs dry” and stops.
Refer to Operator’s Manual for engine start procedure.
5. Stop engine, remove key and close fuel valve.
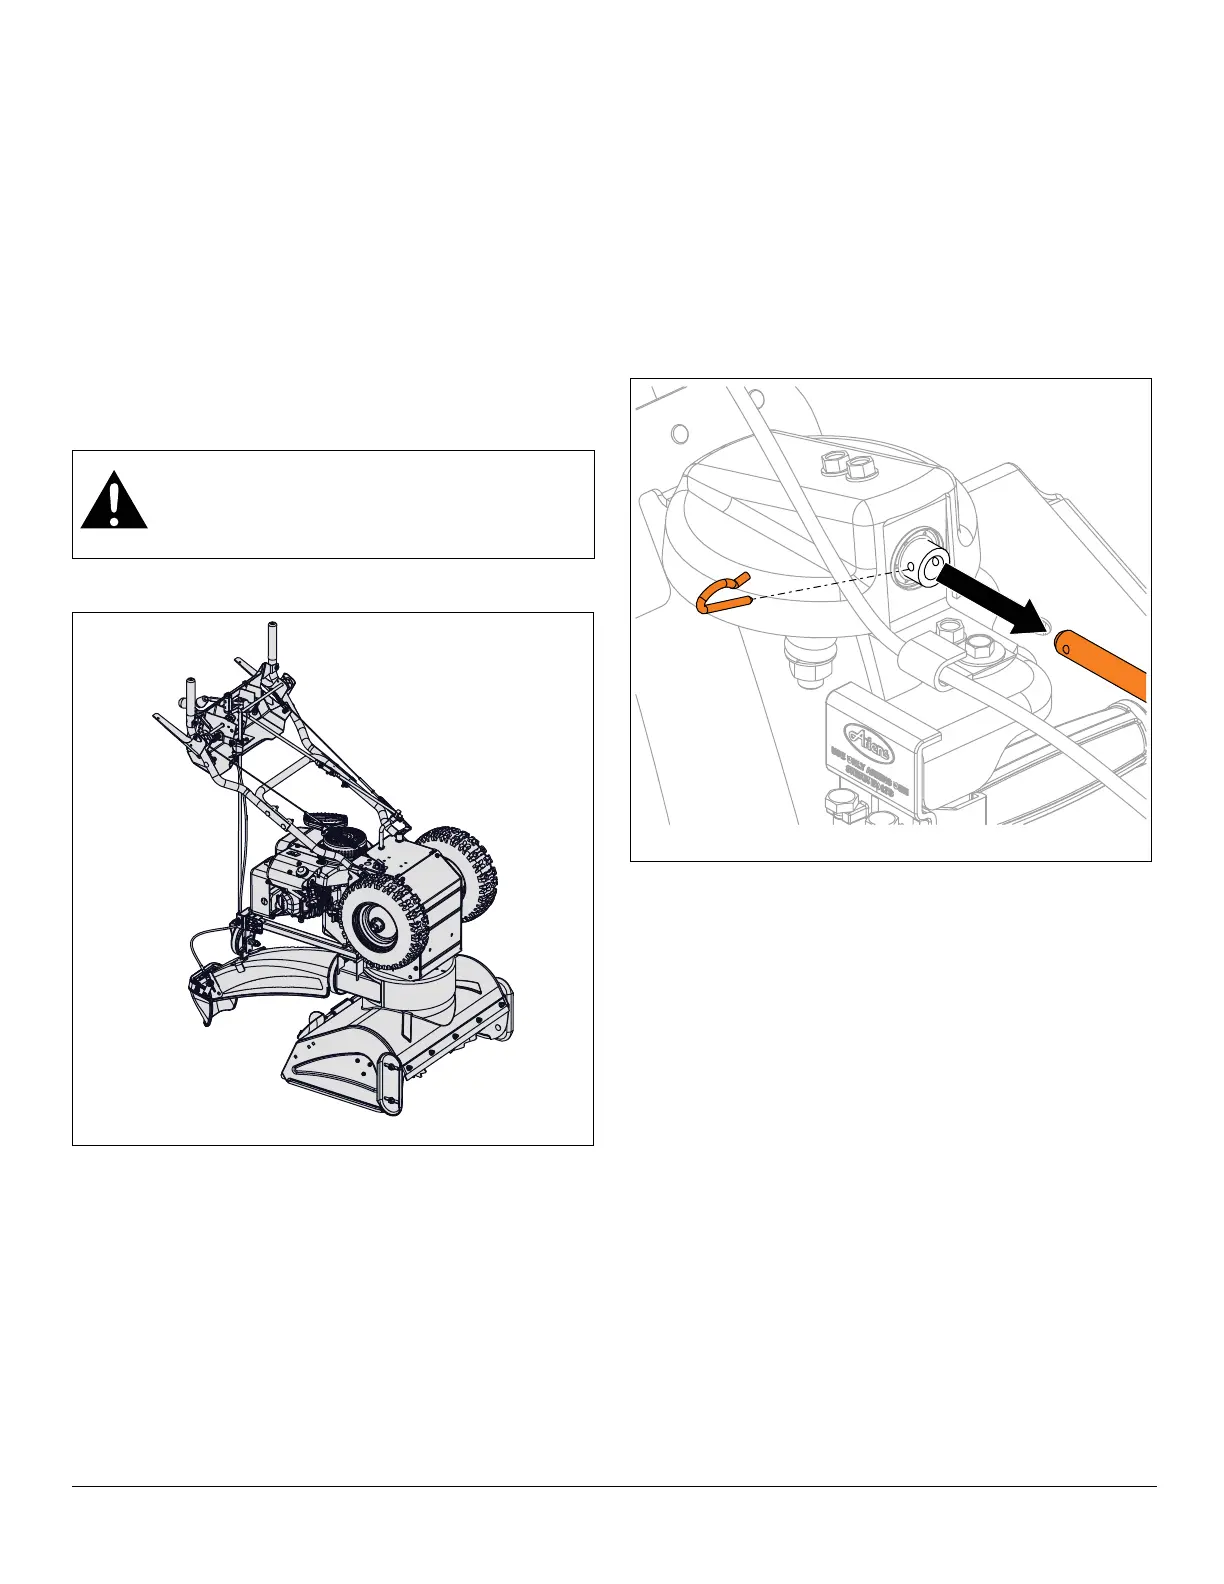
SERVICE POSITION
See Figure 2.
NOTICE: NEVER store unit in service position.
SEPARATE HOUSING FROM FRAME
Remove Auger Housing
IMPORTANT: Save all hardware for reinstallation.
1. Stop engine, remove key and wait for all moving parts
to stop and for hot parts to cool.
2. Disconnect spark plug wire from engine.
3. Remove cable hanger from chute rotation rod.
See Figure 3.
4. Remove spring clip from chute rotation rod and
remove rod from chute gear socket.
5. Models 920406, 920313, 920315: Advance to step 8.
Models 920402, 920314
See Figure 4.
6. Remove hairpin, sleeve bushing and cable eyelet from
deflector arm under dash panel.
IMPORTANT: Reinstall sleeve bushing and hairpin so parts
are not misplaced.
7. With a pliers, squeeze tabs on cable anchor and
remove from deflector bracket.
WARNING: AVOID INJURY. Before placing unit
in service position, drain fuel from tank and fuel
system. See Draining Fuel System on page 7.
Make sure unit is secure and will not tip.