Never attempt to lower lift into a horizontal position without the
use of a suitable lifting device as this can lead to bodily injury
or damage to the machine .
1. Remove the cylinder mounting plate fasteners and retaining ring.
2. Remove the tie rod nuts and count the number of turns required to bring the nut ush with the
tie rod end and record for reference during installation. The tension on the tie rods maintains the
left and right positioning of the cylinder within the mast assembly. Re-installing the nuts with the
proper tension will speed up adjustment later.
3. Remove the cylinder mounting plate. Be careful not to allow the tie rods to suck back into the
mast assembly. Replace the nuts on the tie rod ends temporarily to prevent this.
4. Remove the hydraulic line from the cylinder tting and cap the cylinder tting to prevent contami-
nants from entering the cylinder.
5. Remove sequence strap retainers on the top of the #3 and #2 masts.
6. Remove the front and rear mast access plates from the bottom of the #1 mast.
7. Remove the screws and washers, attaching the #2 and #3 bottom castings to the #2 and #3 mast
assemblies.
8. While keeping tension on the tie rods, slide the cylinder, the #2 and #3 bottom castings out of the
bottom of the UL lift far enough to expose both castings.
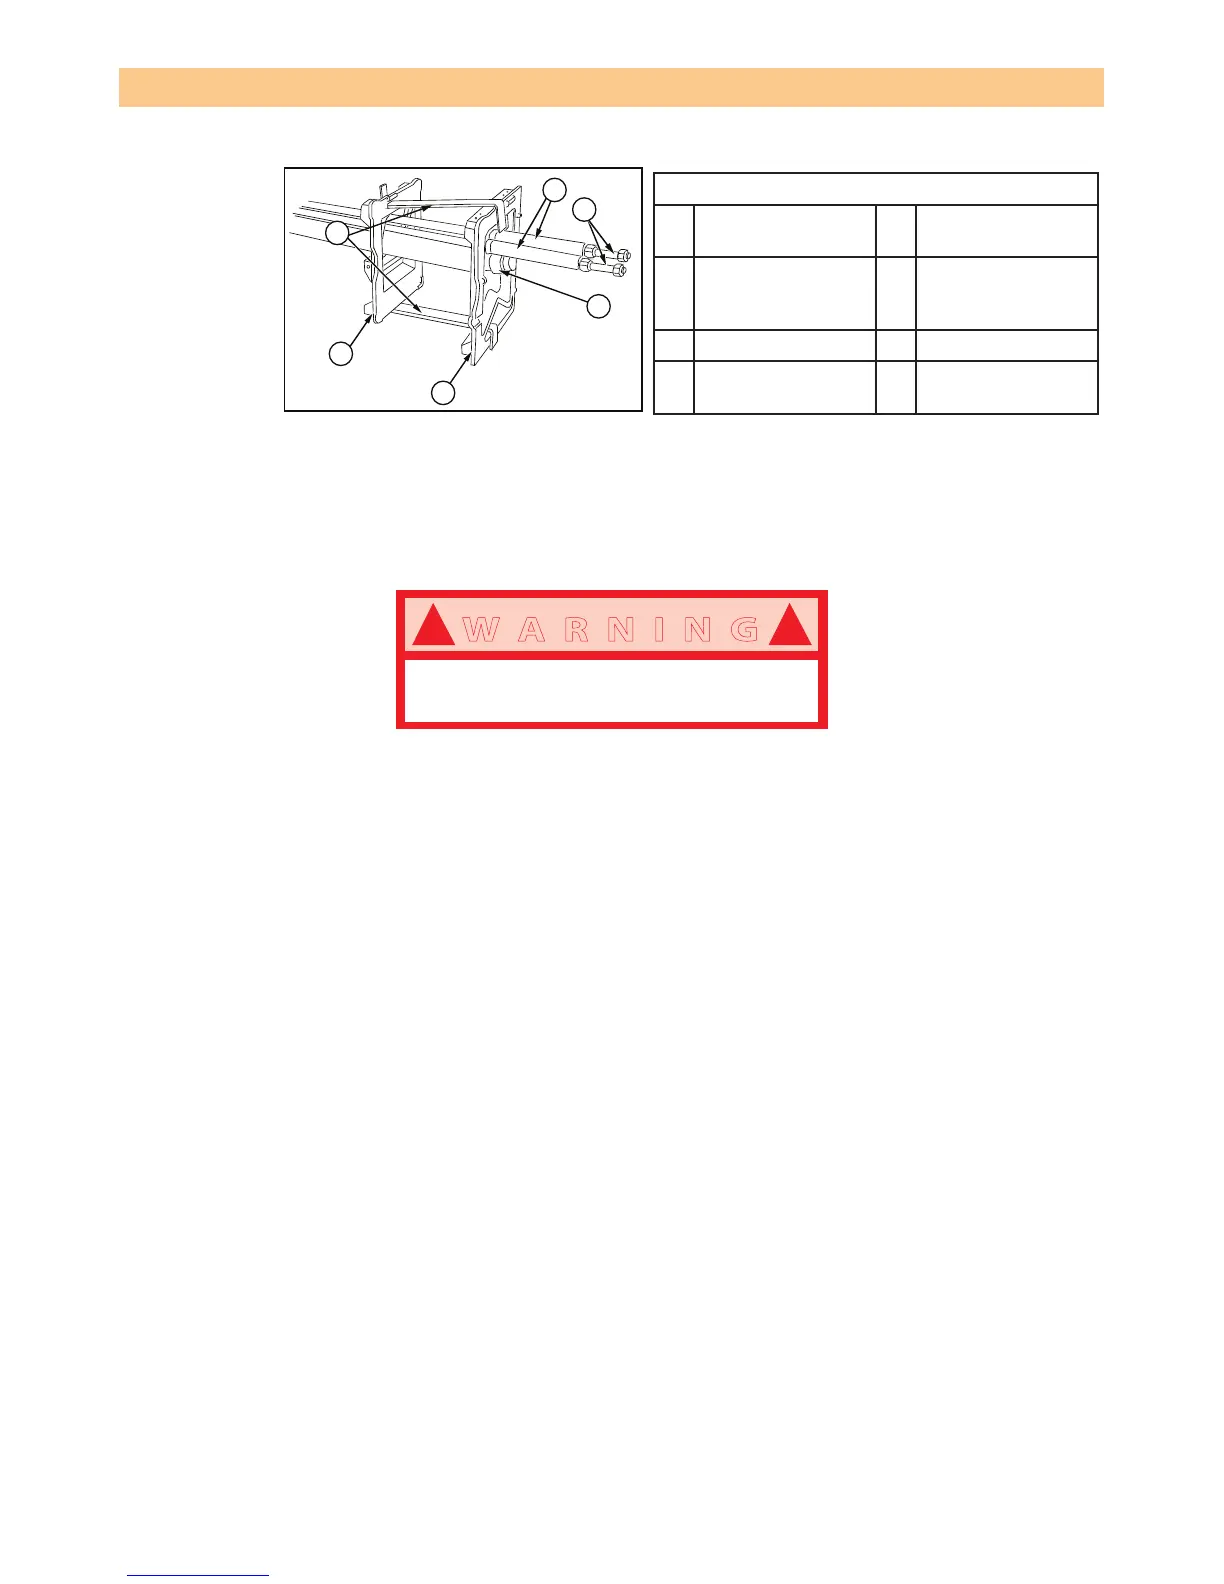
9. Install the cylinder tensioner brackets 062739-000 on #2 and #3 boom castings. Remove the tie
rod nuts and install the tie rod tensioners, 062738-000. Remove all slack from the chains with
the tie rod tensioners.
10. Remove the cylinder assembly from the mast assembly.
CYLINDER INSTALLATION
NOTE: The cylinder assembly must have tension brackets, a tension spacer and tie rod ten-
sioners installed to remove slack from the chain.
1. Slide the cylinder assembly into the mast assembly until #3 bottom casting is at the bottom of
the mast assembly.
2. Install the screws and washers attaching the #3 bottom casting to the #3 mast assembly.
3. Remove the cylinder tensioner brackets from the #2 and #3 bottom castings and tie rod tension-
ers from the tie rods. Install the tie rod nuts nger tight.
4. While maintaining tension on the tie rods to keep slack out of the chains, slide the cylinder as-
sembly completely into the mast assembly.
5. Install the screws and washers attaching the #2 bottom casting to the #2 mast assembly.
6. Install the front and rear mast cover plates on the bottom of the #1 mast.
7. Feed the #4 strap between the #3 and the #2 mast with a sh tape.
8. Slide the #4 strap through the #2 casting.
9. Feed the #3 strap between the #2 and the #1 mast with a sh tape.
SERVICE AND REPAIR
Figure 3-9: Cylinder Assembly Installation.
Cylinder Assembly Installation
1 Tension bracket
(062739-000)
5 Bottom casting,
Mast #3
2 Tie rod
tensioners
(062738-000)
6 Cylinder
3 Tie rods
4 Bottom casting,
Mast #2


 To Next Page