Ø
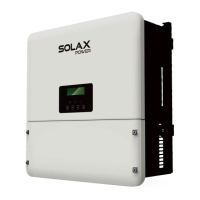
Step1. Check the status of indicators and LCD screen. The left indicator should
be blue and the indicator screen should display the main interface.
Note!
If the left indicator is not blue please check below the three points:
- All the connections are correct.
- All the external breakers are switched on.
- The DC switch on the inverter is in the “ON” position.
Step2. There is a setting guide on the LCD screen if it is the first time to start up,
pls follow it. For specific setting, please refer to section 8 (Setting).
Step3. Set WiFi according to wifi user manual.
Step4. Operate “Self Test”. (applies to Italy only)
Ø
Self-test in accordance with CEI 0-21(applies to Italy only)
The self-test is only required for inverters, which are commissioned in Italy. The
Italian standard requires that all inverters feeding into the utility grid are equipped
with a self-test function in accordance with CEI 0-21. During the self-test, the
inverter will consecutively check the protection reaction times and values for
overvoltage, undervoltage, overfrequency and underfrequency.
Selftest function is available at any time, and the test report will show on the LCD
display for end-user.
Electrical Connection
44
45
Check the inverter:
Ø
Shut down the inverter :
Step1. Press the “Enter” key for five seconds to enter Off Mode.
Step2. Turn off the AC switch, EPS switch and battery switch.
Step3. Wait 5 min before you open the upper lid.(if in need of repair)
7. Firmware Upgrading
User can upgrade inverter’s firmware via an U-disk.
Please ensure the inverter is steadily powered on.
Inverter must connect panels and keep the battery on through whole procedurePV
of upgrading.
Please prepare a and an make sure the size of U-disk is under 32PC G,and the format
is fat 16 or fat 32.
Ø
Preparation
Warning!
Make sure the PV input power is more than 150V (operate the upgrade
on a sunny day), otherwise it may result in serious failing during upgrading.
Step1. Please contact our service support to get the update les, and extract it
into your U-disk as follow:
“update\ARM\618.00050.00_Hybrid_X1G3_Manager_VX.XX_XX-XX.usb”;
“update\DSP\618.00084.00_Hybrid_X1G3_Master_VX.XX_XXXXXXXX”;
(Vx.xx is version number, xxxxxxxx is le complation date)
Ø
Upgrading Steps:
Warning!
Make sure the directory is in accordance with above form strictly!
Do not modify the program file name, or it may cause the inverter
not work anymore!
Step2. Press the “Enter” key for 5 seconds to enter Off Mode. Then unscrew the
waterproof lid and insert U-disk into the “upgrade” port at the bottom of the inverter.
Step3. The LCD will be shown as picture 3-1. Then press up and down to select the
one that you want to upgrade and press “OK” to confirm to upgrade.
Step4. After the upgrade is finished, the LCD will display “succeed”(only for DSP
upgrades), please remember to pull off the U-disk, screw the waterproof lid and press
the “Esc” to return to the Main interface. Then press the “Enter” key to exit Off Mode.
Firmware Upgrading

 Loading...