6.1 PV connection
Electrical Connection
6. Electrical Connection
X1-Hybrid can be connected in series with 2-strings PV modules for 3.0KW,
3.7KW, 4.6KW and 5K W.
Select PV modules with excellent function and reliable quality. Open-circuit
voltage of module arrays connected in series should be <Max. DC input voltage;
operating voltage should be conformed to MPPT voltage range.The
configuration current should be under the maximum dc input current.
Max.DC Voltage Limitation
X1-Hybrid-3.0-D
Model
X1-Hybrid-3.0-N
X1-Hybrid-3.7-D
X1-Hybrid-3.7-N
X1-Hybrid-4.6-D
X1-Hybrid-4.6-N
X1-Hybrid-5.0-D
X1-Hybrid-5.0-N
Max. DC Voltage (V)
MPPT Voltage Range(V)
600
125-550
PV module voltage is very high, which already achieve dangerous
voltage range, please comply with electric safety rules when connecting.
Please do not make PV positive or negative ground!
Warning!
Note!
Please choose a fitting external DC switch if the model (X1-Hyrbid-3.0-
N, X1-Hyrbid-3.7-N, X1-Hyrbid-4.6-N, X1-Hyrbid-5.0-N) is purchased.
The following requirements of PV modules need to be applied for each
input area;
- Same type - Same quantity - Identical alignment - Identical tilt
Please do not make PV positive or negative ground!
In order to save cable and reduce the DC loss, we suggest to install the
inverter near PV modules.
Note!
PV connection mode below is NOT allowed!
Inverter
PV array
PV1
PV2
+
-
+
-
+
-
+
-
+
-
x
√
22
23
Electrical Connection
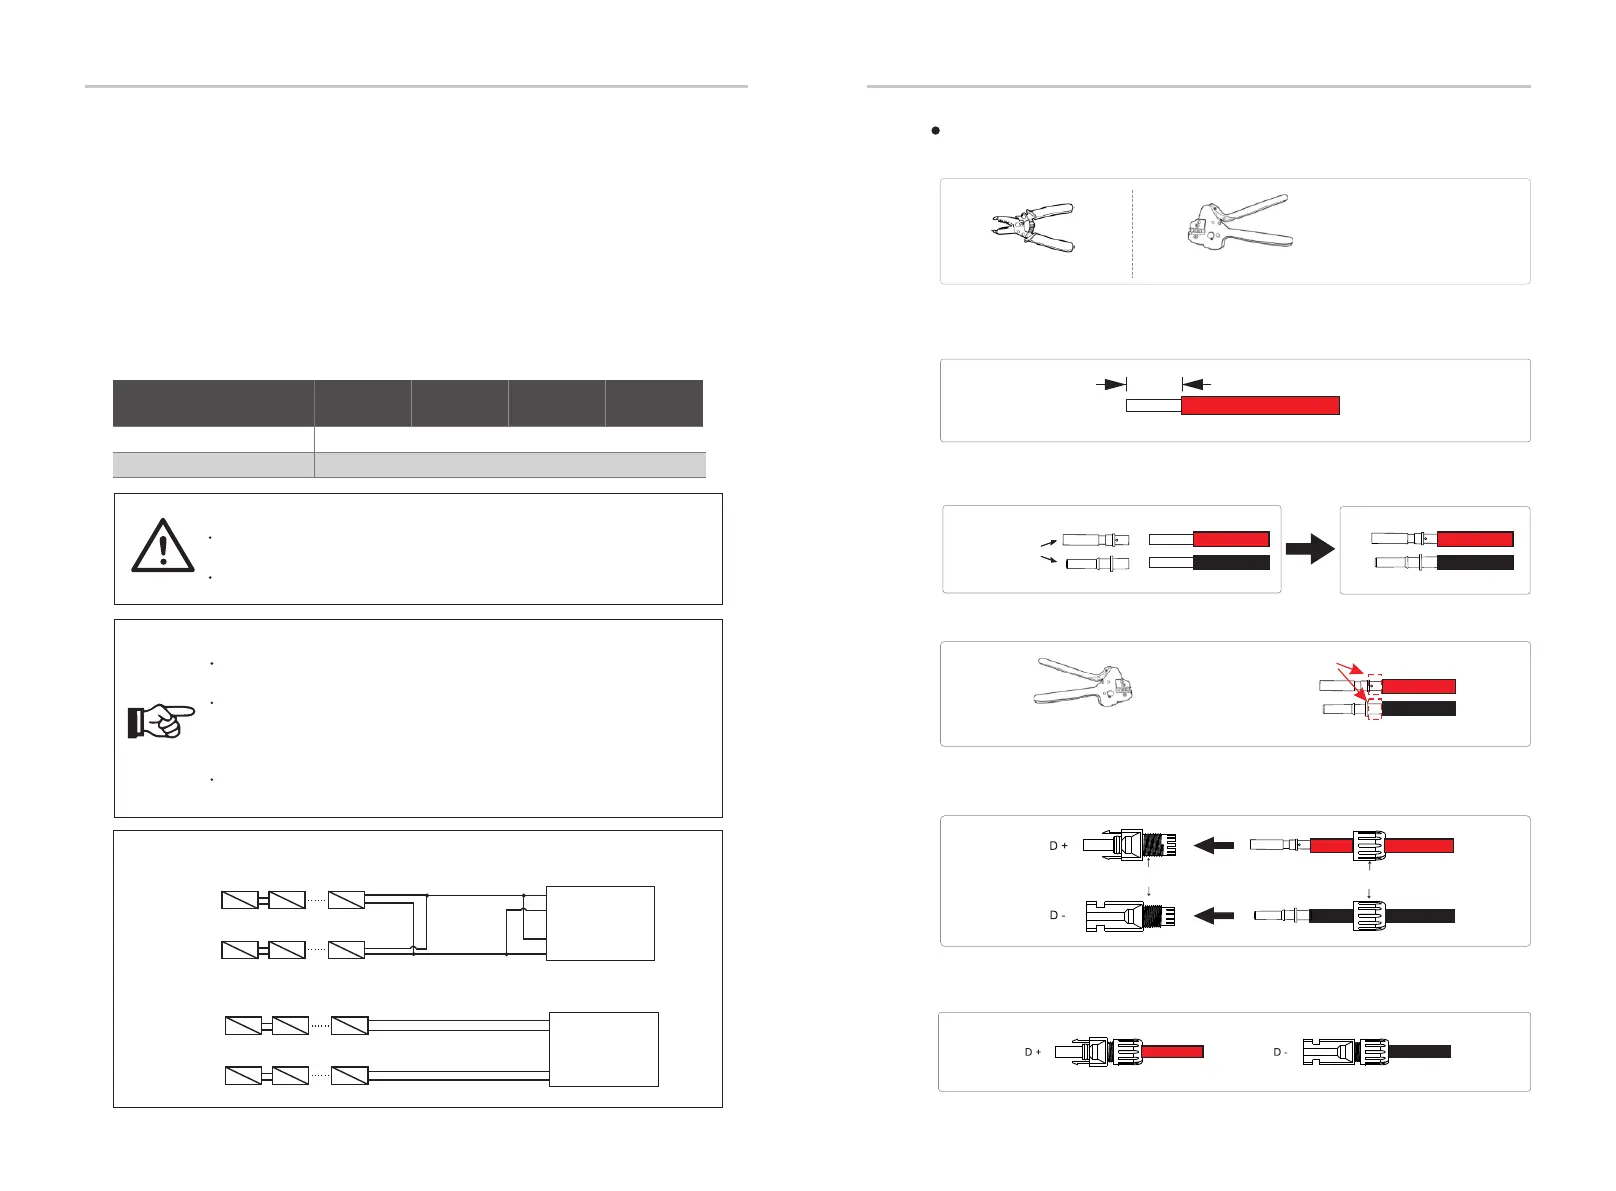
Below tools are needed before connection.
Strpping pliers
Wire crimper
Wire crimper recommended
model :H4TC0001
manufacturer:Amphenol
7.0 mm
12AWG
trip length
d) Crimp pin contact by using the wire crimper.
c) Insert striped wire into pin contact and ensure all conductor strand are captured
in the pin contact.
f ) Insert the wire into plug forcibly, when a "click” is heard or felt the pin contact
assembly is seated correctly. Then tighten the cable nut.
pin contact
Crimp these parts
e) Separate the DC connector as two parts: the plug and the cable nut.
Then insert the wire with pin contact through the cable nut.
Wire crimper
plug
cable nut
a) Turn off the DC switch, then Choose 12 AWG wire to connect the PV module.
b) Trip 7mm of insulation from the wire end by using the strpping pliers.
( recommended model: H4TC0001, manufacturer: Amphenol)
Connection Steps
Inverter
PV array
PV1
PV2
+
-
+
-
+
-
+
-
+
PV connection mode below is allowed!
 Loading...


