4. Installation4. Installation
Assemble the grommet onto the connector body firstly
Figure 4.22
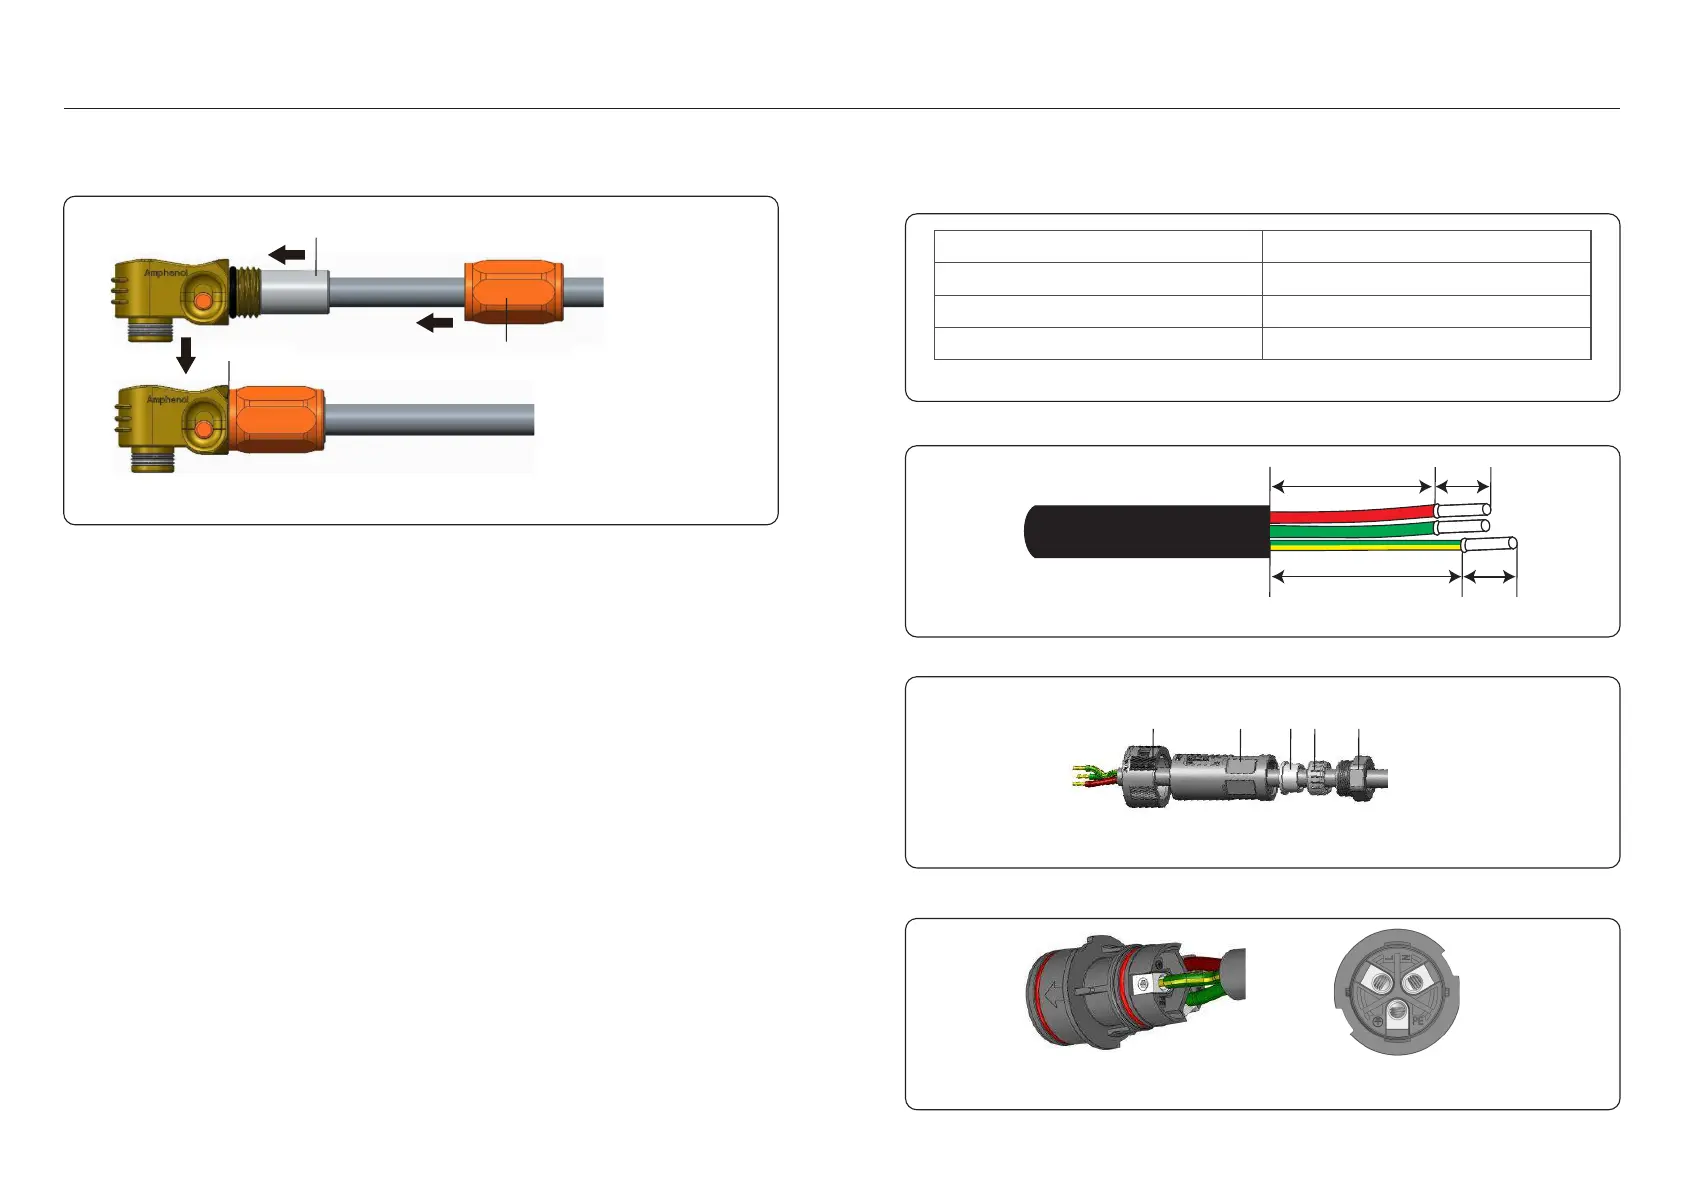
1. .Disassemble the AC connector. Strip the AC wires about 9mm
3. Crimp wires screw twisting torque 0.8+/-0.1N·m.
2. Set the parts on the cable.
Describe
Cable diameter
10~14mm
6~8mm²
9mm
Traverse cross sectional area
Exposure Length
Numerical value
There are two AC terminals and the assembly steps for both are the same.
TakeouttheACconnectorpartsfromthepackaging.
4.6 AC Cable Installation
A
Figure 4.23
Figure 4.24
Figure 4.25
Table 4.2
Step 5: Install grommet and back shel.
.20..19.
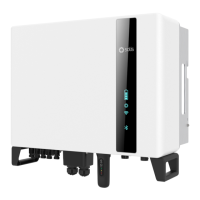
Then assemble back shell onto the connector body and tightenNo gap
22mm
27mm 9mm
9mm
A: Locker
B: Body
C: Seal body
D: Claw
E: Nut
B C D E

 Loading...