Section 3 A-Scan Operation and Clinical Use
Section 3
A-SCAN OPERATION AND CLINICAL USE
(For 300A and 300AP Models Only)
The A-Scan mode of the PACSCAN™ 300AP
allows for measuring the axial length (AXL) of
an eye and calculating the associated IOL power
for an implanted lens.
By placing the A-probe against a patient eye, a
live A-Scan ultrasound pattern for an AXL
measurement can be obtained. The image can
then be “frozen” and the measured value for the
AXL will be displayed along with other
pertinent information. Using the AXL
measurement, the keratometer readings, and an
IOL program parameter (depending on the
specific program selected), the system calculates
the required IOL power.
After completion of measurements and
calculations, a hardcopy may be obtained of the
results using the optional thermal printer. The
hardcopy may include the A-Scan image, table
of IOL powers versus refraction, patient
information, and user information.
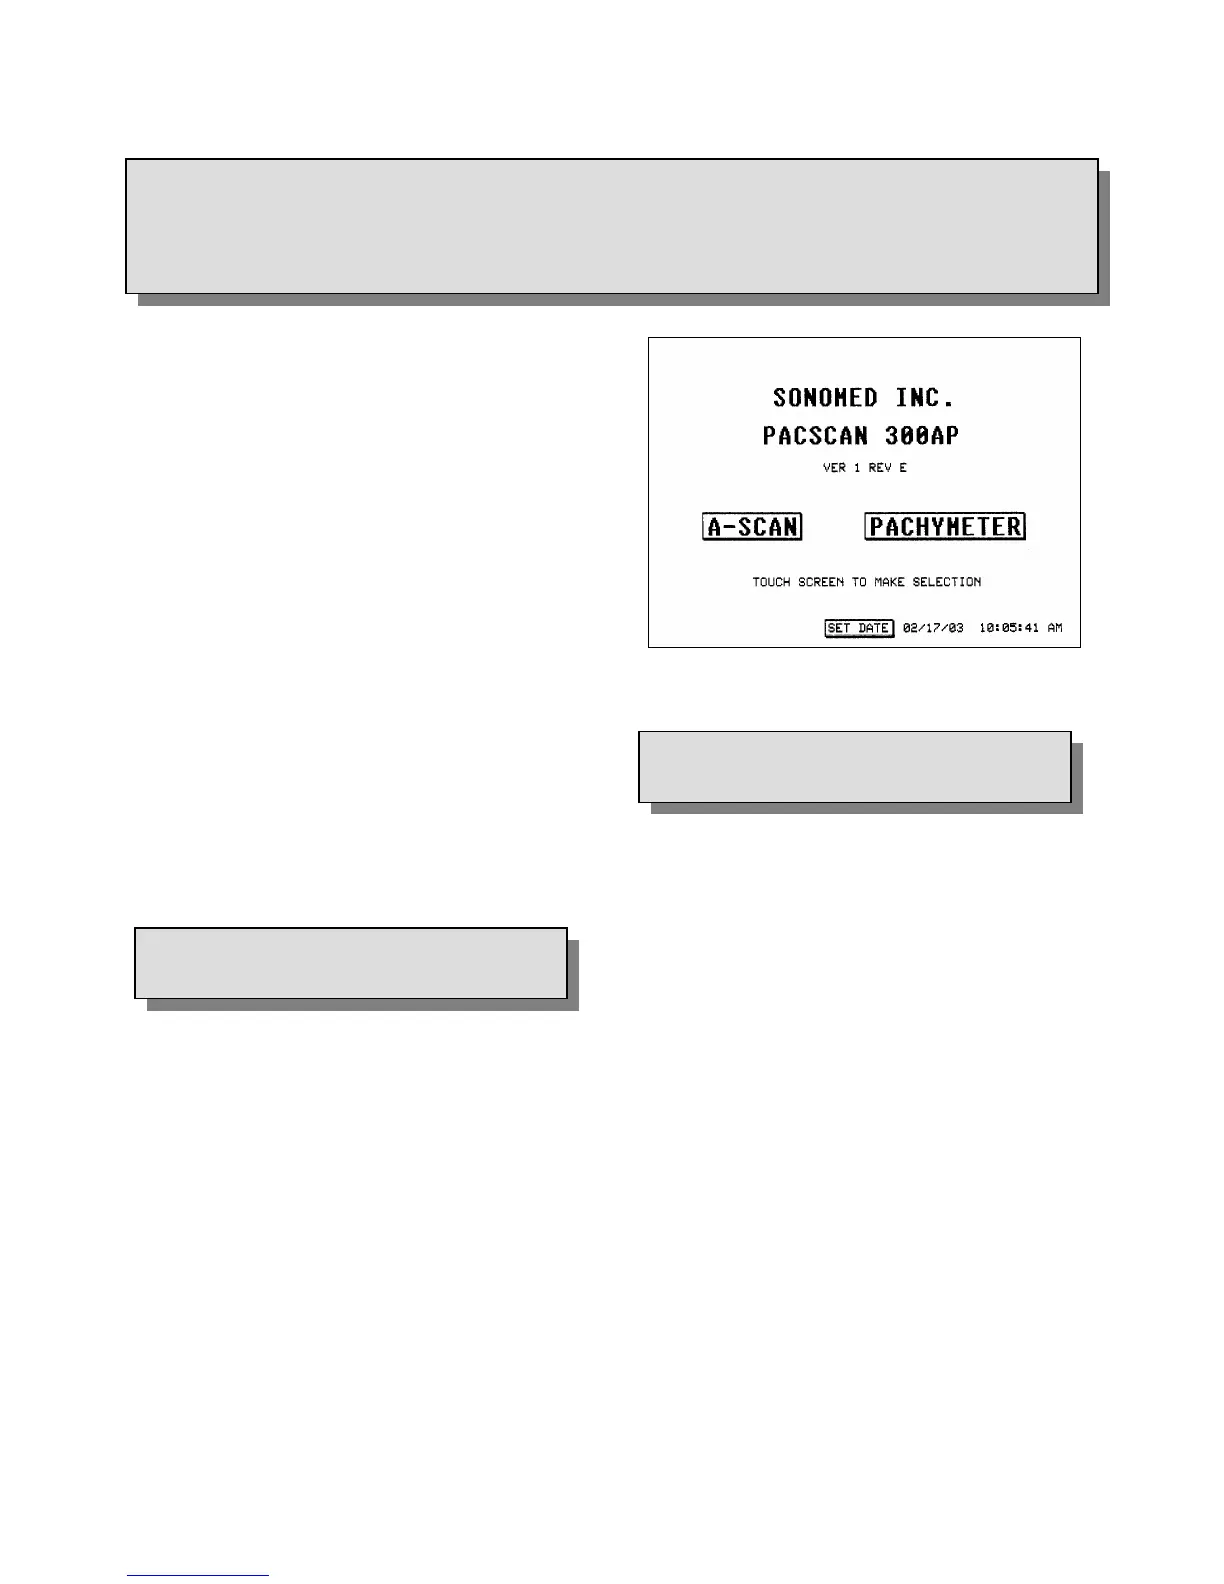
1. Touch the [ A-SCAN ] button on the Main
Screen (see Figure 3-1).
2. Ensure the Calibration Screen appears.
Figure 3-1. Main Screen Display
3.2
CALIBRATION
It is recommended that the functionality of the
P
ACSCAN™ be verified by means of the
calibration procedure prior to performing actual
measurements.
3.1
SELECTING A-SCAN MODE
The P
ACSCAN™ defaults into the Calibration
Screen every time the A-Scan mode is selected.
To perform the calibration procedure, follow
these steps:
1. Place a small amount of ultrasound coupling
gel onto the tip of the A-scan probe.
2. Place the probe onto the calibration cylinder
located on the right side of the system. The
probe should be placed perpendicular to the
cylinder.
3. Observe the measurement displayed on the
touch screen. The measurement will freeze
once it has stabilized and a calibration status
message will be displayed.
Doc # 0300-A-1901-3D 3 - 1