63
6
Acquiring Images
You can acquire images by optimizing the relevant parameters for clinical diagnosis.
6.1 Selecting a Probe and an Exam Type
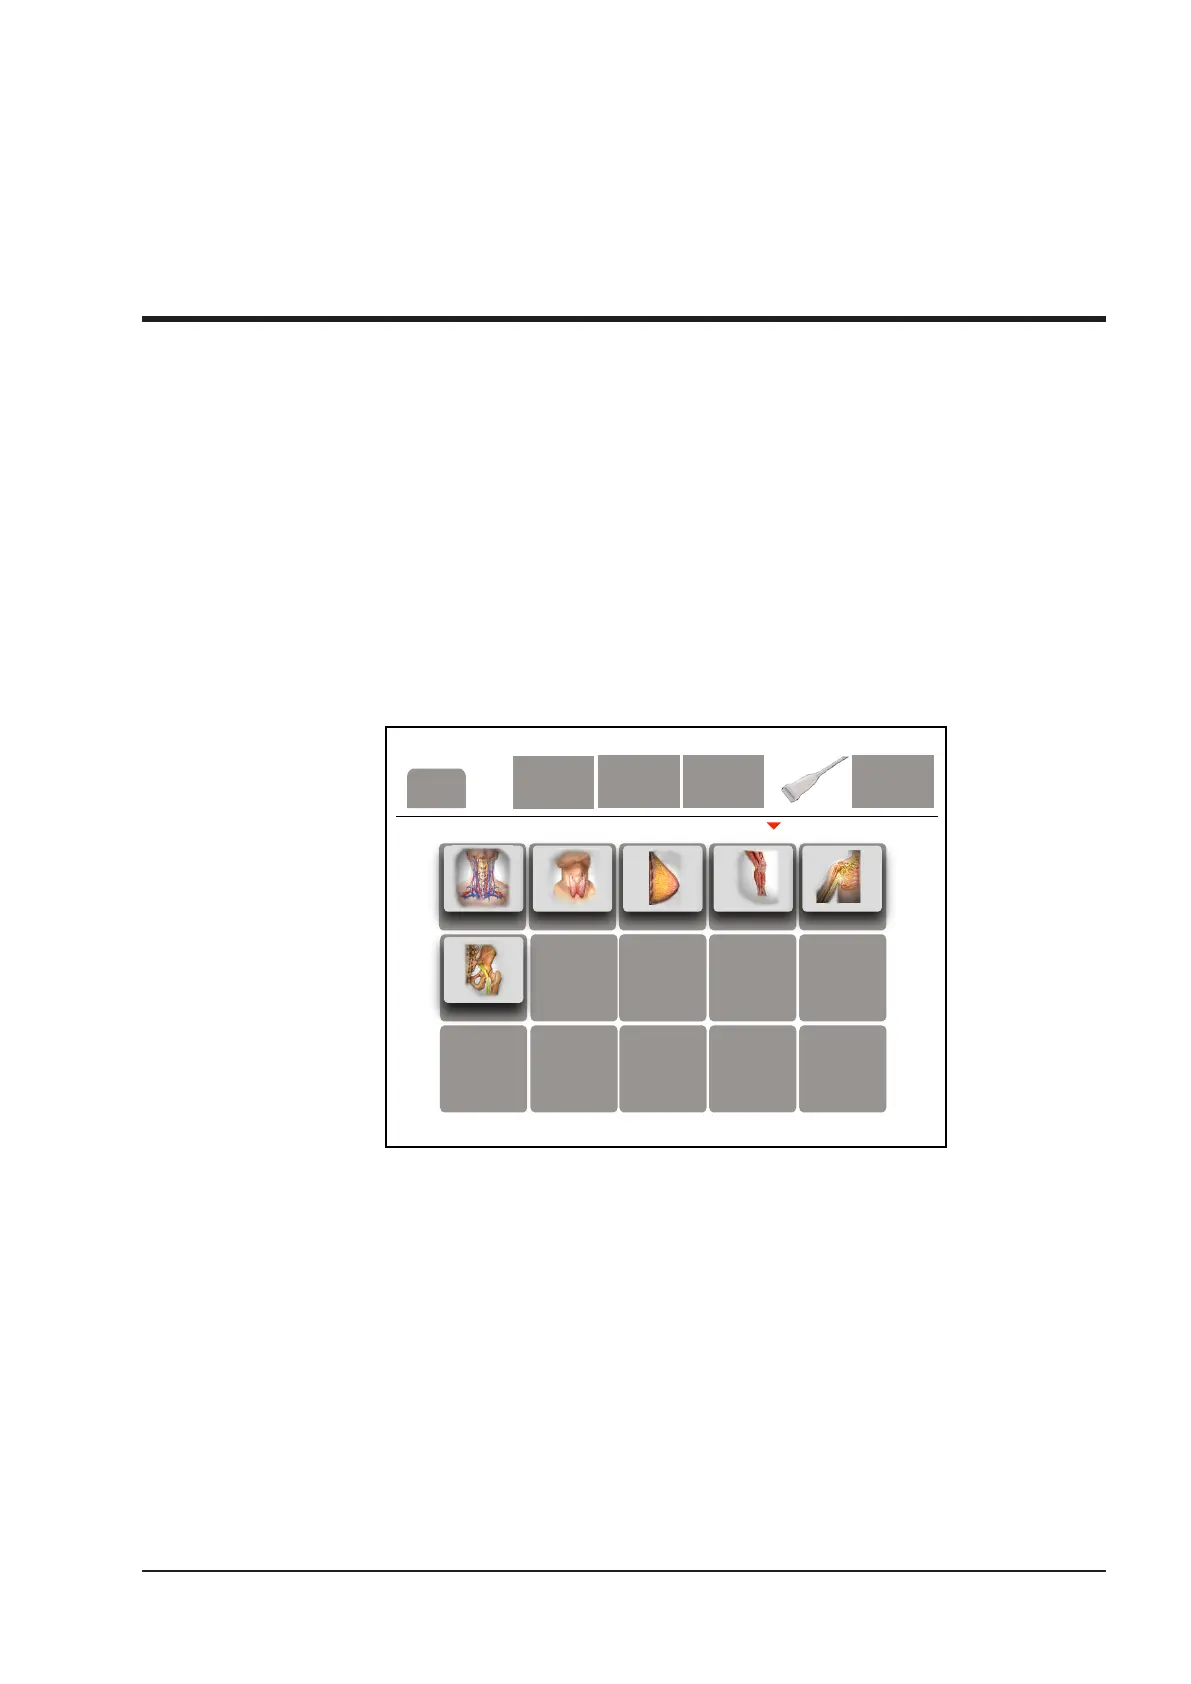
Once the system is started up, the LCD monitor displays the background desktop, the touch screen displays the
available probes and the exam types (as shown in Figure 6-1). You can press the
Probe
key on the control panel to
return to the following mode when you enter other screens. The system automatically enters the basic screen after
you select the desired probe and exam type by tapping the touch screen.
NOTE:
Ensure the probe model and icon displayed on the application mode screen are consistent with the connected
probe. If a problem is found, check that the probe is connected to the system rmly. If the problem still exists,
please stop using the system immediately and contact the manufacturer.
C-Vascular
Thyroid
L-Nerve
Breast
P-Vascular U-Nerve
XXX
Cancel
Figure 6-1 Application Mode Screen
You can also make modications in an exam type and save them as an application preset for future use. Moreover,
the layout of the application mode screen can be modied and factory defaults can be restored.
6.1.1 Customizing A Preset
1. Select the desired probe and exam type.
2. Select an imaging mode and optimize the image.
NOTE:
Parameter optimizing is only available for the current imaging mode.
3. Press the
S
key on the key panel to display the following dialogue box.