5-46
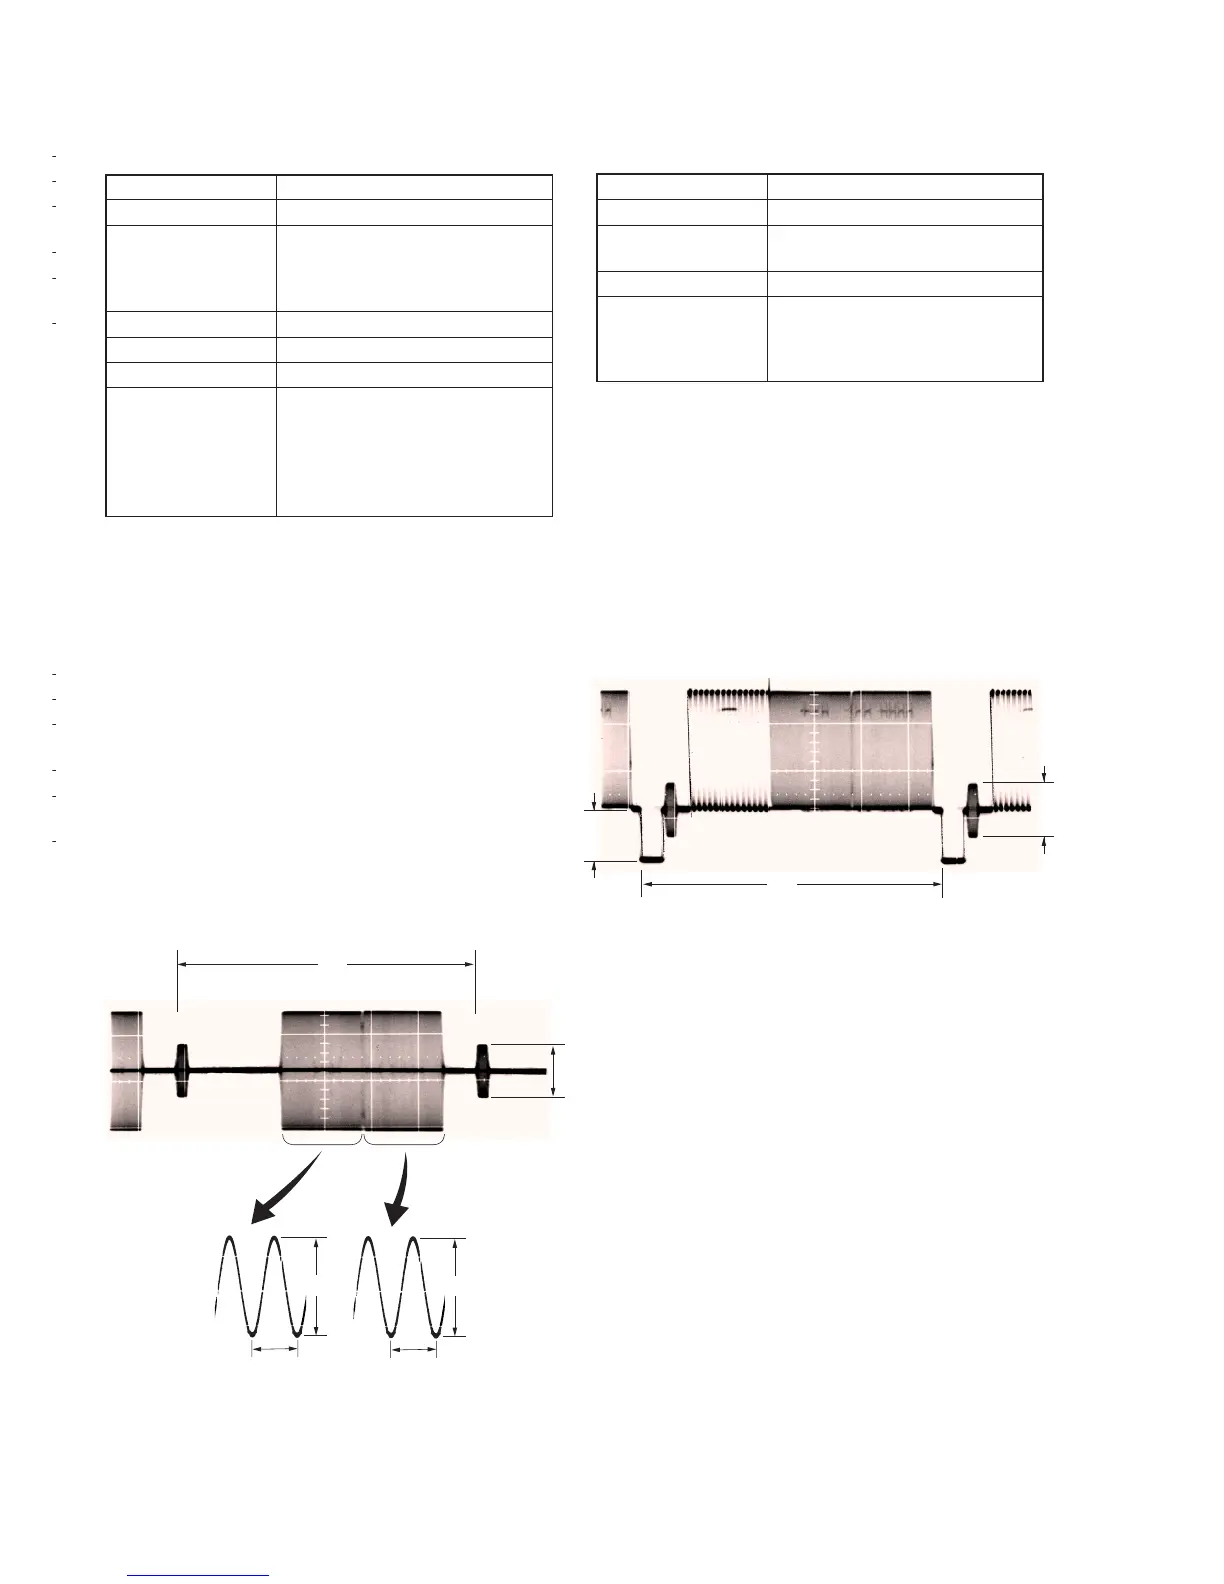
3. S VIDEO OUT Chroma Level Adjustment
(VI-151 Board)
Mode Camera
Subject Arbitrary
Measurement Point Chroma signal terminal of S VIDEO
jack (75 Ω terminated)
External trigger: Y signal terminal of
S VIDEO jack
Measuring Instrument Oscilloscope
Adjustment Page C
Adjustment Address 26, 27
Specified Value Cr level: A = 714 ± 14mV(NTSC)
A = 700 ± 14mV(PAL)
Cb level: B = 714 ± 14mV(NTSC)
B = 700 ± 14mV(PAL)
Burst level: C = 286 ± 6mV(NTSC)
C = 300 ± 6mV(PAL)
Adjusting method:
1) Select page: 0, address: 01, and set data: 01.
2) Select page: 2, address: 35. After note down the data of this
address, set data: 01 to the address.
3) Select page: 3, address: 0C, set data: 02, and press the PAUSE
button of the adjustment remote commander.
4) Select page: C, address: 26, change the data and set the Cr
signal level (A) to the specified value.
5) Press the PAUSE button of the adjustment remote commander.
6) Select page: C, address: 27, change the data and set the Cb
signal level (B) to the specified value.
7) Press the PAUSE button of the adjustment remote commander.
8) Check that the burst signal level (C) is satisfied the specified
value.
9) Select page: 3, address: 0C, set data: 00, and press the PAUSE
button of the adjustment remote commander.
10) Select page: 2, address: 35. and set the data that is noted down
at step 2).
11) Select page: 0, address: 01, and set data: 00.
4. AV OUT Y, Chroma Level Check (VI-151 Board)
Mode Camera
Subject Arbitrary
Measurement Point Video terminal of AUDIO/VIDEO
jack (75 Ω terminated)
Measuring Instrument Oscilloscope
Specified Value Sync level: A = 286 ± 18mV(NTSC)
A = 300 ± 18mV(PAL)
Burst level: B = 286 ± 18mV(NTSC)
B = 300 ± 18mV(PAL)
Adjusting method:
1) Select page: 2, address: 35. After note down the data of this
address, set data: 01 to the address.
2) Select page: 3, address: 0C, set data: 02, and press the PAUSE
button of the adjusting remote commander.
3) Check that the sync signal level (A) satisfies the specified value.
4) Check that the burst signal level (B) satisfies the specified value.
5) Select page: 3, address: 0C, set data: 00, and press the PAUSE
button of the adjustment remote commander.
6) Select page: 2, address: 35. and set the data that is noted down
at step 1).
2H




 To Next Page