16
Chapter 2 Locations and Functions of Parts and Controls
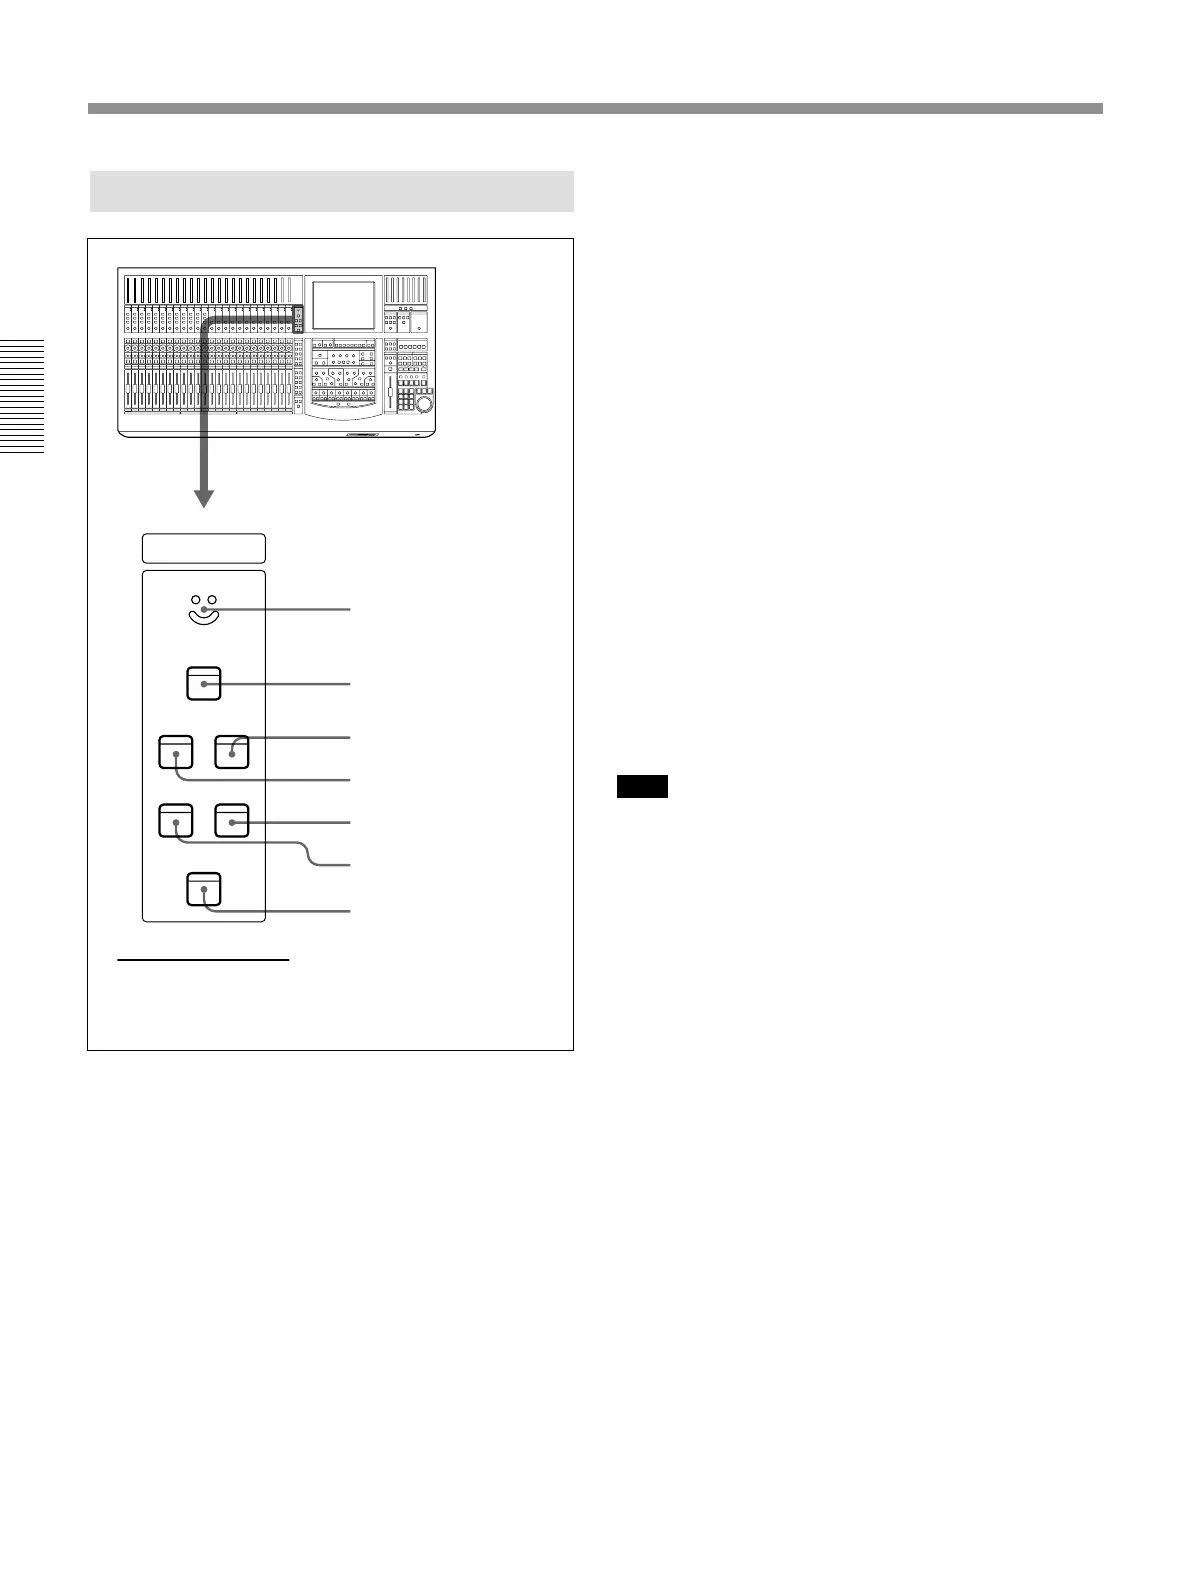
Chapter 2 Locations and Functions of Parts and Controls
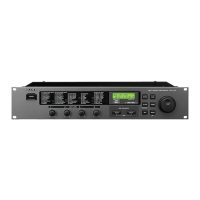
SETUP
SLATE
PGM MTR
AUX STUDIO
TALKBACK
1 Built-in microphone
2 SETUP button
3 MTR button
4 PGM button
5 STUDIO button
6 AUX button
7 SLATE button
The buttons located on this panel are not used
for automation.
Talk-Back Panel
1 Built-in microphone
Built-in microphone for talkback.
2 SETUP button
Press this button so that it lights, to display the OSC/
TALK BACK screen on the display.
For detailed information on the OSC/TALKBACK window,
see page 70.
3 MTR button
Press this button so that it lights, to route the talkback
signal memorized on the OSC/TALK BACK screen to
the MTR bus.
4 PGM button
Press this button so that it lights, to route the talkback
signal memorized on the OSC/TALK BACK window
to the PGM output.
5 STUDIO button
Press this button so that it lights, to route the talkback
signal to the studio monitor output.
Press the button again so that it turns off, to cancel the
talkback signal routed to the studio monitor output.
6 AUX button
Press this button so that it lights, to route the talkback
signal to the AUX bus memorized on the OSC/TALK
BACK window.
7 SLATE button
Press this button so that it lights, to route the talkback
signal to all PGM, MTR, AUX outputs.
Press the button again so that it turns off, to cancel the
talkback signal routing to all PGM, MTR, AUX
outputs.
Note
Be sure to set the MEMORY button to memorize the
talkback outputs selected on the OSC/TALKBACK
window before using the MTR button 3, PGM button
4, STUDIO button 5 and AUX button 6.
For detailed information on the OSC/TALKBACK window,
see page 70.
Locations and Functions of Parts and Controls
 Loading...