FMP-X10 13
SECTION 2 - DISASSEMBLY/PART NUMBER INFORMATION
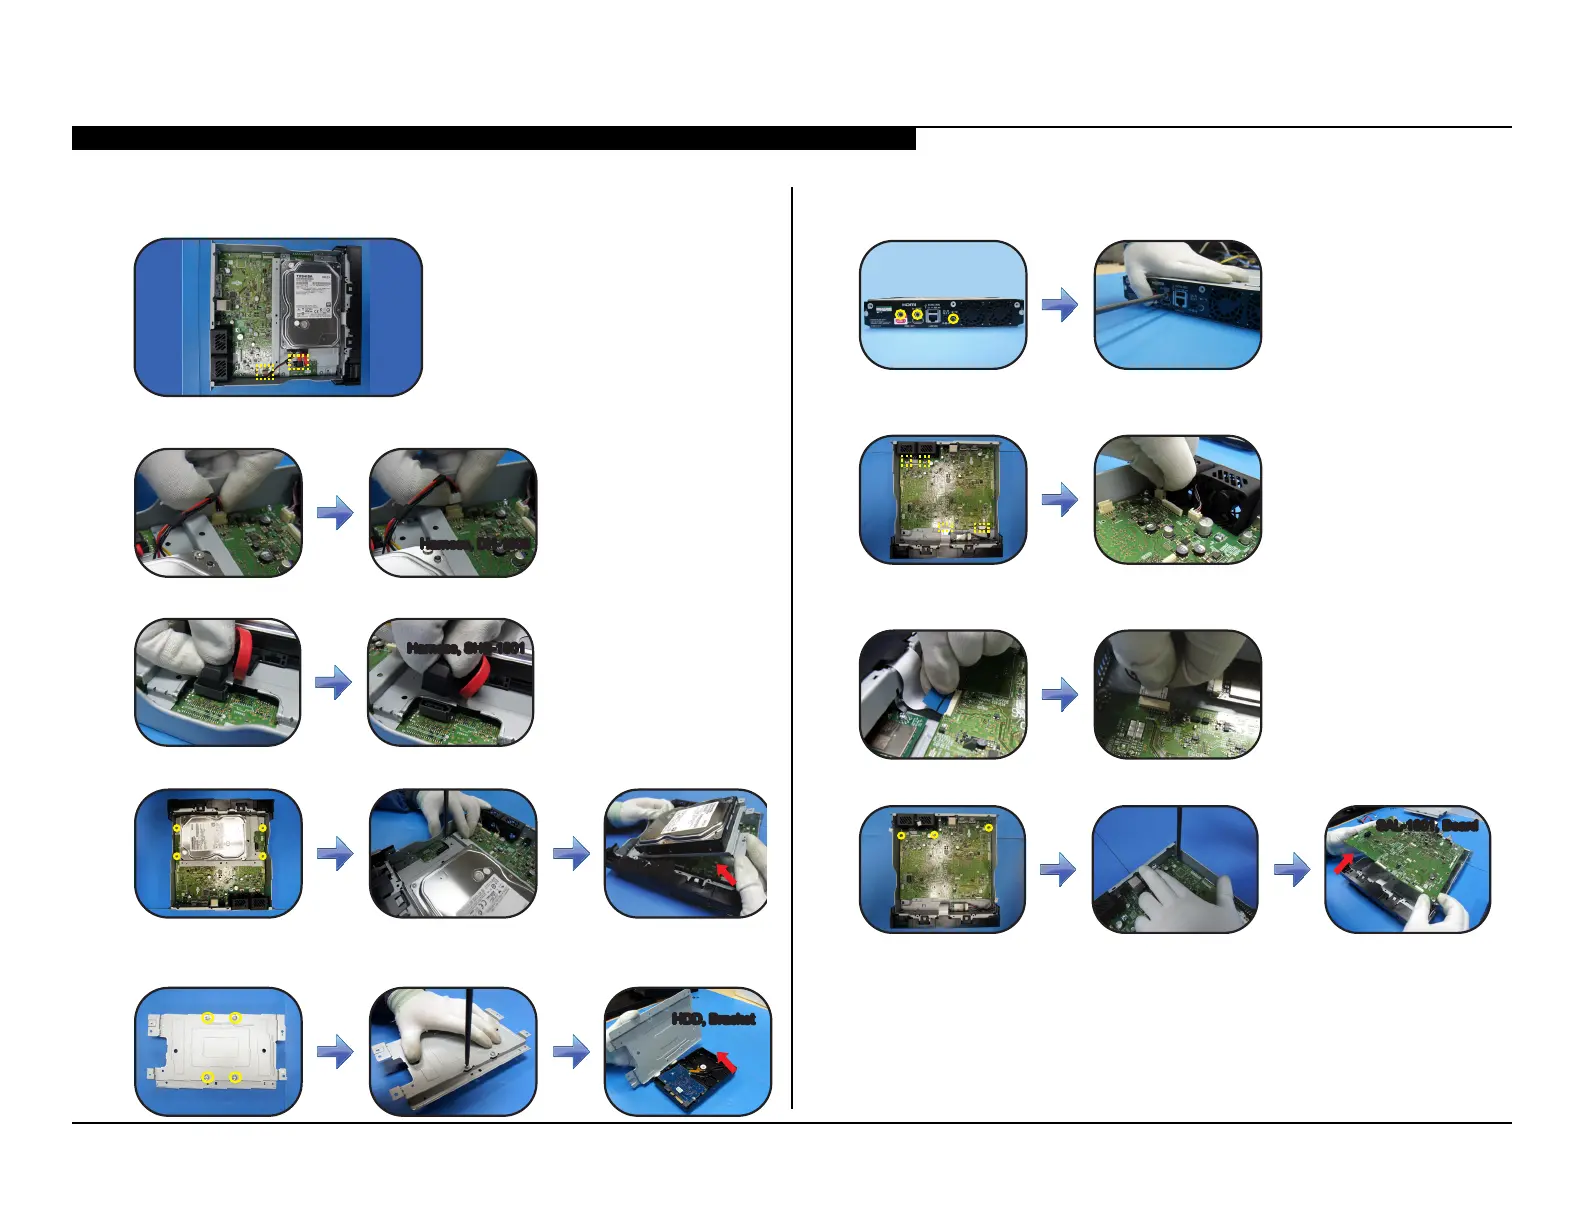
REMOVING THE HARD DISK DRIVE/HDD, X10
1. Locate the 2 connectors shown in the illustration.
2. Locate and disconnect the Harness (DH-1005).
Harness, DH-1005Harness, DH-1005
3. Locate and disconnect the Harness (SHS-1001).
Harness, SHS-1001Harness, SHS-1001
4. Locate and remove 4 screws from HDD Bracket, then lift to detach.
HDD, X10HDD, X10
5. Place HDD, X10 facing down, remove 4 screws to detach from HDD
Bracket as shown.
HDD, BracketHDD, Bracket
REPLACING THE SAL-1001 BOARD
1. Locate and remove the 3 screws as shown in the illustration.
2. Locate all connectors on the SAL-1001 Board, then disconnect
the Fan connectors as shown.
3. Disconnect the LVDS Cable and the Wi-Fi Harness as shown from
the SAL-1001 Board.
4. Locate and remove 3 screws to lift and detach.
SAL-1001, BoardSAL-1001, Board
5. Install the new SAL-1001 Board, screws and connectors.