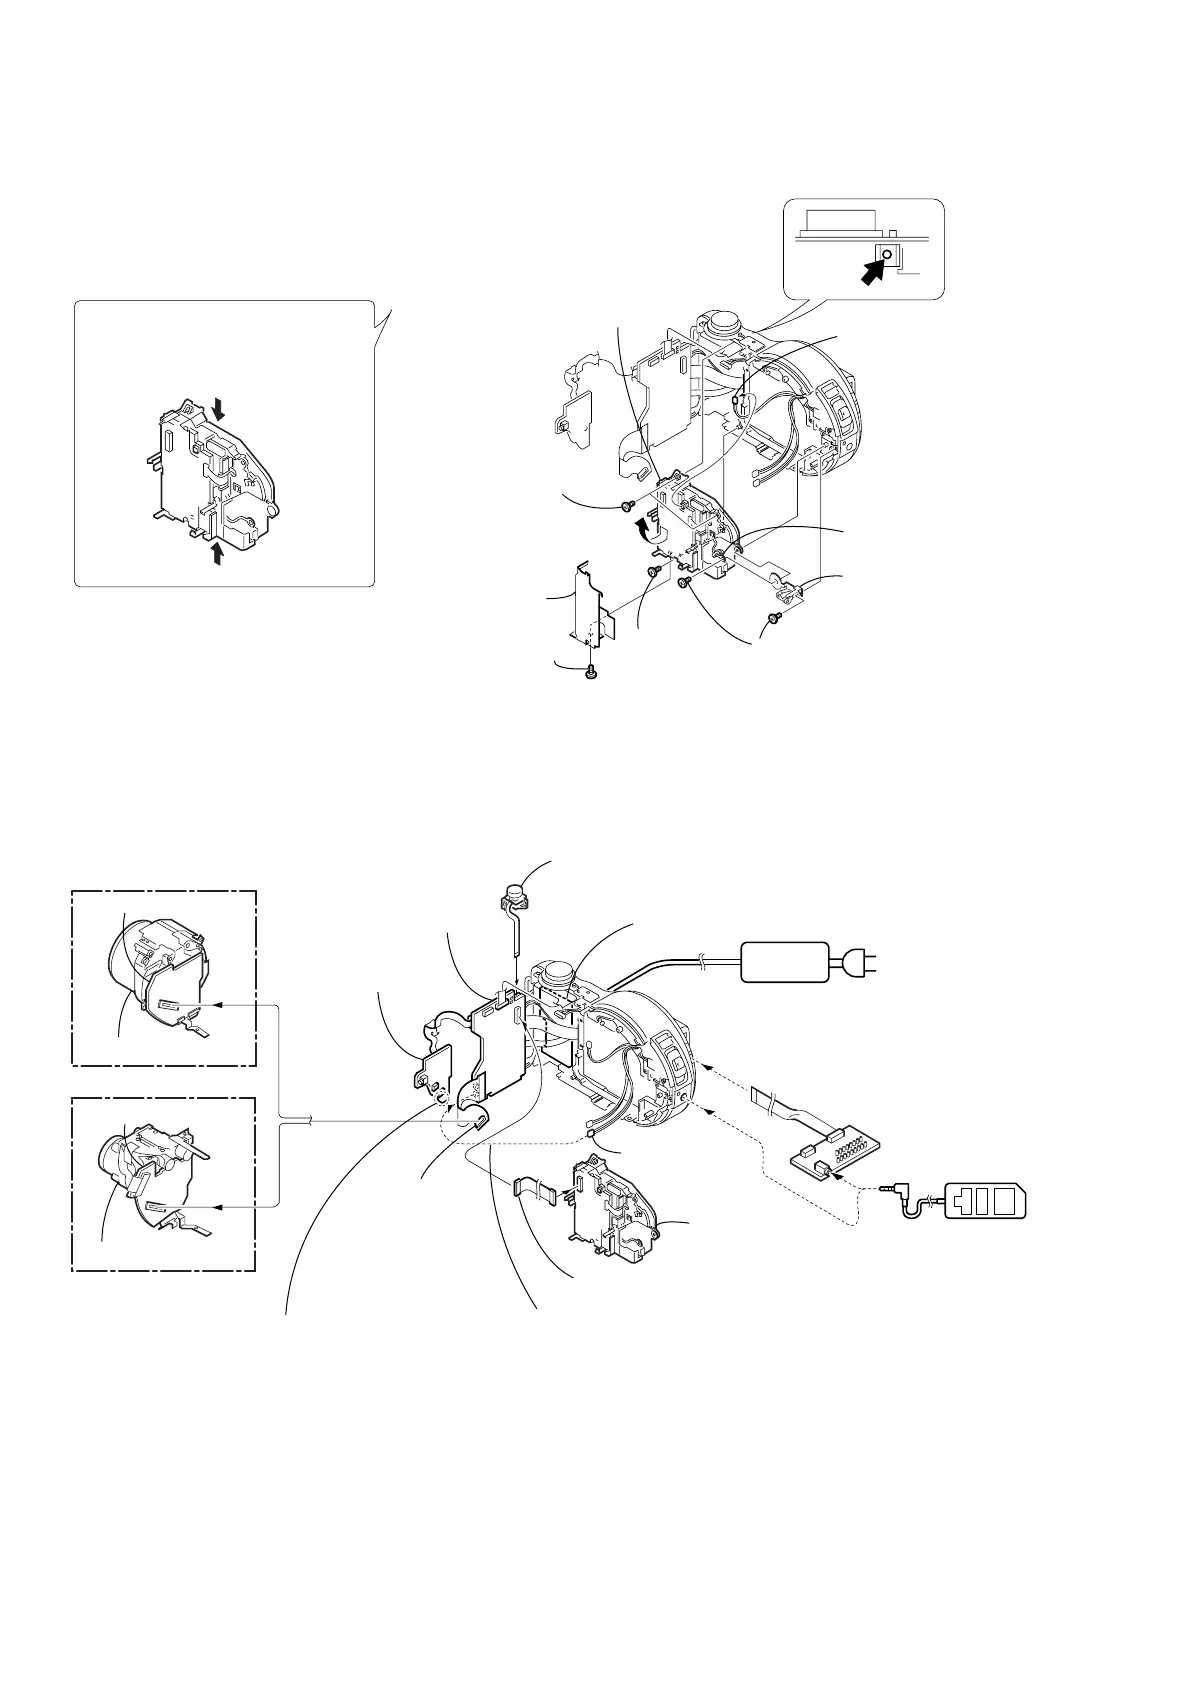
2-8
2-8. BASE UNIT (DDX-G2100 COMPLETE ASSEMBLY)
M
D
-
083
FS-83
SY-
67
JK-
208
M
D-
083
MD-
083
C
D
-
3
33
C
D
-
3
34
SY-
67
JK-
208
4 Nut plate (side)
1 Harness (FS-138) (2P)
(door look plunger)
3 Harness (SF-81)
2 Two precision
screws (DIA 1.7 × 4)
5 Two precision
screws
(DIA 1.7 × 4)
8 Precision screw
(DIA 1.7 × 4)
6 Precision
screw
(DIA 1.7 × 4)
7 Remove the DDX-G2100 complete
assembly in the direction of the arrow.
CPC-9 jig
(J-6082-393-C)
1
18
Adjustment remote
commander (RM-95)
AC IN
AC power
adaptor
FS-83 board
Control switch block
(RL-503) (6P)
DDX-G2100
complete
assembly
Extension cable
(J-6082-487-A) (50P)
Precautions during handling
• Do not turn the side of the optical
lens downward.
• Hold the frame.
• Do not touch the optical lens surface.
9 MD heat sink,
MD sheet
[FS-83 BOARD AND BASE UNIT (DDX-G2100 COMPLETE ASSEMBLY)
CHECK SERVICE POSITION]
CD-334 board
CD-333 board
(CD300)
(CD200)
Lens block assembly
Lens block assembly
JK-208 board,
FP-361 flexible
board
FP-364 flexible
board (70P)
SY-67 board
Harness (FS-140)
(2P) (dew sensor)
When using the CD-R/RW
drive unit. press S101 and S103.
When using the CD-R/RW drive unit.
the dew sensor must be connected.

 Loading...