17
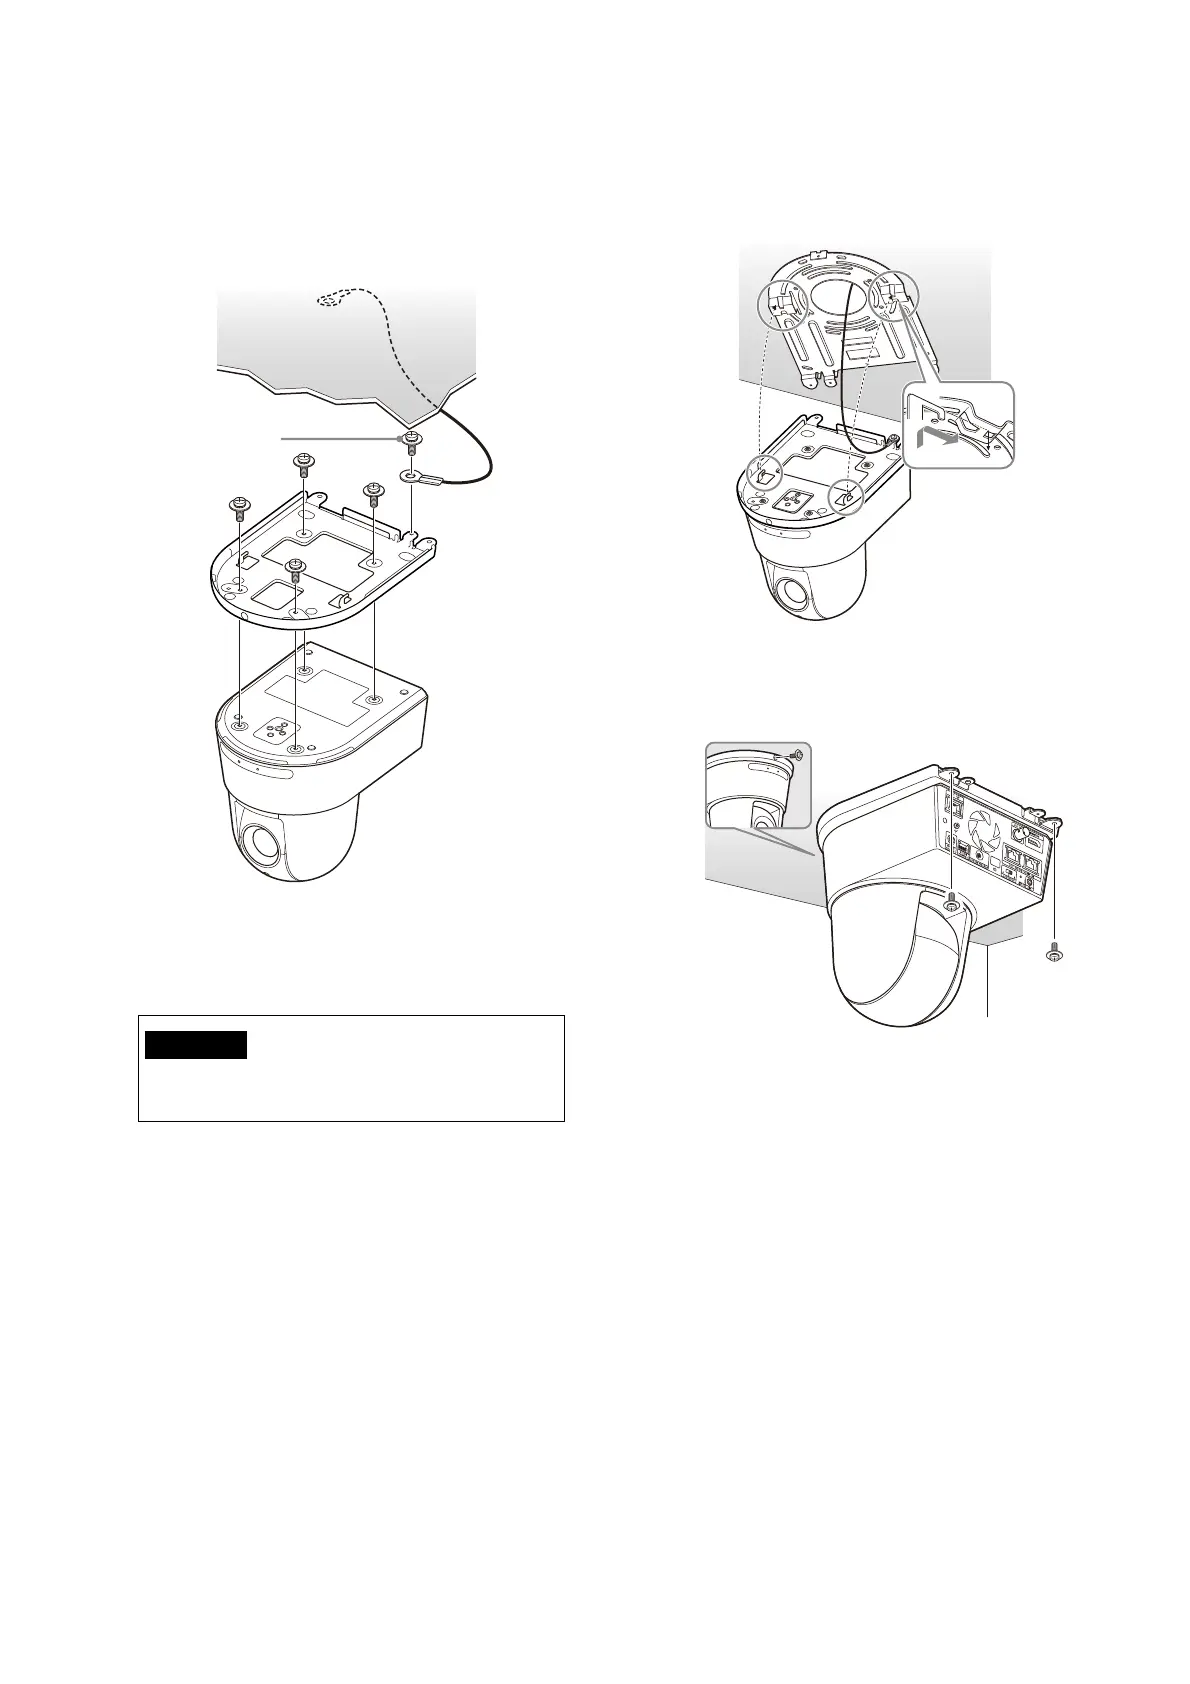
3 Attach the ceiling bracket (A) to the bottom
of the camera using the 4 supplied screws
(M3 × 8).
Align the bracket holes with the screw holes
o
n the camera and attach the bracket to the
camera.
Lightly tighten screws temporarily in the
o
rder indicated in the figure.
Afterwards, screw each of them firmly.
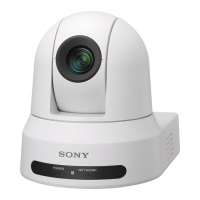
4 Insert the protrusions raised on the ceiling
bracket (A) into the spaces prepared in the
ceiling bracket (B), and temporarily attach
them by pushing the ceiling bracket (A) to
the rear.
5 While pushing up the entire camera, attach
it to the ceiling bracket (B) using the 3
supplied screws (M3 × 8).
Lightly tighten the screws temporarily in the
or
der indicated in the figure. Afterwards,
screw each of them firmly.
CAUTION
Use the supplied screws. Otherwise, you
may break the internal parts of the camera.
Attach the wire
rope.
M3×8
(supplied)
Ceiling
Ceiling
bracket (A)
Ceiling
Ceiling
bracket (B)
Ceiling bracket
(A)
M3 × 8
(supplied)
Ceiling