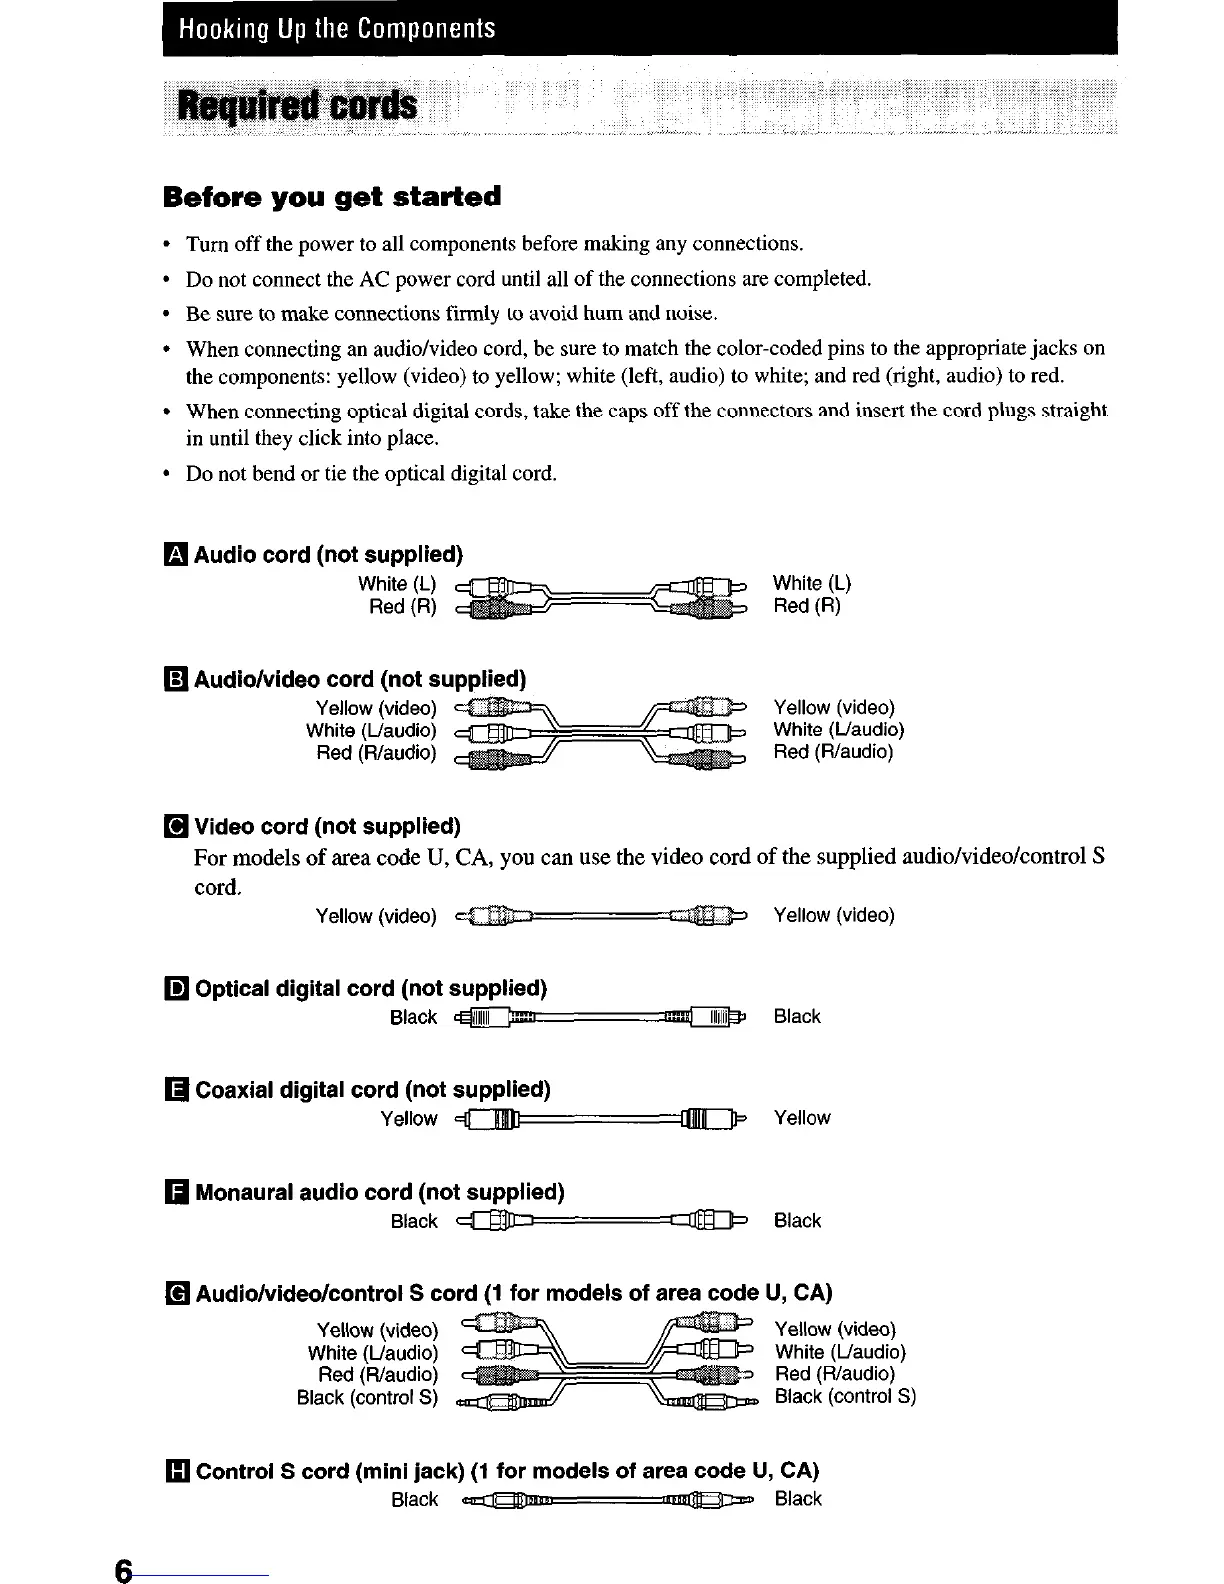
Before you get started
l
Turn off the power to all components before making any connections.
l
Do not connect the AC power cord until all of the connections are completed.
l
Be sure to make connections firmly to avoid hum and noise.
l
When connecting an audio/video cord, be sure to match the color-coded pins to the appropriate jacks on
the components: yellow (video) to yellow; white (left, audio) to white; and red (right, audio) to red.
l
When connecting optical digital cords, take the caps off the connectors and insert the cord plugs straight
in until they click into place.
l
Do not bend or tie the optical digital cord.
0 Audio cord (not supplied)
White (L)
Red (R)
White (L)
Red (R)
q
Audio/video cord (not supplied)
Yellow (video)
White (L/audio)
Red (R/audio)
Yellow (video)
White (L/audio)
Red (R/audio)
q
Video cord (not supplied)
For models of area code U, CA, you can use the video cord of the supplied audio/video/control S
cord.
Yellow (video) Yellow (video)
q
Optical digital cord (not supplied)
Black
@-J::;.
-3 Black
q
Coaxial digital cord (not supplied)
Yellow a-0 Yellow
q
Monaural audio cord (not supplied)
Black eye Black
q
Audio/video/control S cord (1 for models of area code U, CA)
Yellow (video)
White (Uaudio)
Red (R/audio)
Black (control S)
Yellow (video)
White (Uaudio)
Red (R/audio)
Black (control S)
q
Control S cord (mini jack) (1 for models of area code U, CA)
Black -0”. e Black
6