IM-P343-35 CTLS Issue 5
7
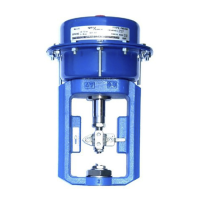
SP500 Electropneumatic Smart Positioner
No. Part
1. LCD display
2. Main menu functions with LCD flag indication
3. Signal pressure to activator
4. Gland connection for wiring M20
5. Terminal block
6. Increase value or toggle value key
7. Decrease value or toggle value key
8. Enter key
9. Supply pressure to positioner
10. Optional pressure gauge block with gauges
11. Spare M20 gland connection for wiring a 4-20 mA retransmission or software switches
12. External earth
13. Internal earth
No. Features
14.
indicates all is OK
15. ! Indicates a delay in positioning, this disappears when the position is reached
16. Indicates that the value displayed is a percentage
17. Indicates that the value displayed is the input current measured in mA
18. Indicates that the value displayed is a time measured in seconds
19. Indicates that you're accessing the main programming menus
20. Indicates that the positioner is in manual mode
21. Indicates that the positioner is running the autocalibration
22. Indicates that you're accessing the SET menu
23. Indicates that the positioner is in automatic mode
24. Indicates that you're accessing the TUNE menu