14
381497 USA 10-2014
APV
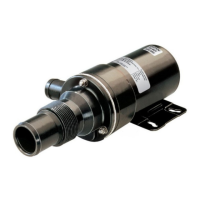
Check the following before starting the pump:
- that the shaft guard has been fitted properly
- that there is free access for liquid and the pump is primed
- that the valve on the discharge side (if fitted) is closed
The valve on the discharge side is closed during start-up to prevent the
motor from overloading, but should be opened again as soon as the
pump has been started.
Note: The Ws+ pump should not be left running too long without
pumping (typically 15 minutes, if the pumped liquid is not hot), as it
gets warm and loses priming liquid by evaporation.
4.1 Flushing water.
In pumps with a flushed shaft seal, check that the supply of flushing
medium is open and that the flow of the medium is adequate
(approx. 4-8 gallons/hour).
5.1 Checking the shaft seal
Check the pump's shaft seal for leaks on a regular basis. If the shaft
seal is leaking, replace it as described below.
5.2 Replacing the shaft seal
The sectional drawing (page 8) shows the pump and position and
construction of the shaft seal - both ordinary seals and seals with
water flushing.
To replace the shaft seal, it is necessary to dismantle the pump as
described below. The sectional drawing is to be used for reference.
1. Disconnect the power supply in the motor isolator by removing the
fuses and disconnecting the cables.
2. Turn off the flushing water supply.
3. Close the inlet and discharge of the pump, and drain the pump/
screw housing, and make sure that there is no liquid in the pump
body.
If the pump is used for hot and/or aggressive liquids, special
precautions must be taken. In such cases, observe the local
regulations for personal protection when working with these
products.
4. Once the inlet and outlet pipes have been properly isolated and
the re-circulation connection (if supplied) removed, remove the
clamp ring (item 25) and front cover (item 27).
5. Unscrew the air screw (item 2) (use a pipe C-spanner or a round
bar in the balance hole in the shaft muff to secure the shaft).
Then open the clamp ring (item 9), take off the pump/screw
housing (item 1) and remove the impeller (item 4).
Dismantling the pump
4. Putting the pump into service
5. Maintenance
Note: for numbered items,
see assembly drawing on
page 8.