Stellar® EC Series Crane Owner’s Manual
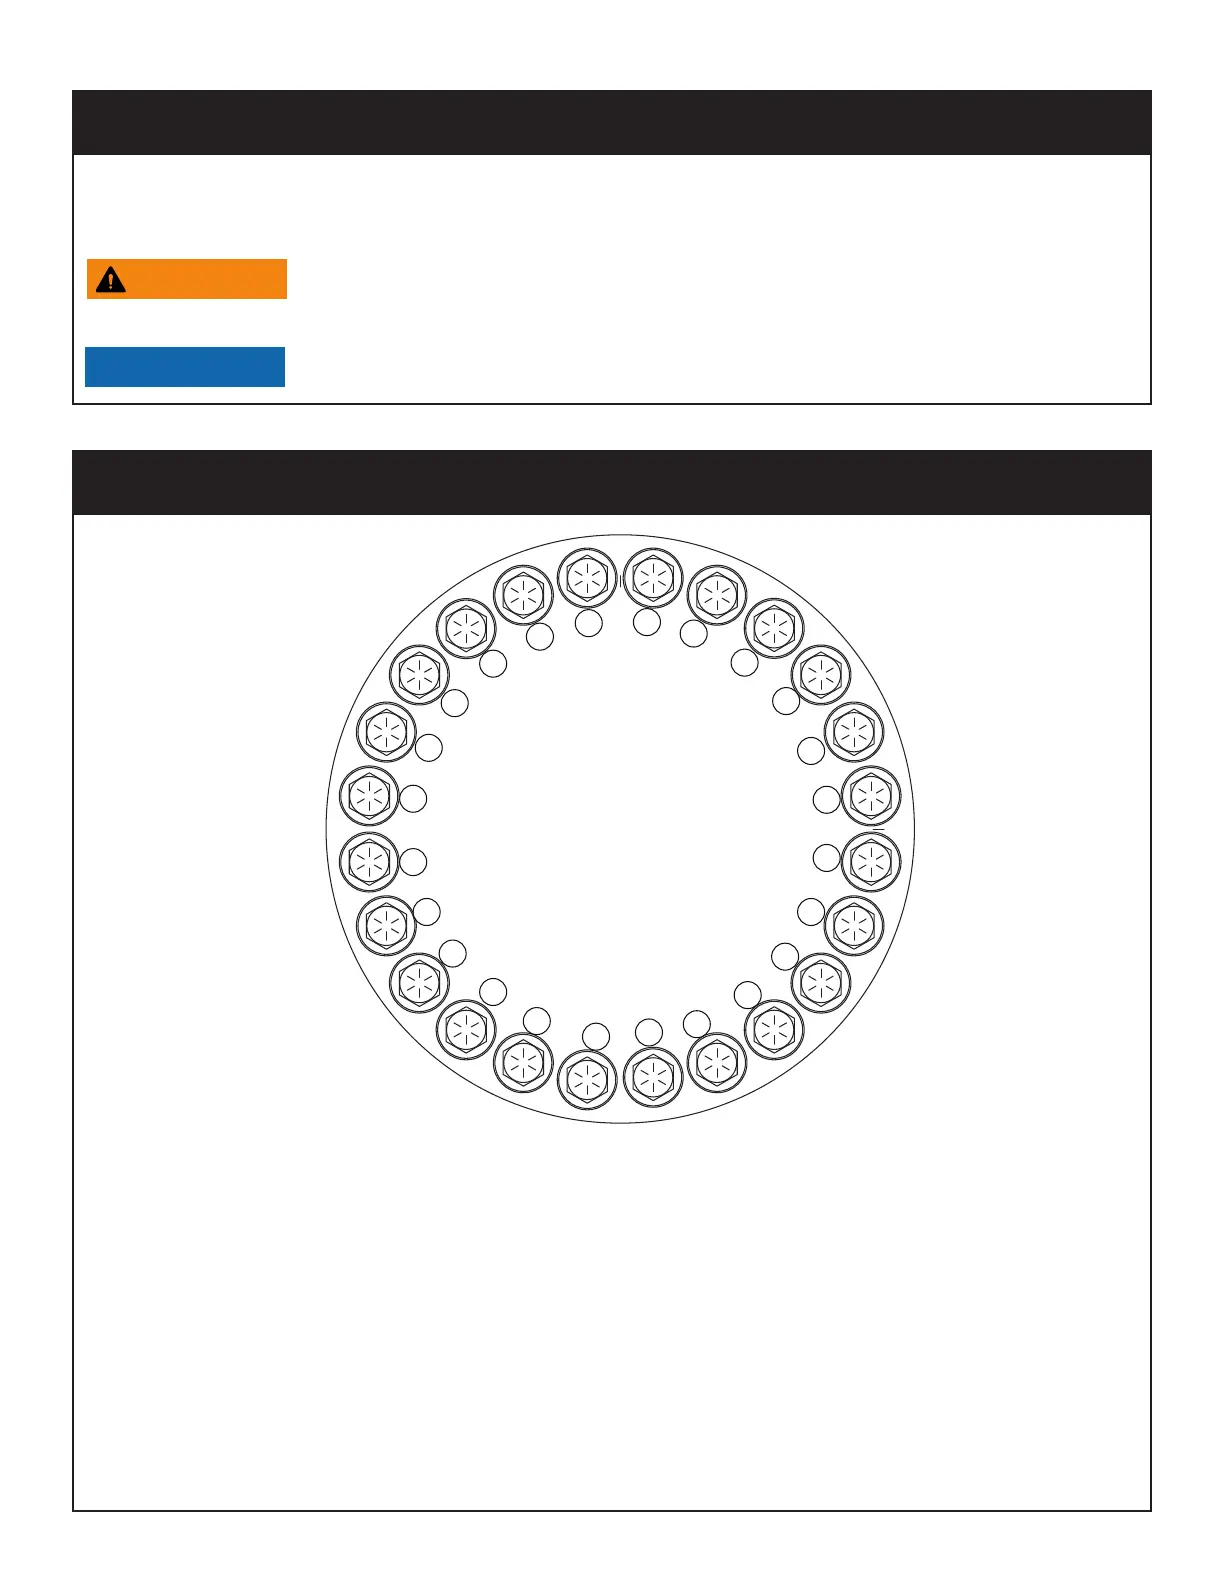
Step 1: Refer to the Torque Data Chart on the previous page to determine the proper
torque value based on the size of bolt used.
Step 2: Torque all bolts to approximately 40% of the specified torque value using the
tightening sequence shown above. Note: The number of bolts may be different
than shown in the diagram but the sequence will work using the same pattern in
relation to Bolt #1.
Step 3: Torque all bolts to 75% of the specified torque value using the tightening sequence
shown above.
Step 4: Torque all bolts to the listed torque value using the tightening sequence shown
above.
Rotation Gear Bearing Thread Tightening Procedure
1
2
3
4
5
6
7
8
9
24
10
11
1213
14
15
16
17
18
19
20
21
22
23
Once a bolt has been torqued to 75% of its proof load and then removed, the torque
coefficient may no longer be the same as when the bolt was new thus giving
indeterminate damp loads after torquing.
Anytime a gear-bearing bolt is removed, it must be replaced with a
new bolt of the identical grade and size.
Always use Red Loctite Threadlocker sealant to secure the new bolt.
Gear-Bearing Bolt Maintenance