stewmac.com
13
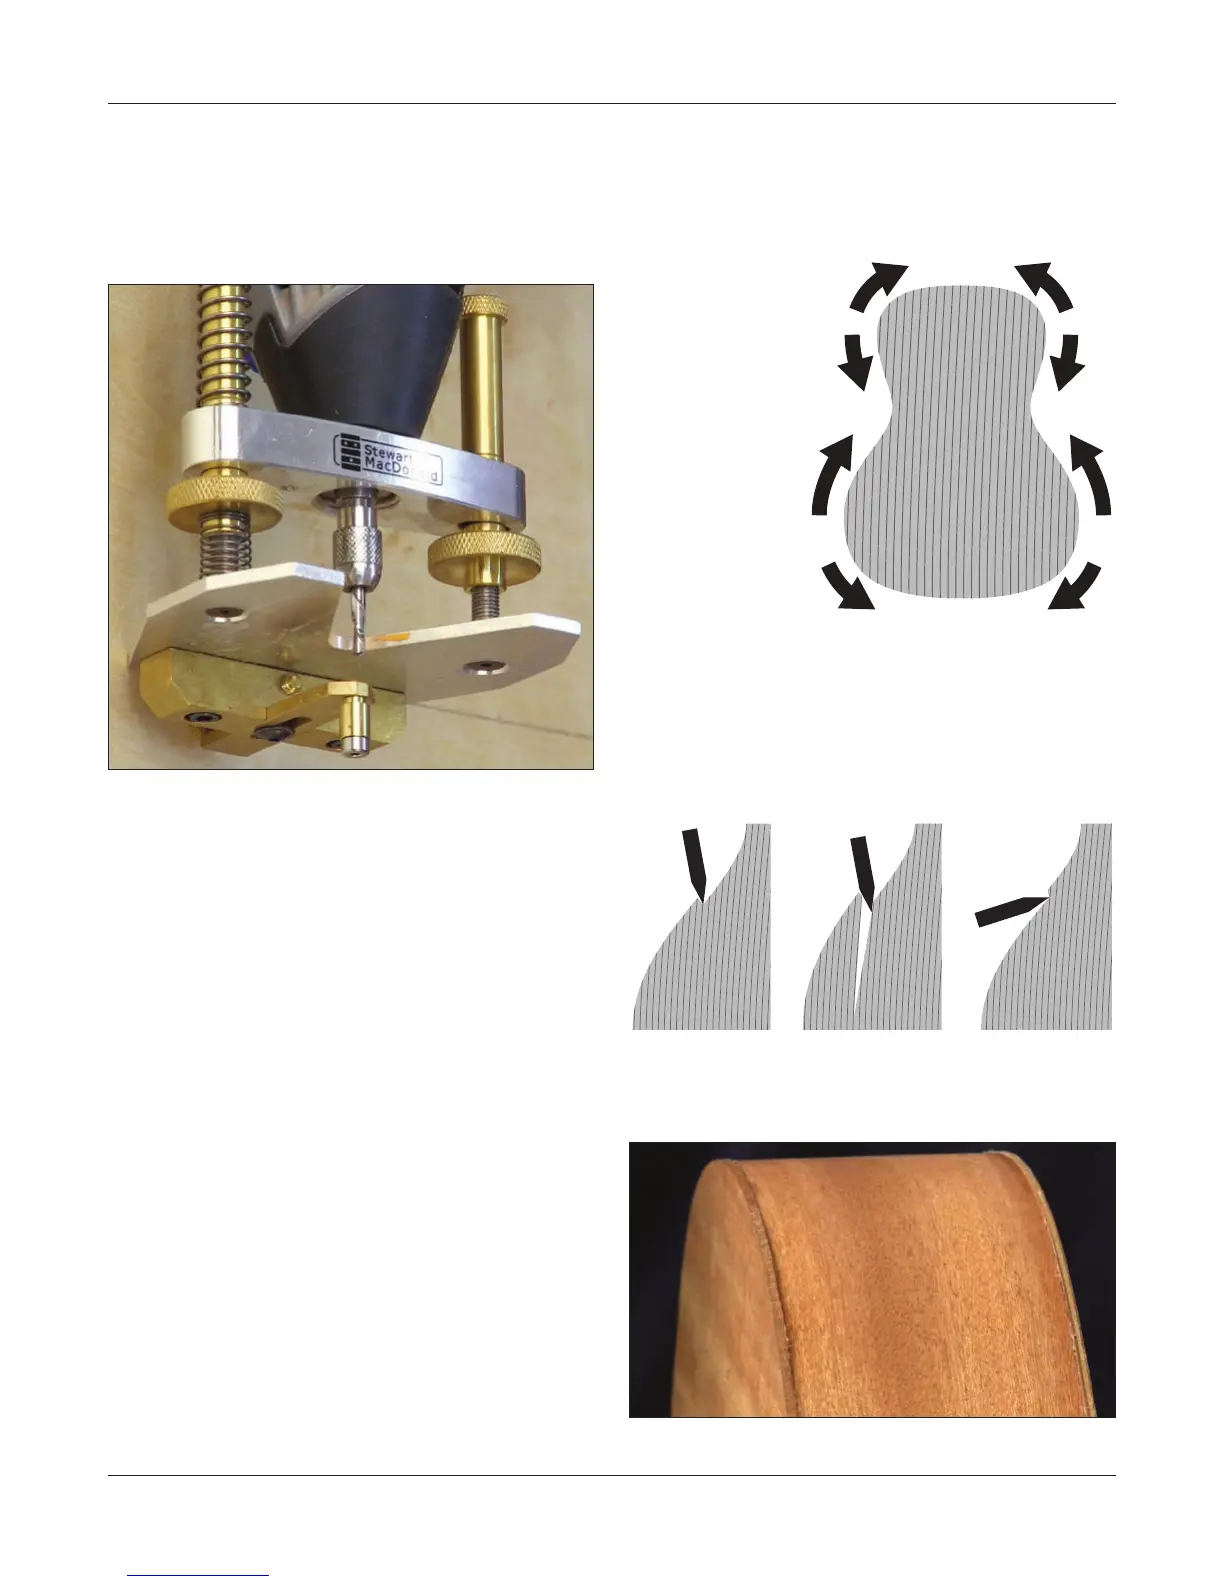
Trim the overhang
Before you glue the top on, you will need to trim the over-
hang on the back of your ukulele. This involves cutting the
overhang slightly proud of the sides, then sanding away
the remainder to make the edges smooth and ush with
the sides.
A Dremel rotary tool with StewMac’s Precision Router Base
and Edge Guide is ideal for trimming the overhang. Use a
down-cut router bit to make a clean cut. Rout away most
of the overhang, leaving it small enough to remove with
sandpaper.
You can also trim the overhang with a sharp razor knife and
a at le. Using the knife, carve away a small bit of wood
with each cut, reducing the overhang until it is close to the
sides. Follow with the le to bring it close enough to remove
with sandpaper.
Beware of tear out. Whether you use a router or a knife, you
must pay attention to the grain of the wood on the body
curves.
At the curves, a cutting tool working against the grain wants
to dig into the wood. This action makes it easy to tear out
a chunk of wood.
To avoid tear out, plan your cuts so that the router or knife
approaches each curve on its downward slope, rather than
climbing upward. The eight arrows on the illustration show
the direction to make each cut around the body.
After trimming, the remaining back and top overhang should
be very small. You’ll remove this with a le and sandpaper.
To avoid tearout,
make your cuts
on the downward
slope of the curve,
with the grain.
Don’t cut upward
against the grain.
Cutting tool
approaching
a curve from
this direction
invites tearout.
Tearout: accidentally breaking at the grain line
Tearout: the
wood breaks
at the grain.
Cutting from
the opposite
direction makes
tearout much
less likely.