page 58
Release 00 - 03/2018
Engine RS100 - RSC100
Service manual
15. ENGINE BLOCK - Overhauling internal parts
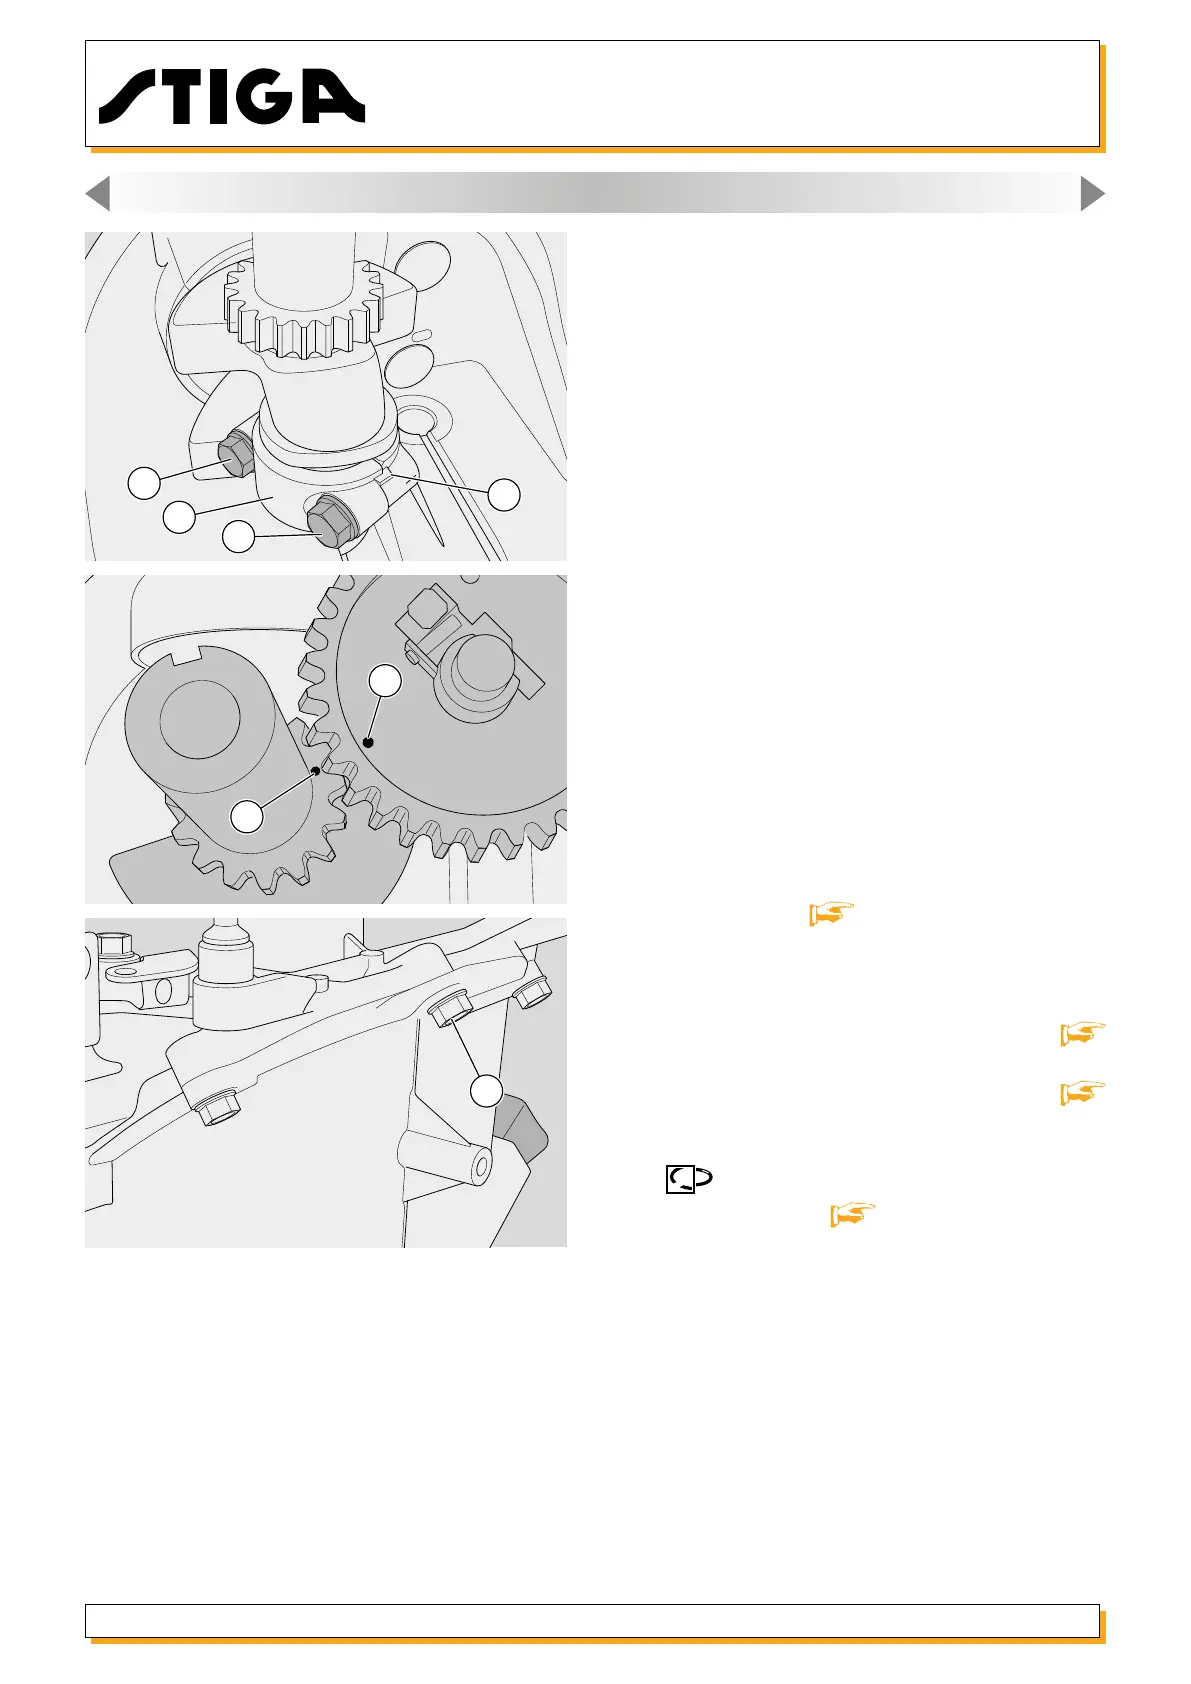
22 - Mount the engine shaft (26) and the connecting
rod cap (21) with the relative screws (23), taking
care with the position references (38) so as to avoid
inverting the mounting direction of the cap.
Close the screws (23) to the indicated couple.
23 - After having xed the connecting rod cap, take
the greatest care to ensure that the two position
references (19) and (20) punched on the engine
shaft and camshaft gears, coincide, ensuring the
correct distribution phasing.
24 - Close the carter and x the screws (6) to the
indicated couple [ 15.2].
25 - Whenever the engine shaft is dismantled and
retted, it is always necessary to:
- replace the sealing ring on the fan side [
14.5];
- replace the sealing ring on the sump side [
14.6].
26 -
During assembly perform the operations
indicated in section [ 15.2] always remember
to replace the silicone gasket (7) between the sump
and the casing
6
23
23
38
21
20
19

 Loading...