BT 13120
12.1 Tools, Servicing Aids
– Pliers (DIN 5256-C19) – 0811 641 8380
– Installing sleeve (5) – 1115 893 4600
– Press arbor – 1117 893 7200
– Hot air blower
12.2 Disassembling the Clutch Housing
N Preparations, @ 3.1.
N Remove handlebar together with control handle, @
5.2.
N Remove the powerhead, @ 7.2.
N Remove clutch housing together with gearbox, @
9.2.
N Remove clutch housing from the gearbox, @ 9.4.
N Remove the clutch drum, @ 10.3.
N Remove the auger brake, @ 11.5.
N Remove the circlip (5) with pliers DIN 5256-C19 –
0811 641 8380.
N Heat the clutch housing (1) in bearing seat area to
about 120°C (250°F).
N Use press arbor 1117 893 7200 to remove the ball
bearings (3 and 4).
N Heat the clutch housing (1) in area of ball bearing (2)
to about 120°C (250°F).
N Carefully knock out the ball bearing (2).
12.3 Installing the Clutch Drum
N Heat the clutch housing (1) in area of bearing seats to
about 120°C (250°F).
N Use installing sleeve 1115 893 4600 to fit the ball
bearing (2).
N Press home closed ball bearing (3) with press arbor
4119 893 7200.
N Use press arbor 4119 893 7200 to install the ball
bearing (4).
N Fit circlip (5) with pliers DIN 5256-C19 0811 641 8380
so that it is seated in the groove in the crankcase (1).
N Install the auger brake, @ 11.11.
N Install the clutch drum, @ 10.4.
N Fit clutch housing on the gearbox, @ 9.5.
N Install clutch housing together with gearbox, @ 9.3.
N Install the powerhead, @ 7.2.
N Install handlebar together with control handle, @ 5.7.
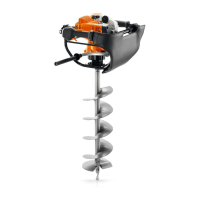
12 Clutch Housing
2
1
3
4
5
0000-GXX-2685-A0
 Loading...