1.3.4.2. PWM – Updating firmware for PWM use.
If the steps in Section 1.3.4.1 reveals that a Talon intended for PWM use has too-old firmware, field
upgrading a Talon can be done quickly with the following procedure...
Power off robot and disconnect Talon SRX from roboRIO’s PWM port if it’s connected.
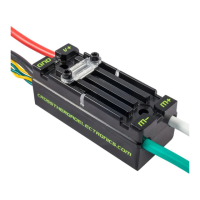
Locate the free yellow/green CAN wire pair from the Talon. Since PWM-use only
requires one yellow/green wire pair, the other should be free to use.
If the roboRIO CAN bus port is in use, disconnect the CAN bus wires to free the
roboRIO’s CAN bus port. This is done be pressing the Weidmuller connector buttons
on the roboRIO and pulling out the CAN bus wires.
Insert the Talon’s free yellow/green wire pair directly into the roboRIO’s CAN bus.
Note 1: Although CAN bus requires 120Ω resistor (or PDP) at each of the two
ends of the CAN bus, when connecting a single Talon to a roboRIO for the
specific purpose of updating a single Talon, you can likely skip terminating this
end. This is because the short bus length of a single Talon, and the 120Ω resistor
integrated in the roboRIO is generally sufficient for the purpose of this procedure.
This is convenient since in this specifc case, the Talon wire pair not connected to
the roboRIO’s CAN bus port will likely have a PWM connector crimped onto it.
Power the robot on and follow the firmware update steps in the Software Reference
Manual, Section “2.3 Firmware Field-upgrade a Talon SRX”. The attached Talon
will likely have a device ID of zero. Generally it’s best to update to the latest crf file.
Disconnect the Talon SRX from roboRIO CAN bus port. If there are additional Talons
to update, go back and re-perform this procedure. Although the roboRIO and Talon